
How to Fix a Jammed or Humming Garbage Disposal (Repair Guide)
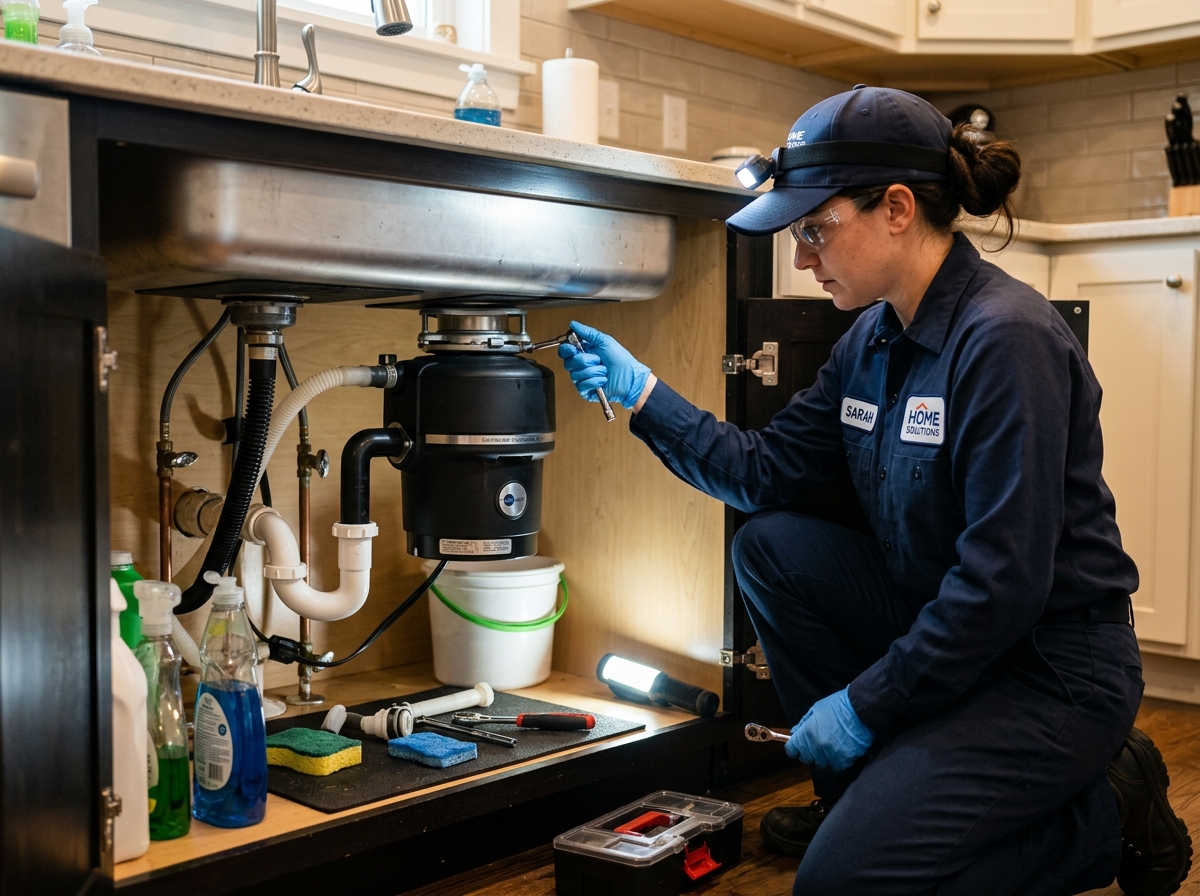
The garbage disposal is one of the most useful conveniences in any modern kitchen, handling food scraps and helping keep your sink clean. However, because it operates out of sight, it is often subjected to materials it was never designed to grind. When your disposal jams, you will typically hear a loud humming noise when you flip the wall switch, but the blades will not rotate. If left turned on, the motor will rapidly overheat and trip the built-in circuit breaker, shutting the unit down completely. In this safety-oriented repair guide, we will analyze the internal mechanics of a disposal, show you how to safely unjam it using a wrench, explain the overload reset button, and cover how to fix leaks and prevent future jams.
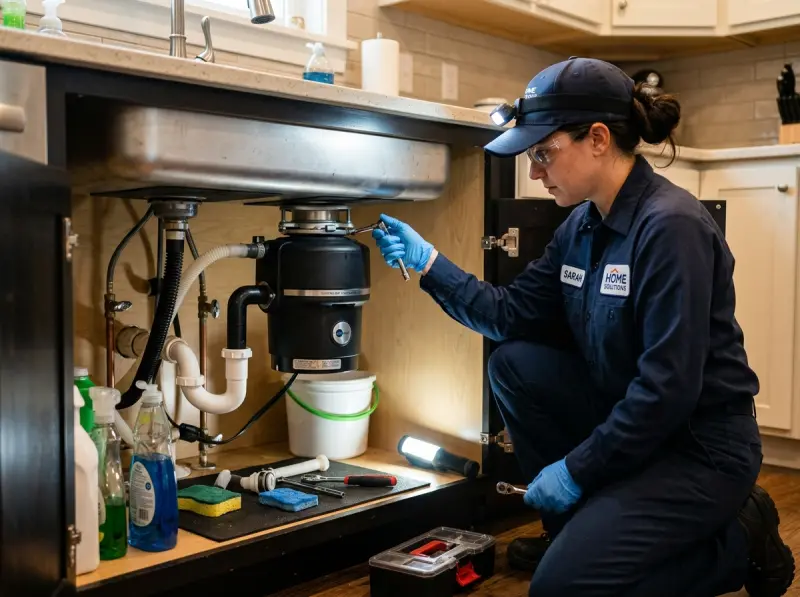
1. Inside a Garbage Disposal: How It Grinds
Unlike popular belief, garbage disposals do not contain spinning knives or sharp blades. Instead, they rely on centrifugal force to grind food. At the bottom of the grind chamber sits a heavy metal plate called the flywheel. Mounted to this flywheel are two small, swiveling metal lugs called impellers.
When you flip the switch, a powerful induction motor spins the flywheel at 1,725 RPM. The centrifugal force throws the food outward against a stationary, slotted metal ring called the shredder ring. The swiveling impellers push the food against the teeth of the shredder ring, grinding it down into tiny particles that are washed down the drain with running water. If a hard object—like a peach pit, coin, or bone—gets wedged between the rotating flywheel and the stationary shredder ring, the plate locks up, stalling the motor and producing a loud hum.
The motor itself relies on electromagnetic induction coils. Stalling the motor results in high current draw (locked rotor amps). This causes the motor windings to heat up rapidly. To prevent the unit from catching fire or burning out the motor windings, manufacturers integrate a thermal overload sensor on the bottom plate. If the temperature exceeds safe parameters, the sensor breaks the circuit, popping the small red reset button outward.
2. Why Your Disposal Hums But Won’t Grind
When you flip the wall switch and the disposal only hums, the motor is energized but unable to turn. This is caused by one of three issues:
A. Mechanical Jam
A foreign object—such as a fruit pit, olive seed, coin, bone, screw, or piece of glass—has become physically wedged between the rotating flywheel plate and the stationary shredder ring, preventing the motor shaft from rotating.
B. Seized Motor Bearings
If water has leaked past the lower shaft seal, the motor bearings will rust and seize up, locking the shaft. When this happens, the motor cannot turn even if the chamber is completely empty of food. This is common in older disposals (over 8 years old).
C. Weak or Failing Start Capacitor
The disposal motor relies on an internal start capacitor to provide the high starting torque required to spin the flywheel. If the capacitor fails, the motor will hum but lack the strength to start rotating. You can distinguish this because the flywheel will spin easily by hand, but hums when powered.
3. Step-by-Step Guide to Safely Unjam a Disposal
If your disposal is humming, you can easily free the jam using a standard 1/4-inch hex key (Allen wrench) from the bottom of the unit. Follow these safety steps:
- Step 1: Shut Off Power. Turn off the wall switch and unplug the unit from the outlet under the sink. If it is hardwired, shut off the circuit breaker. Never place your hands inside the disposal.
- Step 2: Locate the Hex Hole. Go under the sink and look at the bottom center of the garbage disposal. You will see a small circular hole matching a 1/4-inch Allen wrench.
- Step 3: Rotate the Wrench. Insert the hex key into the hole. Forcefully rotate the wrench back and forth. This turns the motor shaft directly. Rotate it clockwise and counterclockwise until you feel the resistance break and the shaft spins freely.
- Step 4: Remove the Jammed Object. Shine a flashlight down the sink drain. Use a pair of long needle-nose pliers or tongs to fish out the foreign object that caused the jam.
- Step 5: Reset the Overload. On the bottom of the disposal, locate the small red button. This is the built-in thermal overload switch. If the motor stalled, this button popped out to protect the motor. Push the button back in until you hear a click.
- Step 6: Test the Unit. Plug the unit back in, run cold water, and flip the switch to confirm quiet, smooth operation.
4. Disposal Horsepower (HP) Guide: Choosing the Right Strength
When selecting a garbage disposal or replacing a failed unit, understanding horsepower (HP) ratings is essential. The HP rating determines the motor’s torque and grinding capacity, which impacts what types of waste it can safely process:
- 1/3 Horsepower: The entry-level option. These motors have low torque and lightweight galvanized steel grinding components. They are prone to jamming and are only suitable for light use by a single occupant who rarely grinds solid foods.
- 1/2 Horsepower: The most common builder-grade standard. Suitable for small families who perform light cooking. They process soft vegetables easily but will jam on fibrous stalks or small bones. They typically feature galvanized or mid-grade stainless steel parts.
- 3/4 Horsepower: The professional residential sweet spot. Highly recommended for active home kitchens. With 3/4 HP, the motor spins with enough torque to pulverize hard root vegetables, small chicken bones, and fruit pits without stalling. They feature heavy-duty stainless steel alloy grind rings and double-insulated sound shells for quiet operation.
- 1.0 Horsepower: Heavy-duty commercial-grade performance. These models are designed for large households, home chefs, and heavy cooking routines. They are virtually impossible to jam, slicing through tough organic matter with ease, and feature advanced multi-stage grind systems.
5. How to Re-Seal and Install a Leaking Sink Flange
If your garbage disposal is leaking from the very top collar where it mounts to the sink basin, the seal between the sink flange and the stainless steel sink has failed. Over years of vibration, the plumber’s putty under the flange flange dries, cracks, and washes away. Here is how to remove, clean, and re-seal the sink flange:
- Unplug the disposal. Support the weight of the disposal with a block of wood or a car jack under the sink, then rotate the lower mounting ring (collar) counterclockwise using a screwdriver inserted into the ear loops. Lower the disposal body out of the mounting assembly.
- Use a flat-blade screwdriver to pry off the split snap ring from the sink flange sleeve under the sink. Remove the support ring, backup ring, and cardboard gasket.
- Push the old sink flange up and out through the sink hole. Scrap away all dried putty from the sink opening and the flange rim using a plastic scraper to avoid scratching the stainless steel. Clean the area with rubbing alcohol.
- Roll a tennis-ball-sized clump of fresh plumber’s putty into a uniform rope about 1/2 inch thick. Lay this rope in a circle around the sink drain opening.
- Press the sink flange firmly down into the putty. Go under the sink, place the cardboard gasket and backup rings onto the sleeve, and slide the metal mounting ring up.
- Install the snap ring into the groove. Tighten the three mounting screws evenly in a star pattern until the flange is clamped tight. Excess putty will squeeze out into the sink basin; scrape it off and save it. Re-mount the disposal body, secure the collar, and test for leaks.
6. Advanced Electrical Diagnostics for Dead Disposals
If you flip the wall switch and the disposal is completely silent—meaning it does not hum, click, or show any signs of electrical life—the issue is an interruption in the electrical supply circuit. You can systematically diagnose this using a non-contact voltage tester and a multimeter:
- Check the GFCI safety outlet under the sink. If the outlet has tripped (the test button is popped out), press the “Reset” button. If the disposal is hardwired, check the main electrical breaker panel to confirm the circuit breaker has not tripped to the off position.
- If the breaker and GFCI are reset, unplug the disposal from the outlet. Plug a known working device (like a hair dryer or lamp) into the sink outlet, flip the wall switch, and see if it turns on. If the lamp does not light, the wall switch itself or the under-sink outlet wiring is defective.
- If the outlet is supplying 120V AC power but the disposal remains dead after pressing the red reset button, the issue is inside the disposal wiring. Unplug the unit, turn it upside down, and remove the small metal plate covering the electrical terminal box.
- Inspect the wire nuts connecting the power cord wires to the internal motor wires. Look for loose connections, charred wires, or corrosion.
- Test the motor windings: Set your multimeter to the Ohms scale. Touch the probes to the black (hot) and white (neutral) terminals of the motor. A functional motor should read between 10 and 30 Ohms. An OL reading indicates a broken internal wire or burnt motor winding, which requires replacement.
7. Addressing Garbage Disposal Leaks
Leaks under the kitchen sink can damage wood cabinets, breed mold, and rust plumbing lines. A disposal can leak from four primary spots:
- Sink Flange Leak: Located at the very top of the disposal where it meets the sink drain. This leak occurs when the mounting bolts loosen or the plumber’s putty under the flange dries out and cracks. Re-puttying and tightening the flange is required.
- Dishwasher Connection Leak: Water seeping from the small rubber hose connecting the dishwasher drain line to the disposal nipple. This is resolved by tightening the hose clamp or replacing the split hose end.
- Discharge Pipe Leak: Located where the plastic drain pipe connects to the side of the disposal body. The rubber gasket or metal flange plate can warp over time. Replace the gasket and tighten the screws.
- Bottom Casing Leak: If water is dripping directly from the electrical holes on the bottom plate of the disposal, the internal motor shaft seals have failed. Water is flowing through the motor housing. This unit cannot be repaired; it must be replaced immediately for safety.
8. Food Waste Guidelines & What NOT to Put Down
To prevent future jams and drain line blockages, never put these materials down your garbage disposal:
| Material | Why It Damages the System | Correct Disposal Method |
|---|---|---|
| Grease, Fats, and Oils | Cool down in the pipes and form solid fat bergs that cause severe plumbing blockages. | Pour into a jar and throw in trash bin. |
| Fibrous Foods (Celery, Corn Husks) | Long strings wrap around the motor shaft and bind the bearings, causing jams. | Compost or trash bin. |
| Starchy Items (Rice, Pasta, Potato Peels) | Absorb water and expand inside the drain line, forming a thick paste that blocks water flow. | Throw in organic waste bin. |
| Bones and Fruit Pits | Hard bones chip impeller blades and easily wedge the flywheel, causing instant motor lock. | Trash bin. |
9. Preventative Care and Maintenance Routine
Keeping your disposal clean and smelling fresh requires minimal effort. Follow this simple monthly maintenance routine:
- Ice and Rock Salt: Once a month, throw a cup of ice cubes and a half-cup of rock salt down the disposal. Run cold water and turn on the unit. The ice chops off grease film on the shredder teeth, while the salt scrubs the flywheel clean.
- Citrus Deodorizer: Slice a lemon or orange into small pieces and grind them in the disposal. The natural citric acid cuts grease and leaves a fresh citrus aroma.
- Baking Soda and Vinegar: Pour half a cup of baking soda down the drain, followed by a cup of white vinegar. Let it fizz for 15 minutes, then flush with boiling water. This eliminates food odors.
- Run Cold Water: Always run cold water (never hot) when grinding food scraps. Cold water keeps fats solid so they can be ground and flushed; hot water melts fats, which then coat the pipes.
10. Case Studies: Disposal Repairs in Alpharetta, GA
Here are actual garbage disposal repairs completed by our technicians in Alpharetta:
Case Study 1: Windward Parkway Townhouses
A resident in a Windward Parkway townhouse reported a dead garbage disposal. There was no hum and no movement. Our technician tested the electrical outlet under the sink and found it had power. We inspected the bottom plate and noted the red overload button was popped out. We inserted a hex key, rotated the motor shaft manually to free a small copper screw that was jammed inside the chamber, pressed the red reset button, and restored operation.
Case Study 2: Ocee Neighborhood Home
A homeowner near Ocee Park complained of water leaking under the sink whenever they ran the disposal. Our technician dried the area and dusted it with baby powder. Upon running water, we observed water dripping directly from the lower metal motor casing. The internal shaft seals had failed. We removed the worn unit and installed a new Badger 5 InSinkErator with a 5-year warranty, replacing the plastic discharge plumbing lines.
Case Study 3: Crabapple Community Residences
Near Crabapple, a customer had a disposal that hummed but wouldn’t grind. The client had already tried turning the hex wrench, but the shaft spun easily. This indicated the flywheel was free, but the motor could not start. We tested the start capacitor using a capacitance meter; it read 0 microfarads (burnt out). We replaced the start capacitor assembly, and the disposal worked quietly again.
11. Comprehensive FAQs (Frequently Asked Questions)
Q1: Why is my garbage disposal humming but not spinning?
A humming noise means the motor is receiving electricity but cannot rotate because a hard food particle, coin, or bone has jammed the flywheel plate. The motor is stalled and will trip the thermal overload protector if not turned off within 10 seconds.
Q2: What is the red button on the bottom of my garbage disposal?
The red button is a manual reset switch for the built-in thermal overload circuit breaker. If the disposal jams or overheats, it trips for safety. Once you clear the jam, let the motor cool for 5 minutes and press this button back in to restore power.
Q3: How much does it cost to replace a garbage disposal in Alpharetta?
The average cost to replace and install a new garbage disposal ranges between $185 and $350. This covers the price of a standard 1/2 or 3/4 HP disposal unit, labor fees, plumbing connections, and testing. Higher horsepower commercial units or premium quiet models can cost more.
Q4: Why is my garbage disposal leaking from the very bottom?
If water is dripping from the bottom casing, the internal motor seals have failed. Water is passing through the electrical motor housing. This is a severe shock hazard. This disposal cannot be repaired; the unit must be replaced immediately.
Q5: Can I grind eggshells and coffee grounds in the disposal?
No. Coffee grounds turn into a thick paste that settles in the drain pipes, causing slow drains. Eggshells have an internal membrane that can wrap around the motor shaft, and their fine particles act like sand, sticking to grease inside the piping.
Q6: How long do garbage disposals typically last?
A standard garbage disposal lasts between 8 to 12 years. Over time, the grinding teeth wear down, the motor bearings dry out, or internal corrosion causes the casing to leak water.
Q7: Why does my garbage disposal smell like sewage?
Foul odors are caused by food particles and grease adhering to the underside of the black rubber splash guard and the grind chamber walls. Scrubbing the splash guard with hot soapy water and grinding citrus peels eliminates the odor.
Q8: How much horsepower (HP) does my kitchen disposal need?
For single-family homes, a 1/2 HP motor is the minimum standard. If you cook daily or have a large family, a 3/4 HP or 1 HP motor is recommended because they offer higher torque and grind food much finer, preventing pipe blockages.
Q9: What causes a garbage disposal to not make any sound at all?
If there is no hum and no movement, check the GFCI outlet under the sink or check if the main circuit breaker has tripped. If the outlet has power, the thermal overload button on the disposal bottom may need to be pressed, or the motor is dead.
Q10: Why does my dishwasher drain water back up into my garbage disposal?
Both appliances share the same sink drain pipe. If the garbage disposal is clogged with food, the dishwasher wastewater cannot pass, backing up into the sink basin. Running the disposal clears this line.
Q11: Can hot water damage my garbage disposal?
Hot water won’t damage the disposal itself, but it melts food grease. Once the melted grease travels down the cold plumbing pipes, it solidifies, forming a grease plug that causes a main kitchen line backup.
Q12: Is it worth repairing a leaking garbage disposal?
If the leak is at the top flange or side pipe connection, it is cheap and easy to repair. However, if the leak is from the bottom of the casing, replacing the unit is the only option.
Q13: What should I do if my garbage disposal is making a loud rattling or metallic clanking noise?
A loud rattling or metallic clanking noise indicates that a hard, loose object (such as a coin, wedding ring, metal screw, or gravel) has fallen down the drain and is bouncing around on top of the spinning flywheel. Turn off the disposal wall switch immediately. Shine a flashlight down the sink drain, and use a pair of long needle-nose pliers or kitchen tongs to extract the foreign object. Never run the disposal with loose metal objects inside, as they can shatter the grinding impellers, fracture the shredder ring, or punch a hole through the outer plastic housing, causing a major leak.
Conclusion & Professional Support
A jammed garbage disposal is a common kitchen issue that can usually be resolved using the hex wrench and reset button. However, if the disposal is leaking from the bottom casing, makes a grinding sound due to failing bearings, or refuses to turn on even after resetting, the unit must be replaced.
If you need assistance unjamming, repairing, or replacing your garbage disposal, contact the team at Appliance Repair Alpharetta by calling (770) 796-7742 or booking online through our Garbage Disposal Repair Service page. We provide quick, professional disposal installations and plumbing updates across Alpharetta, Milton, Roswell, and Johns Creek.
Related Service & Area Directories
Related Professional Repair Services & Local Guides
For complete technical diagnostics across Fulton County, explore our dedicated services: Emergency Appliance Repair • Same-Day Local Service • Commercial Appliance Diagnostics • Residential Kitchen & Laundry Service • Master Diagnostic Error Codes • Appliance Repair Cost Guide • Johns Creek GA Dispatch • Washer & Dryer Restoration • Oven & Range Repair Guide.
Looking for certified professional assistance? Explore our Kitchen Appliance Repair in Alpharetta and our Emergency Plumbing & Appliance Service.
Need Certified Appliance Repair Today?
Skip the phone line — book direct local priority dispatch across Alpharetta, Milton, Roswell & Johns Creek.