
The Hidden Danger of Clogged Dryer Vents (And How to Clean Them)
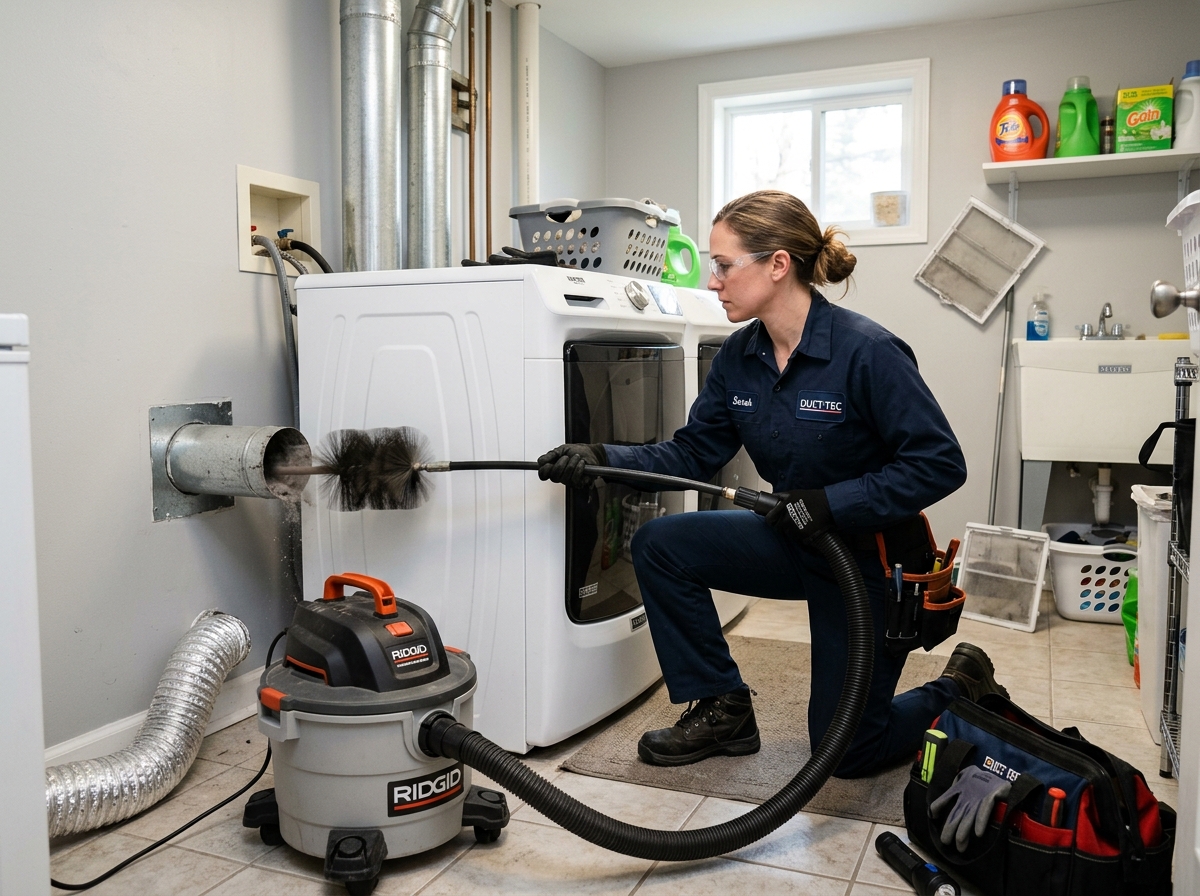
Every time you load your clothes dryer, hot air circulates through the wet garments, evaporates the moisture, and exits the home carrying lint through a duct vent. This process seems straightforward, yet behind the drywall lies a hidden network of pipes that poses a severe threat to your home if neglected. According to the United States Fire Administration (USFA), clothes dryers are responsible for over 15,000 house fires annually, causing millions of dollars in property damage, injuries, and tragic losses. The leading cause of these fires? A failure to clean the dryer vents. As lint escapes the lint screen, it sticks to the metal walls of the ductwork, slowly choking off the airflow until the system is completely blocked. In this safety-focused, semantic SEO-optimized guide, we will cover the warning signs of a clogged dryer vent, provide a step-by-step DIY cleaning manual, and discuss how to keep your laundry room fire-safe.
1. Why Clogged Dryer Vents Pose a Severe Fire Hazard
Flashing lint is composed of tiny fibers that shed from cotton, wool, and synthetic fabrics as they tumble inside the dryer drum. Lint is highly flammable. During normal dryer operation, the heating element (electric coils or a gas burner) operates at temperatures ranging from 120°F to over 150°F. When the exhaust path is clear, this heat is safely blown out of the home.
When the dryer vent is restricted by lint buildup, the hot air is trapped inside the dryer cabinet. The temperature inside the drum rises rapidly, far exceeding safe operating limits. If the ambient temperature inside the cabinet reaches the ignition point of the dry lint gathered near the heating element, it ignites instantly. The draft from the dryer fan then acts as a bellows, blowing the fire directly into the wall cavity along the path of the exhaust pipe, resulting in a rapid, catastrophic house fire.
The Physics of Lint Auto-Ignition under Thermal Containment
Lint consists of short-staple cellulose fibers (from cotton and linen) and thermoplastic polymers (from polyester and nylon). Cellulose has a relatively low thermal degradation threshold; it begins to pyrolyze (break down chemically under heat) at temperatures as low as 300°F (150°C), releasing flammable gases. Thermoplastic fibers melt and form sticky pool barriers that further block exhaust air. In a restricted vent scenario, the temperature adjacent to the electric heating element or gas combustion chamber can exceed 500°F in under ten minutes of runtime. Once pyrolysis gases accumulate and contact the red-hot heating coil, auto-ignition occurs. The flexible plastic or foil ducting behind the machine collapses or melts, feeding oxygen to the fire and allowing it to consume the drywall paper and wooden studs inside the wall structure.
Dryer Fire Prevention Statistics:
- Leading Cause: Dust, fiber, and lint buildup account for 27% of all dryer fires.
- Peak Season: Dryer fires peak during winter months (January is the highest) as heavier clothing materials shed more fibers.
- Gas vs Electric: Gas dryers present an additional hazard: a blocked vent can cause carbon monoxide (CO) gas to back up into the living spaces, posing a silent, deadly poisoning risk.
2. Critical Warning Signs Your Dryer Vent is Blocked
Your dryer will almost always give warning signs when the vent begins to clog. Recognizing these symptoms early can save you from a fire hazard and reduce wear on your appliance. If you notice any of the following signs, stop using the dryer and clean the vent immediately:
Symptom A: Clothes take more than one cycle to dry
This is the most common indicator of restricted airflow. When moist air cannot escape the dryer, it remains trapped in the drum. The clothes continue to tumble in a humid environment, requiring two or three cycles to dry. This wastes electricity and wears down the heating element.
Symptom B: The dryer feels extremely hot to the touch
If the top of the dryer cabinet or the laundry room feels excessively hot when the machine is running, the exhaust heat is not venting properly. The heat is trapped inside, placing thermal stress on internal thermal fuses and wiring.
Symptom C: Musty odors or a burning smell
A musty smell is caused by damp lint sitting in the ductwork. If you detect a faint burning smell (like hot dust or scorched fabric), lint is likely overheating near the heating element. Shut off the machine immediately.
Symptom D: The exterior vent hood does not open
Walk outside the home while the dryer is running. Check the wall exhaust cap. The plastic or metal flap dampers should blow open from the air pressure. If they remain closed or barely wiggle, there is little to no airflow reaching the exit point.
3. Step-by-Step DIY Dryer Vent Cleaning Guide
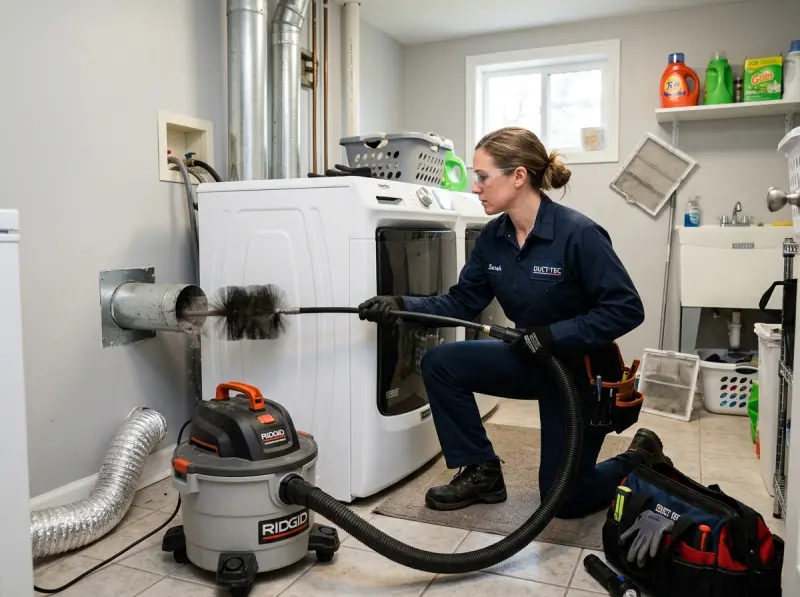
Cleaning your dryer vent is a manageable maintenance task that can be accomplished with a few basic tools. To do this properly, purchase a rotary dryer vent cleaning kit (which includes flexible fiberglass rods that thread together and a round bristles brush head that attaches to a power drill).
Tools and Materials Needed:
- Rotary dryer vent brush kit (15 to 20 feet long)
- Power drill
- Vacuum cleaner with hose attachment
- Screwdriver or nut driver
- Heavy-duty foil duct tape (do not use plastic duct tape)
Cleaning Procedure:
- Disconnect the Dryer: Unplug the dryer from the wall outlet. For gas dryers, turn off the yellow gas valve. Pull the dryer away from the wall to access the back.
- Disconnect the Exhaust Duct: Use a screwdriver to loosen the hose clamps holding the flexible transition duct tube to the back of the dryer and the wall port. Pull the pipe off.
- Vacuum the Dryer Port: Insert your vacuum hose into the exhaust port on the back of the dryer. Clean out any loose lint gathered near the internal fan blower.
- Clean the Wall Entrance: Vacuum the wall exhaust port opening to clear loose lint blockages.
- Insert the Rotary Brush: Attach the brush head to the first fiberglass rod segment, lock it into your power drill chuck, and insert it into the wall duct. Run the drill at a slow speed while gently pushing the brush forward.
- Add Rod Segments: Thread additional rod segments together to reach the entire length of the duct. Keep the drill spinning clockwise (never counterclockwise, or the rods will unscrew and get stuck inside the wall).
- Extract the Brush: Pull the rods back slowly while keeping the drill spinning to pull out massive clumps of accumulated lint. Vacuum up the lint as it exits.
- Clean the Exterior Vent: Go outside and inspect the exhaust hood. Clear away any nesting materials, bird guards, or stuck lint. Run the brush from the outside if needed.
- Reconnect and Test: Reinstall the flexible transition duct. Ensure it is not kinked, bent, or crushed behind the dryer cabinet. Use foil tape to seal connections, plug the dryer in, and run it on “Air Dry” to blow out remaining loose dust.
For professional vent safety checks, visit our dedicated Dryer Vent Cleaning page.
4. Upgrading to Safe Venting Materials & Code Compliance
Not all dryer ducts are built to modern safety codes. If your home has plastic vinyl or flexible white foil transition ducting behind the dryer, you should replace it immediately. These materials are highly flammable and trap lint because of their ribbed internal structure, which creates air turbulence.
According to the International Residential Code (IRC), section M1502, dryer exhaust ducts must be constructed of minimum 0.016-inch-thick rigid metal, having smooth interior surfaces, with a nominal diameter of 4 inches. Male ends of the duct must run in the direction of the airflow. Screws or other fasteners that penetrate into the duct are strictly prohibited because they act as lint catchers, forming instant blockages. Upgrading your venting system to meet rigid metal specifications dramatically reduces fire risks and optimizes performance.
5. Dryer Vent Maintenance Frequency & Schedule
How often you should clean your dryer vent depends on several household factors, including laundry volume and the length of your exhaust line:
| Household Size | Loads Per Week | Recommended Cleaning Schedule |
|---|---|---|
| Small (1-2 People) | 1 to 3 Loads | Once every 12 to 18 months |
| Medium (3-4 People) | 4 to 7 Loads | Once every 12 months (Annually) |
| Large (5+ People / Pets) | 8+ Loads | Once every 6 months |
If your dryer’s exhaust line has multiple turns (90-degree elbows) or exits through the roof (roof-vented dryer exhausts), lint accumulates faster because air velocity drops at each bend. These setups should be cleaned at least once a year by a professional using commercial high-pressure pneumatic tools. For a full range of related dryer and washer services we offer, check our Washer & Dryer Repair section.
6. Testing and Replacing Dryer Thermal Fuses and Safety Limits
Every modern clothes dryer has built-in thermal safety cutoff limit switches to prevent cabinet fire auto-ignition. The most critical safety component is the thermal fuse, which is mounted directly to the exhaust blower housing. When exhaust temperatures exceed safety limits (typically 196°F to 220°F depending on the model), the thermal fuse burns open, permanently breaking the circuit to the motor or the heating coils.
A blown thermal fuse is the most common reason a dryer will run but fail to heat, or refuse to turn on at all. It is a non-resettable component; once blown, it must be replaced. The fuse usually blows because of restricted airflow from a clogged vent pipe. If your dryer runs but doesn’t heat, follow these diagnostic steps:
How to Diagnostically Test the Thermal Fuse:
- Unplug the Appliance: Disconnect the electrical cord and turn off gas lines.
- Access the Blower Housing: Remove the rear metal panel of the dryer. Locate the white plastic oval or rectangular part (approximately 2 inches long) mounted on the silver metal blower duct housing.
- Test for Continuity: Pull the two wire connectors off the fuse spade terminals. Set your multimeter to the Rx1 (Resistance) or Continuity/Beep mode.
- Read the Meter: Touch the multimeter probes to the two terminals of the fuse. If the fuse is functional, the meter will beep and read 0 Ohms. If the meter remains silent and reads OL (open loop), the fuse is blown and must be replaced.
- Replace and Clean: Install a new OEM thermal fuse, but do not turn the dryer back on until you have fully swept and vacuumed the exhaust vent pipe. Running a dryer with a new fuse on a clogged vent will cause the new fuse to blow within minutes.
Gas Dryer Burner Coils and Solenoid Ignition Systems
Gas clothes dryers rely on a burner assembly to produce heat. When the cycle starts, the control board closes safety loops and powers a silicon carbide igniter. As the igniter glows white-hot, a radiant sensor detects the heat and cuts power to the igniter while simultaneously opening two solenoid gas valves (burner coils) to release natural gas or liquid propane, which ignites from the residual heat. Over time, these solenoid gas coils fail. As they heat up during operation, their internal copper windings break contact, shutting off the burner. If your gas dryer heats up for the first 5 minutes of a cycle and then blows only cold air for the rest, replacing the dual solenoid gas coils is the standard mechanical solution.
Thermodynamic Calculations for Maximum Dryer Vent Lengths
Calculating the maximum allowed duct length for a clothes dryer is critical to ensure proper exhaust velocity. The base maximum length allowed by most building codes is 35 feet from the dryer connection to the exterior termination hood. However, this length must be reduced for every bend or elbow installed in the line, as each turn increases backpressure and air friction. Use the equivalent lengths below to calculate your system limit:
| Duct Component | Equivalent Length Deduction | Reason for Backpressure Increase |
|---|---|---|
| 90-Degree Short Radius Elbow | 5 Feet | Sharp turn causes extreme air turbulence and velocity drop. |
| 45-Degree Mitered Elbow | 2.5 Feet | Moderate deflection, preferred over 90-degree bends. |
| Exterior Wall Cap (Louvers) | 0 Feet (Baseline) | Standard free exhaust escape window. |
For example, if your exhaust line has three 90-degree elbows, you must deduct 15 feet from the 35-foot limit, meaning your actual maximum allowed straight run is only 20 feet. Exceeding this limit will cause lint to settle in the pipe, creating a blockage. In long runs, installing a dedicated inline dryer booster fan is required to maintain exhaust speed.
Semantic SEO Troubleshooting: Dryer Symptoms & Solutions
If your dryer is experiencing issues beyond a clogged vent, follow these diagnostic guidelines to determine the best course of action:
Symptom A: Dryer runs but does not heat up
If the drum spins and airflow is clear, but there is no heat, the thermal fuse has likely blown due to previous overheating from a clogged vent. Once the thermal fuse blows, the dryer is disabled to prevent a fire. Other causes include a failed heating element (burned coil), a faulty high-limit thermostat, or a failed igniter on gas dryers. Replacing the thermal fuse is a quick and affordable repair.
Symptom B: Dryer makes a squeaking or grinding noise
This is a mechanical issue. It is typically caused by worn drum support rollers, a failed drum belt pulley (idler pulley), or a failing motor bearing. If left unaddressed, the drum can seize up, snapping the belt and halting the machine. Replacing rollers and pulleys resolves these noises completely.
Conclusion & Professional Support
A clogged dryer vent is a major household hazard that can be easily prevented with routine inspection and cleaning. By recognizing warning signs—such as long dry times and overheating—and maintaining a regular cleaning schedule, you can protect your home, reduce your energy bills, and keep your clothes dryer running efficiently.
If you prefer a professional to inspect and clean your dryer vents, or if you need repairs for a dryer that is not heating or running, call Appliance Repair Alpharetta at (770) 796-7742 or contact us via our Contact Us page today. Our local experts are ready to keep your home safe and efficient!
Related Service & Area Directories
Related Professional Repair Services & Local Guides
For complete technical diagnostics across Fulton County, explore our dedicated services: Emergency Appliance Repair • Same-Day Local Service • Commercial Appliance Diagnostics • Residential Kitchen & Laundry Service • Master Diagnostic Error Codes • Appliance Repair Cost Guide • Alpharetta Appliance Repair Hub.
Need Certified Appliance Repair Today?
Skip the phone line — book direct local priority dispatch across Alpharetta, Milton, Roswell & Johns Creek.