
Why is My Dishwasher Leaving Standing Water? (Troubleshooting Guide)

There is nothing more frustrating than opening your dishwasher at the end of a long cleaning cycle, expecting to unload dry, sanitary dishes, only to find a pool of murky, stagnant water sitting at the bottom of the tub. A dishwasher leaving standing water is one of the most common kitchen plumbing anomalies. It not only halts your cleaning routines but also creates breeding grounds for mold, mildew, and foul kitchen odors. Fortunately, a drainage failure does not necessarily mean you need to purchase a new appliance. In this detailed diagnostic guide, we will analyze the physics of dishwasher drainage, explain the five primary components that fail, and show you step-by-step how to clear clogs and test internal components using a digital multimeter.
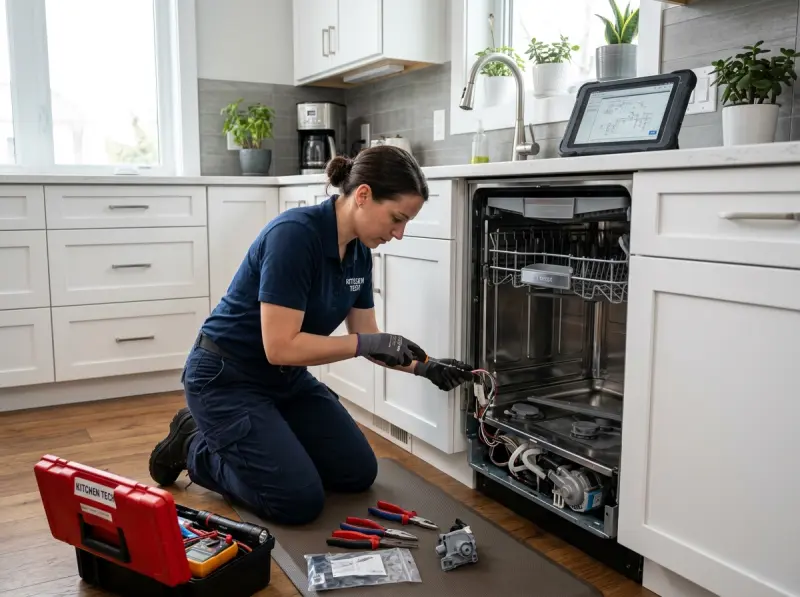
1. Understanding the Physics of Dishwasher Drainage Cycles
To diagnose drainage failures, it is helpful to understand how a dishwasher handles wastewater. At the beginning of a cycle, clean water enters the tub through the inlet valve. The circulation pump forces this water through the spray arms at high velocity to scrub the dishes. As food particles are washed off, the water passes through a multi-stage filtration system at the center bottom of the tub. Once the wash phase is complete, the control board halts the wash pump and energizes the drain pump motor.
The drain pump spins a small plastic impeller at high speed, pushing the dirty water out through a flexible drain hose. This hose is routed up in a loop (known as a “high loop”) before connecting to your sink drain or garbage disposal. The high loop is a critical siphon-prevention mechanism; it uses gravity to prevent dirty sink water from back-flowing into your clean dishwasher. If this loop falls down or the check valve fails, gravity will pull wastewater backward, leaving standing water in the bottom of your machine.
During the drainage phase, the pump must overcome the vertical lift of the drain hose loop, which usually sits between 20 to 32 inches above the kitchen floor. If the pump motor windings degrade, it may successfully push water across flat lines but fail to lift it over the high loop. This results in the pump motor overheating, shutting off via its internal thermal overload switch, and leaving a thick pool of soapy water in the tub.
The Role of the High Loop and Air Gap Systems
In municipal plumbing codes across Georgia, including Alpharetta and Fulton County, dishwashers must utilize a high loop or an air gap to prevent cross-contamination. An air gap is a cylindrical chrome fixture mounted next to your kitchen sink faucet. It physically splits the drain line with a physical air space, making it physically impossible for sink backups to siphon back into the dishwasher. If your dishwasher has a high loop instead, the drain hose must be secured to the very top of the cabinet under-counter framework. If the hose drops down, any water draining from your kitchen sink can gravity-flow directly into the dishwasher tub, filling it with dirty, smelly sink water.
2. Detailed Component Analysis: The 5 Failure Modes
When standing water accumulates, the root cause usually falls into one of these five areas, ranging from simple maintenance checks to electrical motor failures:
A. Clogged Filter and Sump Screen
This is the most common cause. The filter at the bottom of the tub is designed to catch large food chunks, stickers, glass shards, and grease. If you do not clean the filter regularly, a thick layer of organic residue will block the water from entering the sump basin, trapping it in the tub. Hard water minerals in Alpharetta water can also bind to the mesh screen, forming a translucent scale layer that restricts drainage even if the screen appears visually clean.
B. Blocked Garbage Disposal Connection
If your dishwasher was recently installed and immediately refuses to drain, the installer likely forgot to knock out the plastic drain plug inside the garbage disposal inlet nipple. Alternatively, food scraps can build up inside the disposal inlet, choking off the drain path. When the disposal runs, it can also force food slurry back down the dishwasher line if the check valve is weak.
C. Failed Drain Pump Motor and Impeller
The drain pump motor can burn out electrically, or its plastic impeller blades can break after hitting a hard object like a bone or glass shard. When this happens, you will often hear a faint hum from the bottom of the machine during the drain phase, but no water will move. Over time, the internal seals of the pump can also weep, allowing water to enter the motor windings and cause a short-circuit.
D. Defective Check Valve (Drain Flapper)
The check valve is a small rubber flap located at the outlet of the drain pump or hose connection. It acts as a one-way street, allowing water to flow out but sealing shut when the pump stops. If the rubber flap gets stuck open by debris or rots over time, water inside the drain line will flow back into the tub. In some dishwasher models (like GE), this check valve uses a small plastic piston that can stick due to detergent buildup.
E. Clogged Drain Hose or Air Gap
Soap scum, food debris, and grease can accumulate inside the narrow drain hose, forming a solid plug. If your sink has an air gap, food waste from the sink can clog the air gap channels, causing water to spray out onto the counter or back up into the dishwasher. In extreme cases, a kinked hose behind the dishwasher cabinet can also throttle flow, causing the drain cycle to time out.
3. Step-by-Step DIY Drain Inspection & Clearing Guide
Before calling out a technician, follow these step-by-step diagnostic steps to find and clear the blockage:
- Step 1: Manually Remove the Water. Use a small cup or turkey baster to scoop out the standing water from the tub. Soak up the remaining moisture with dry towels. This prevents water from spilling into the under-cabinet electrical areas during disassembly.
- Step 2: Clean the Filter Assembly. Rotate the cylindrical filter counterclockwise and lift it out. Rinse it under warm running water using a soft brush to remove grease film. Lift off the flat metal screen underneath and clean the sump basin.
- Step 3: Check the Sump Basin for Debris. Look inside the sump basin. You will often find seeds, broken glass, bone fragments, or plastic twist-ties sitting near the suction inlet. Remove them carefully.
- Step 4: Inspect the Garbage Disposal. If you have a disposal, run it for 10 seconds to clear any food waste. If it is a new disposal installation, disconnect the dishwasher drain hose from the side port and verify the metal knockout plug has been fully removed.
- Step 5: Clear the Sink Air Gap. If your sink has an air gap, pull off the chrome cap, remove the internal plastic cover, and check for food blockages. Use a small bottle brush or a straw to clear the channels.
- Step 6: Flush the Drain Hose. Locate where the drain hose connects under the sink. Disconnect it and check for blockages. Place the hose end into a bucket and run a short diagnostic cycle to see if the pump pushes water out. If not, blow air through the hose to clear the block.
- Step 7: Inspect the Pump Impeller. Many modern dishwashers (like Bosch and KitchenAid) allow access to the pump impeller from inside the sump. Pop off the plastic impeller cover plate and verify the blades spin freely without hair or debris binding the shaft.
4. Testing the Drain Pump Motor with a Multimeter
If the drainage path is completely clear of clogs but the dishwasher still fails to pump out water, the drain pump motor itself has likely failed. You can test the motor’s electrical windings for continuity using a digital multimeter:
- Safety Warning: Unplug the dishwasher from the wall outlet or shut off the circuit breaker at the main panel before opening any covers.
- Access the Pump: Remove the lower front access kickplate panels. The drain pump is typically located at the bottom of the tub, attached to the side of the plastic sump basin.
- Disconnect Wires: Pull off the wire harness plug from the pump terminals. Note their positions for reassembly.
- Set Multimeter: Set your multimeter to the lowest Ohms resistance setting (Rx1 or Rx10).
- Test Windings: Touch the probes to the two metal terminals on the pump motor. A functional drain pump motor should read between 15 to 40 Ohms. If the meter reads OL (Open Loop/Infinity) or 0 Ohms (Dead Short), the internal motor coils are damaged, and the pump must be replaced.
- Check Ground Short: Touch one probe to a metal terminal and the other probe to the metal frame of the pump. The meter should read OL. If it shows any numerical value, the motor is shorted to ground and will trip your home GFCI breaker instantly.
5. Brand-Specific Diagnostics & Error Codes
Different dishwasher manufacturers utilize varying hardware configurations that exhibit unique failure patterns:
| Brand | Error Code | Troubleshooting Action |
|---|---|---|
| Bosch | E24 / E25 | Indicates drainage timeout or blocked impeller. Check the white plastic impeller cover inside the sump; if it is missing or loose, the pump cannot create suction. Check for hair wrapped around the impeller shaft. |
| Whirlpool / Maytag | F9 E1 / 9 Flashes | Indicates slow drain or drainage failure. Inspect the check valve flapper at the pump outlet. Check if the drain hose is clogged with accumulated grease. Run a diagnostics cycle to test pump voltage. |
| Samsung | 5C / 5E / OC | Drainage error. The system detected water in the tub at the end of the drain cycle. Samsung sensors are highly sensitive; inspect the ECS sensor in the sump for scum buildup and clean it. Check the high loop height. |
| GE Profile | FTD (Fault to Drain) | Drain pump failed to empty the tub in 4 minutes. Check the piston check valve at the bottom rear of the tub. If the rubber seal on the piston expands due to oil contact, it will lock the drain path shut. Replace the piston. |
6. Preventative Care and Maintenance Tips
Routine maintenance is key to preventing sudden drainage breakdowns and avoiding expensive repair bills. Follow these simple preventative steps:
- Monthly Filter Wash: Establish a routine to wash your dishwasher filter on the first day of every month. A clean filter reduces wear on the drain pump.
- Hot Vinegar Purges: Once a month, place a cup of white vinegar on the top rack of an empty dishwasher and run a heavy, hot-water sanitizing cycle. The acid breaks down grease deposits and hard water scale inside the drain lines.
- Scrape, Don’t Rinse: Scrape large food particles off plates before loading, but do not pre-rinse them completely clean. Dishwasher detergent needs food proteins to activate properly; pre-rinsing leads to detergent oversudsing, which blocks the water sensor.
- Run the Garbage Disposal: Always run your garbage disposal before starting a dishwasher cycle. This ensures the shared under-sink drain path is completely clear of obstacles.
7. Case Studies: Real Repairs in Alpharetta, GA
To demonstrate our team’s expertise, here are real-life examples of drainage repairs we resolved recently in local Alpharetta neighborhoods:
Case Study 1: Windward Subdivision (Alpharetta, GA)
A homeowner in the Windward neighborhood reported a pool of dirty water in their Bosch dishwasher accompanied by an E24 error code. The client had already cleaned the filter, but the issue remained. Our technician removed the kickplate, tested the drain pump motor, and found it was electrically sound (28 Ohms). However, upon opening the sump cover, we discovered a tiny piece of clear plastic wrap wound tightly around the impeller shaft, preventing it from spinning. We cleared the plastic wrap, re-secured the impeller cover, and successfully cleared the error code.
Case Study 2: Avalon Shopping District Condominiums
A resident in a luxury apartment near Avalon had a KitchenAid dishwasher that left water in the bottom after every wash. The dishwasher was only 18 months old. Upon inspection, our technician noticed the drain hose under the sink had dropped down behind the trash bin. Whenever the client ran the garbage disposal or poured liquid down the sink, gravity pulled sink wastewater directly down the sagging hose and into the dishwasher tub. We installed a high loop bracket to secure the hose under the granite countertop, purged the tub, and solved the issue permanently without replacing any parts.
Case Study 3: Medlock Bridge Road Homes
Near Medlock Bridge, we serviced a GE Profile dishwasher with a persistent FTD (Fault to Drain) code. The pump hummed but failed to empty the water. Testing the motor revealed a reading of OL (Open Loop), indicating a burnt coil winding. We uninstalled the failed pump, cleaned the sump basin, installed a new genuine GE OEM pump assembly, verified the check valve seal, and completed the cycle successfully.
8. Comprehensive FAQs (Frequently Asked Questions)
Here are answers to the 12 most common questions about dishwasher drainage failures:
Q1: Is it normal to have a small amount of water left in the bottom of the dishwasher?
Yes, it is completely normal to have a shallow pool of clean water (about 1/4 to 1/2 inch deep) inside the sump basin under the filter screen. This water keeps the internal rubber seals moist, preventing them from drying out, cracking, and leaking. However, water filling the entire bottom filter screen or flooding the metal tub floor is a failure.
Q2: Can I use chemical drain cleaners (like Drano) to clear a clogged dishwasher?
NO! Never pour commercial liquid drain cleaners into your dishwasher. These products contain highly caustic chemicals (such as sodium hydroxide) that produce extreme heat. They will warp the plastic tub liners, melt the rubber hoses, and destroy the internal gaskets of the wash and drain pumps, leading to catastrophic leaks.
Q3: How much does it cost to replace a dishwasher drain pump in Alpharetta?
The average cost to replace a drain pump ranges between $180 and $320, depending on the brand and model of your appliance. This includes the cost of the genuine OEM pump part, labor, and a professional diagnostic review. Higher-end European brands like Miele or Asko can be slightly more expensive due to specialized component costs.
Q4: Why does my dishwasher fill with water even when it is turned off?
If your dishwasher fills with water when not in use, the cause is either a faulty water inlet valve (if the water is clean) or a missing high drain loop under the sink (if the water is dirty and smells like sink waste). A failed inlet valve will slowly weep water past its solenoid seat, filling the tub over 24-48 hours. Replace the valve if this occurs.
Q5: What is the difference between a High Loop and a Sink Air Gap?
A sink air gap is a physical chrome cylinder mounted on top of the sink basin that physically splits the drain path with air, making siphoning impossible. A high loop achieves a similar result by looping the drain hose to the highest possible point under the countertop. Both prevent sink backups from entering the dishwasher, but air gaps are required by code in some municipal areas.
Q6: How long should a residential dishwasher drain pump last?
A high-quality dishwasher drain pump is designed to last between 7 to 10 years under normal residential use. Running the machine daily with heavily soiled dishes or failing to clean the filter regularly increases the load on the pump, which can shorten its lifespan to 4-5 years.
Q7: Why is my dishwasher humming but not draining?
A humming noise indicates that the drain pump motor is receiving electrical power but the impeller cannot turn. This is caused by a piece of glass, a bone, or a toothpick jamming the impeller blades, or the motor bearings having seized due to water damage. Power should be shut off immediately to prevent the motor windings from burning out.
Q8: Can hard water cause my dishwasher to stop draining?
Yes. Hard water contain calcium and magnesium minerals that accumulate on the micro-fine mesh of the dishwasher filter. Over time, this forms a solid white mineral scale that blocks water flow into the sump. Cleaning the filter with white vinegar or a descaling agent dissolved the scale and restores flow.
Q9: Where is the dishwasher check valve located, and how do I clean it?
The check valve is typically located at the outlet of the drain pump, right where the drain hose connects to the pump housing. Disconnect the hose, pull out the small rubber flapper valve, rinse it under hot water to remove grease, and inspect it for tearing. Replace it if it is warped or soft.
Q10: Why does my dishwasher drain slowly?
Slow drainage is caused by partial clogs inside the drain hose, a partially blocked sink connection, or a worn drain pump motor that is losing its torque. We recommend clearing the hose with a drain snake or replacing the hose if it is heavily impacted with soap grease.
Q11: Will a clogged sink cause my dishwasher not to drain?
Absolutely. Because the dishwasher drain hose connects directly to the sink drain or garbage disposal, any blockage in your main kitchen sink piping will prevent the dishwasher from emptying. If your kitchen sink is backed up, you must clear the sink plumbing before troubleshooting the dishwasher.
Q12: Can I replace a dishwasher drain pump myself?
Yes, if you are comfortable with basic tools, have shut off the water and electricity, and can lay the dishwasher on its back. However, accessing the pump requires working around high-voltage connections and plumbing seals. If you are unsure, hiring a licensed technician prevents leaks and electrical faults.
Conclusion & Professional Support
Standing water in your dishwasher is a problem that should be resolved quickly to prevent water damage to your kitchen cabinets and mold growth inside the wash chamber. While cleaning filters and check valves are standard DIY tasks, replacing a failed drain pump or diagnosing complex control board issues is best left to licensed professionals.
If your dishwasher continues to pool water after checking the filters and hoses, contact the local experts at Appliance Repair Alpharetta by calling (770) 796-7742 or booking online through our Dishwasher Repair Service page. Our technicians carry genuine factory-certified parts in their service vans to resolve drainage problems in a single visit across Alpharetta, Milton, Roswell, and Johns Creek.
Related Service & Area Directories
Related Professional Repair Services & Local Guides
For complete technical diagnostics across Fulton County, explore our dedicated services: Emergency Appliance Repair • Same-Day Local Service • Commercial Appliance Diagnostics • Residential Kitchen & Laundry Service.
Need Certified Appliance Repair Today?
Skip the phone line — book direct local priority dispatch across Alpharetta, Milton, Roswell & Johns Creek.