
GE Profile Electric Range JS760SLSS Oven Not Heating — Bake Element, Sensor & Control Board Repair Alpharetta GA
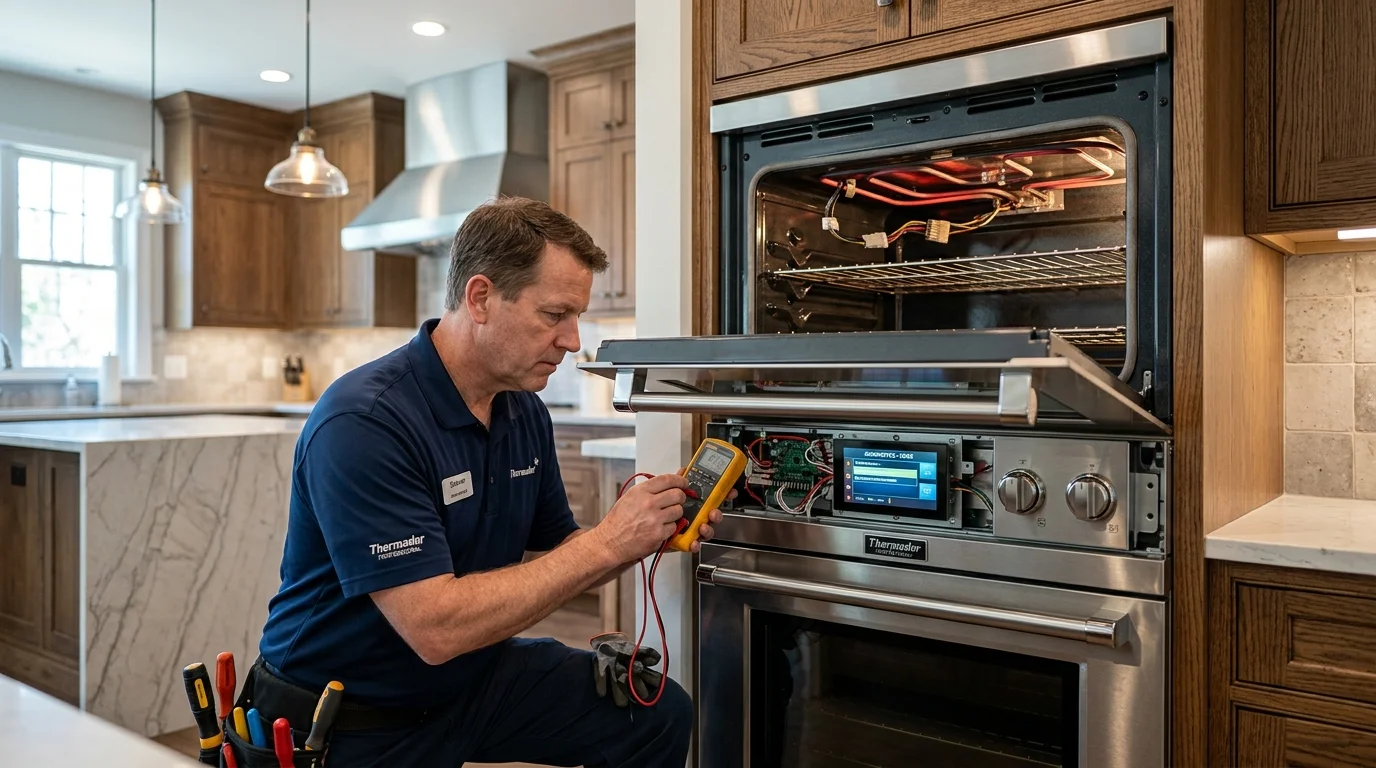
If your GE Profile electric range model JS760SLSS is leaving your dinners cold while the stovetop works fine, you’re not alone. Discover exactly why your GE oven won’t heat on bake, what F2 or F3 error codes mean, and how to properly diagnose bake elements, RTD sensors, and control boards safely.
Table of Contents
- 1. Introduction
- 2. Symptoms
- 3. Common Causes
- 4. Step-by-Step Troubleshooting
- 5. When to Stop DIY
- 6. Repair vs Replace
- 7. Estimated Cost Factors
- 8. How Professionals Diagnose
- 9. Common Parts Involved
- 10. Maintenance Tips
- 11. Safety Tips
- 12. FAQs
- 13. Related Services
- 14. Related Problems
- 15. Related Brand Pages
- 16. Related Location Pages
- 17. Deep Dive: Multimeter
- 18. History of GE
- 19. Extended FAQs
- 20. Final Thoughts
- 21. Key Takeaways
- 22. Call to Action
1. Introduction
There is nothing quite as frustrating as preparing a beautiful meal, sliding it into your GE Profile Electric Range (specifically the JS760SLSS model), and returning an hour later to find the oven completely cold. When a GE oven not heating issue strikes homes in Alpharetta, GA, it disrupts family dinners, holiday gatherings, and daily meal prep routines. While the surface burners on your slide-in range might be working perfectly, the internal baking compartment relies on a completely different set of electrical components and logic circuits. The GE JS760SLSS is a sophisticated appliance featuring hidden bake elements, electronic oven controls (EOC), and precise RTD temperature sensors. Understanding how these parts interact is crucial to diagnosing the lack of heat.

Modern ranges operate on a 240VAC electrical system. The bake element in your GE oven requires a staggering 3400 watts of power to bring the cavity up to a searing 450 degrees or maintain a gentle 350-degree baking temperature. When this system fails, the root cause could be a mechanical failure (like a blistered element), a sensor failure (like a shorted thermistor), or a logic failure (a burnt relay on the main control board). In this comprehensive guide, we will dissect the mechanical and electrical anatomy of the GE JS760SLSS range, explore the notorious F2 and F3 error codes, and walk you through professional-grade diagnostics using multimeter resistance readings.
Appliance Repair Alpharetta GA is dedicated to empowering homeowners with accurate, actionable technical knowledge. However, working with 240-volt electrical circuits presents severe, life-threatening risks. We emphasize safety above all else. If you are uncomfortable wielding a multimeter or handling heavy gauge wiring, our certified technicians are ready to assist. Let’s delve into the complex, fascinating world of electric range repair and uncover exactly why your GE Profile oven is leaving you out in the cold.
Furthermore, it is important to understand the architecture of this specific appliance. The GE JS760SLSS utilizes a hidden bake element, which means you cannot simply look at the floor of the oven to see if the element is glowing red. The element is concealed beneath the oven liner, requiring panel removal for visual inspection. This design choice makes cleaning easier but complicates DIY diagnostics. The broil element, located at the top of the cavity, is fully exposed and operates at 3600W. Often, homeowners notice the oven isn’t heating on bake, but the broil function works perfectly. This specific symptom is a massive clue in the diagnostic process, immediately ruling out the terminal block, the main power cord, and the dual 40-amp circuit breakers at your home’s electrical panel. If broil works, the oven is receiving 240V. The problem is isolated to the bake circuit.
Diving deeper into the specifics of the GE JS760SLSS, we must understand its dual-fuel vs all-electric configurations. While some ranges feature a gas cooktop and electric oven (dual-fuel), the JS760SLSS is entirely electric, meaning both the cooktop and oven share the same 240VAC 40-to-50 amp power source. The all-electric design relies heavily on a centralized electronic control board rather than individual thermostats or gas valves. It also employs a sophisticated power management system to ensure that all surface burners and oven elements don’t overwhelm the circuit when running simultaneously. Because it’s completely reliant on electricity, even minor voltage drops or relay stutters can significantly impact the preheating times and the final baking results.
Another major factor that separates the JS760SLSS from entry-level freestanding units is its slide-in design. Unlike standard freestanding ranges that have a prominent backguard housing the controls, the slide-in range features front-mounted controls. This means the critical Electronic Oven Control (EOC) board is located directly above the hot oven cavity and right behind the front knobs. While this offers a sleek, built-in look that fits seamlessly against your backsplash, it subjects the sensitive electronics to higher ambient temperatures, especially during high-heat self-cleaning cycles or extensive broiling. This physical layout explains why EOC relay failures are slightly more common in slide-in models compared to traditional freestanding units, as heat mitigation is inherently more challenging.
2. Symptoms of a Failing GE Oven
Recognizing the exact symptoms your GE Profile range is exhibiting is the first step toward a successful repair. A general “not heating” complaint can manifest in several distinct ways. Here are the detailed symptoms you might observe:
Oven Preheats Incredibly Slowly
If your oven is taking 45 minutes to reach 350°F, it’s highly likely that only the broil element is functioning during the preheat cycle. Modern GE ovens utilize both the bake and broil elements to rapidly preheat the cavity. If the 3400W bake element fails, the oven relies entirely on the top element, which struggles to heat the lower section of the cavity effectively. You’ll notice the top of your food burning while the bottom remains raw. Furthermore, when observing the preheat cycling, a healthy oven will typically alternate power between the top broil element and the bottom bake element in a precise rhythm to ensure rapid and even heating. If you listen closely and only hear the relay click for the broil element without the corresponding bake relay activation, it’s a dead giveaway that the bake circuit is compromised.

Bake Fails, But Broil Works Perfectly
This is the most common symptom of a dedicated bake circuit failure. You set the oven to Bake at 350°F, you hear the control board click, but zero heat is generated. However, when you switch the setting to Broil, the top element immediately glows bright orange. This symptom confirms that your house is delivering full 240VAC to the appliance and the terminal block is intact. The issue is strictly isolated to the bake element, its specific wiring harness, or the bake relay on the EOC. Additionally, the broil-only operation nuance means the control board processor is still capable of interpreting user inputs and sending commands, which heavily isolates the issue to the high-voltage load side of the bake circuit rather than a complete logic board failure.
F2 or F3 Error Codes on the Display
GE utilizes specific diagnostic codes to alert users of sensor failures. An F2 error code typically signifies that the oven temperature has exceeded a safe threshold (a runaway temperature condition), which can occur if the bake relay on the control board fuses shut and constantly sends power to the element. An F2 can also indicate a shorted sensor. The exact F2 display behavior on the JS760SLSS often involves a continuous, loud, and annoying beep accompanied by the flashing code on the digital matrix display, preventing any further use of the oven until power is cycled. An F3 error code explicitly means the RTD (Resistance Temperature Detector) sensor circuit is open. The control board reads infinite resistance and shuts down the heating functions as a safety precaution. The F3 code usually triggers immediately upon selecting a bake or broil cycle, halting the process before it even begins.
Uneven Baking or Burnt Bottoms
Even if the oven appears to heat, you might notice your cookies are burnt on the bottom but raw on top, or vice versa. This indicates an issue with temperature regulation. The RTD sensor might be slowly failing, shifting its resistance curve so it tells the control board the oven is 350°F when it is actually 425°F. This drifting calibration ruins baked goods long before a hard failure triggers an error code. You might also notice that the oven cycling patterns are erratic; instead of maintaining a tight 10-degree window around the set temperature, the oven may swing wildly by 30 or 40 degrees, resulting in inconsistent culinary outcomes.
Oven Simply Won’t Turn On at All
In this scenario, the display might be blank, or the oven might refuse to accept any input commands. While this isn’t strictly an “oven not heating” issue, a completely dead appliance usually points to a catastrophic failure of the main control board, a blown internal thermal fuse (if equipped on your specific sub-model), or a complete loss of power at the wall outlet.
3. Common Causes for GE JS760SLSS Not Heating
The GE Profile JS760SLSS is a marvel of modern engineering, but it relies on several critical components that can degrade over time due to extreme thermal cycling.
The 3400W Bake Element Failure
The bake element is essentially a massive resistor designed to convert electrical current into intense heat. The core of this element is composed of nichrome wire, an alloy primarily made of nickel and chromium, suspended within a magnesium oxide powder insulator and encased in a steel or incoloy outer sheath. Nichrome is chosen for its extremely high electrical resistance and its ability to withstand incredibly high temperatures without oxidizing or melting. Over years of use, the internal heating wire expands and contracts, eventually causing micro-fractures in the nichrome. When a break occurs, the high-voltage current jumps the tiny gap, causing localized arcing. This arcing generates intense, concentrated heat that quickly burns through the protective sheath, resulting in a visible blister, bubble, or a complete rupture where the element physically snaps in two. Often, the failure happens right at the terminal connections due to the stress of heating and cooling cycles acting on the rigid mounting points. A healthy JS760SLSS bake element should read approximately 17 ohms of resistance. If it reads O.L (Open Line) on a multimeter, the element has snapped internally and must be replaced. Because this model uses a hidden bake element, you cannot visually inspect it without disassembling the floor panel.

RTD Temperature Sensor Malfunction
The Resistance Temperature Detector (RTD) is a specialized thermistor located inside the oven cavity, usually near the top rear corner. It is critical to differentiate between the two main types of temperature sensors: Pt1000 and NTC (Negative Temperature Coefficient) thermistors. The GE JS760SLSS utilizes a Pt1000 RTD sensor. The “Pt” stands for Platinum, which is used for the sensor element because of its exceptional stability and linear resistance-temperature relationship, and “1000” means it has a nominal resistance of 1000 ohms at 0°C (32°F). Unlike NTC sensors where resistance drops as temperature rises, the Pt1000 RTD’s electrical resistance increases predictably with heat. To properly diagnose this sensor, technicians rely on a precise temperature vs resistance table: at 32°F it should read 1000Ω, at 77°F it will read approximately 1100Ω, at 212°F it climbs to 1385Ω, and at a typical baking temperature of 392°F it should measure 1725Ω. If the sensor fails open (infinite resistance), it triggers an F3 code. If it shorts or drifts wildly out of specification, the oven won’t know when to turn the elements on or off, leading to cold or dangerously overheated conditions (F2 code).
Electronic Oven Control (EOC) Board Relay Burnout
The EOC board is the brain of your GE range. It houses heavy-duty relays that act as electrical switches. When you press “Bake,” the EOC sends a low-voltage signal to close the bake relay. This relay takes 120VAC from the L1 leg of your power supply and sends it down to the bake element (which meets the L2 leg to complete the 240VAC circuit). The most common point of failure on the EOC is relay contact pitting. As the mechanical relay snaps shut to carry the massive 15+ amps required by the element, a tiny electrical arc occurs right before the contacts touch. Over thousands of cycles, this arcing vaporizes microscopic amounts of the metal contacts, creating soot, pitting, and charring. Eventually, the contacts become so coated in carbon or so physically degraded that they can no longer conduct electricity, even when the relay coil successfully pulls them closed. This is exactly why the bake relay typically fails long before the broil relay; the bake element cycles on and off continuously during normal cooking to maintain temperature, whereas the broil element is used far less frequently and typically remains on constantly during use. Furthermore, the EOC can suffer from capacitor degradation over time, causing power supply issues that prevent the relays from engaging reliably. In severe cases, you might notice a burnt smell or scorch marks on the back of the control board.
Door Lock Motor Failure
While often overlooked when diagnosing a “not heating” issue, the door lock motor assembly plays a crucial role in the oven’s safety logic. The JS760SLSS model features a motorized latch that secures the door during the extreme heat of the self-clean cycle. However, this motor assembly also contains microswitches that report the door’s locking status back to the main control board. If the motor fails while in the locked position, or if a microswitch incorrectly reports that the latch is engaged when it isn’t, the EOC will initiate a safety lockout protocol. This self-clean lockout is designed to prevent the bake and broil elements from turning on while the door state is indeterminate or stuck. If your oven refuses to heat and you notice the door lock icon flashing or hear the latch motor grinding continuously, the lock assembly is the likely culprit preventing the bake circuit from engaging.
Broil Element Wiring
The immense power flowing through an electric range requires heavy-gauge wiring and solid connections. While the bake element wiring is a frequent failure point, the broil element wiring harness is also susceptible to severe degradation. Because the broil element is located at the very top of the oven cavity, its terminal connections are exposed to the highest temperatures and cooking splatters. This extreme environment accelerates connector terminal corrosion. The metal spade connectors can oxidize, becoming brittle and increasing electrical resistance. This resistance generates localized heat, which can literally melt the high-temperature wire insulation and burn the terminal connector completely off the element. A visual inspection of the wiring harness heading to both the bake and broil elements is a critical step in diagnosing a heating failure.
Why the Infinite Switch is NOT the Culprit
A common misconception among homeowners is blaming the infinite switches for an oven heating issue. Infinite switches are the rotary dials that control the surface burners on the stovetop. They rapidly pulse power on and off to regulate the heat of the glass-top elements. The infinite switches are completely isolated from the oven’s baking and broiling circuits. If your oven won’t bake, replacing an infinite switch will not solve the problem.
4. Step-by-Step Troubleshooting Guide
If you are technically inclined and comfortable using a digital multimeter, you can perform these DIY-safe diagnostic steps. Always prioritize safety when dealing with 240V appliances.
Step 1: Disconnect Power Completely
Do not rely solely on turning the oven off at the display. You must locate your home’s breaker box and flip the double-pole 40-amp or 50-amp breaker designated for the range to the OFF position. Alternatively, pull the range away from the wall and unplug the massive 3-prong or 4-prong pigtail cord from the 240V wall receptacle.
Step 2: Access the Hidden Bake Element
Open the oven door. Remove the oven racks. Look at the floor of the oven cavity. On the GE JS760SLSS, there are typically two screws at the rear of the floor panel. Remove these screws. Carefully lift the rear of the floor panel up and slide it backwards to clear the front lip. Lift it out of the oven. You will now see the hidden bake element exposed.

Step 3: Visual Inspection of the Element
Inspect the entire length of the dark grey tubular element. Look for white chalky spots, blistering, distinct breaks, or areas where the metal looks melted. If you see physical damage, the element has failed catastrophically and must be replaced. Even if it looks perfect, it could be broken internally, which requires the next step.
Step 4: Resistance Test of the Bake Element
Remove the mounting screws securing the bake element to the rear wall of the oven cavity. Carefully pull the element forward a few inches to expose the wire terminals. Using needle-nose pliers, pull the two wire connectors off the element terminals. (Warning: Do not let the wires slip back into the insulation hole!). Set your digital multimeter to the Ohms (Ω) setting. Place one probe on each terminal of the element. You should read approximately 16 to 18 ohms. If the meter reads O.L (Open Line) or infinite resistance, the 3400W element is dead.
Step 5: Test the RTD Temperature Sensor
Locate the temperature sensor protruding into the upper rear corner of the oven cavity (it looks like a small metal wand). Remove the two mounting screws. Carefully pull the sensor and its wiring harness into the cavity until the plastic disconnect plug is exposed. Unplug the sensor. Place your multimeter probes into the sensor-side of the plug. Using the Pt1000 chart, verify that at 77°F, a healthy GE sensor will read approximately 1100 ohms. If it reads vastly different (e.g., 500 ohms or O.L), replace the sensor. This will cure your F2 or F3 error codes.
Step 6: Inspect the Wiring Harness
While the bake element wires are exposed, closely examine the spade connectors. Are they blackened, brittle, or loose? A loose connection causes high resistance and extreme heat, often burning the wire completely off. If a connector is burnt, you must cut the wire back to clean copper, strip it, and crimp on a high-temperature steel terminal connector (standard automotive connectors will melt in an oven).

Step 7: Check the Broil Element
For thoroughness, perform the same resistance test on the top broil element. The broil element is rated at 3600W and should also measure in the 14-18 ohm range. If both elements test good, and the sensor tests good, the problem is likely upstream at the control board.
Step 8: Educational – Live Voltage Test Steps (Pro Only)
When professional technicians cannot find a definitive failure using resistance tests, they must measure live voltage. With the oven fully assembled, plugged in, and set to bake, a technician will carefully measure across the element terminals. They are looking for a full 240VAC between the L1 side of the element and the L2 side of the element during a bake command. If they read 0V across the element, they will check each leg to ground. Finding 120V on one leg but 0V on the other confirms which half of the circuit is failing (often the EOC relay). They must also verify the neutral wire integrity at the terminal block, as a dropped neutral can cause bizarre logic board behavior even if the heating elements are 240V.
5. When to Stop DIY and Call a Professional
While testing resistance with a multimeter is safe when the unit is unplugged, there is a strict limit to what a homeowner should attempt. You should immediately stop your DIY repair and call Appliance Repair Alpharetta GA if:
- Live Voltage Testing is Required: If all components test good for resistance, a technician must trace the 240VAC voltage while the machine is live to find where the voltage drops out. This is exceedingly dangerous. 240 volts carries enough amperage to cause fatal electrocution or severe arc flash burns.
- You Find Melted Wiring: If the main terminal block where the power cord attaches is melted, you have a severe electrical hazard that requires professional rewiring and potentially evaluation of your home’s receptacle.
- F2 Error Code Persists: If you replace the sensor and the F2 runaway temp error continues, the control board relay is stuck closed. The board must be replaced, and the unit must be rigorously tested to ensure it will not pose a fire hazard.
- You Are Unsure About Reassembly: Putting the hidden bake element back incorrectly can cause it to short against the chassis, creating a massive spark when powered on.

6. Repair vs Replace Decision Matrix
When facing a broken GE JS760SLSS, you must decide whether to invest in the repair or purchase a new range. As a rule of thumb, we follow the 50% rule: If the repair cost exceeds 50% of the cost of a comparable new appliance, replacement is strongly advised.
| Appliance Age | Failed Component | Recommendation | Reasoning |
|---|---|---|---|
| Under 5 Years | Bake Element / Sensor | Strongly Repair | Very cost-effective repair. Unit has plenty of life left. |
| 5 – 8 Years | Main Control Board (EOC) | Weigh Options | EOCs are expensive. Repair if the rest of the unit is pristine. |
| Over 10 Years | Multiple issues (Element + Board) | Replace Appliance | Cost of parts + labor exceeds 50% of a new GE Profile range. |
7. Estimated Cost Factors
While we cannot provide exact down-to-the-penny prices without diagnosing the machine in your home, we can outline the factors that dictate the cost of repairing a GE oven not heating in the Alpharetta area.
- Diagnostic Service Fee: We charge a flat $79 service fee to come to your home, disassemble the appliance, perform electrical testing, and provide a firm quote. This fee is completely waived if you proceed with the repair.
- Cost of OEM Parts: We use Original Equipment Manufacturer (OEM) GE parts. A new bake element is relatively inexpensive. An RTD sensor is also on the lower end of the cost spectrum. However, a brand new main electronic control board is a highly complex component and represents a more significant investment.
- Labor Intensity: Replacing a bake element on a JS760SLSS takes our trained technicians less time than replacing a main control board and recalibrating the oven temperatures. Labor is billed based on standard national appliance repair guide times.
- Wiring Repairs: If we find burnt wiring harnesses, we must splice in high-heat insulated wire and ceramic wire nuts, which adds slightly to the labor time but is crucial for safety.
| Component | Relative Part Cost | Typical Labor Impact |
|---|---|---|
| Bake Element | $ – Low | Medium (Hidden panel removal required) |
| RTD Temperature Sensor | $ – Low | Low (Quick access from cavity) |
| EOC Main Board | $$$ – High | High (Extensive disassembly and wiring) |
| Door Lock Motor | $$ – Medium | Medium |
| Terminal Block | $ – Low | Medium (Requires heavy gauge rewiring) |
8. How Professionals Diagnose the JS760SLSS
When you call Appliance Repair Alpharetta GA at (770) 796-7742, our Master Technicians employ a systematic, schematic-driven approach to diagnostics. The scope of work description is extensive.
First, we verify the customer’s complaint. We enter the GE diagnostic mode (usually by pressing a combination of keys on the display, specific to the tech sheet hidden inside the console). We check for stored error codes like F2 (over-temp/shorted sensor) or F3 (open sensor). We then measure the incoming voltage at the terminal block to ensure a full 240VAC across L1 and L2, and 120VAC from L1 to Neutral and L2 to Neutral.

If voltage is perfect, we utilize an amp clamp. We turn on the bake cycle and clamp the wire feeding the bake element. If the element is drawing zero amps, it means the circuit is open (either a broken element or a bad relay). We then perform a continuity test on the 3400W bake element. If it reads ~17 ohms, the element is good. The next test is tracing the voltage out of the EOC. If the control board is receiving 120V to the relay, but sending 0V out to the bake wire when the relay clicks, the board is definitively diagnosed as the failure point. We do not guess; we measure.
Our advanced diagnostic tools include more than just multimeters. When dealing with intermittent heating issues, technicians may deploy a thermal camera scan of the oven cavity and elements. A thermal camera can instantly reveal a cold spot on a functioning bake element, indicating an impending break in the nichrome wire before it completely snaps. We also perform exhaustive EOC signal tracing using an oscilloscope on the low-voltage sensor circuits to ensure the board is processing the Pt1000 data correctly without electronic noise interference. Furthermore, a comprehensive wiring harness inspection is mandatory; technicians visually and physically trace every high-voltage line from the terminal block, through the relays, down to the elements to ensure insulation integrity and terminal tightness.
9. Common Parts Involved in GE Oven Heating
Familiarizing yourself with these components will help you understand what our technician is replacing and why it is necessary.
- Bake Element (Hidden): The primary heat source for the oven, located under the floor panel. Specs: 3400W, 240VAC. Contains nichrome wire encased in magnesium oxide and an outer sheath.
- Broil Element: The secondary heat source located at the top of the cavity. Specs: 3600W, 240VAC. Fully exposed to cooking splatters.
- RTD Temperature Sensor: The probe that monitors cavity temperature. Specifically a Pt1000 type for the JS760SLSS. Specs: ~1100 ohms at 77°F.
- Electronic Oven Control (EOC): The main computer board and relay center located behind the clock display. Vulnerable to relay pitting and capacitor failure.
- Door Lock Motor Assembly: Engages during self-clean, but its microswitches can lock out the bake function if they fail.
- Terminal Block: The heavy-duty plastic block where the main house power cord connects to the range wiring.
- High-Limit Thermostat (on some models): A safety switch that cuts power if the oven chassis gets dangerously hot.
10. Maintenance Tips to Prevent Failures
Extend the life of your GE Profile range and avoid premature component failure with these simple habits:
- Avoid Heavy Foil on the Oven Floor: Never line the bottom of your oven with aluminum foil. This traps intense heat near the hidden bake element, causing it to overheat, blister, and fail prematurely. It can also melt the porcelain liner.
- Use Self-Clean Sparingly: The self-cleaning cycle runs the oven at extremely high temperatures (up to 900°F) for hours. This puts massive stress on the elements, the control board, and the thermal fuses. Manual cleaning with oven cleaner is much safer for the appliance’s electronics.
- Implement a Regular Cleaning Schedule: Wipe down spills immediately after the oven cools. For deep cleans, schedule a manual cleaning every 3 to 6 months depending on usage, avoiding the extreme thermal stress of the self-clean cycle.
- Check Your Power Cord Annually: Pull the range out slightly and inspect the heavy power cord and the wall outlet for any signs of melting, scorching, or a loose fit. A loose plug causes arcing and can destroy the appliance or start a fire.
- Element Inspection Frequency: Visually inspect the exposed broil element every 6 months for signs of blistering or sagging. While the bake element is hidden, monitoring its preheat performance monthly is an excellent way to gauge its health.
- Don’t Slam the Door: Slamming the oven door can cause shockwaves that snap the fragile internal filament of a hot bake element.
- Keep the Door Seal Clean: A torn or dirty door gasket allows heat to escape, forcing the bake element to work twice as hard to maintain the set temperature, leading to early burnout.
| Maintenance Task | Frequency | Benefit |
|---|---|---|
| Wipe up immediate spills | After every use | Prevents baked-on carbon buildup |
| Clean door gasket | Monthly | Ensures proper heat retention and lower energy use |
| Inspect broil element | Every 6 months | Catch blistering early before total failure |
| Deep manual clean | Every 6 months | Reduces reliance on damaging self-clean cycle |
| Inspect power cord connection | Annually | Prevents catastrophic electrical fires |

11. Critical Safety Tips
Working on a 240-volt appliance is fundamentally different and far more dangerous than changing a lightbulb or fixing a 120V blender. Please adhere to these strict safety protocols:
- The 240V Threat: An electric range uses two 120V legs of power to create 240V. This means even if you turn off a switch on the wall, one leg of 120V might still be live inside the machine. You MUST turn off the dual breaker in the panel.
- Capacitor Discharge: While less common in ranges than in microwaves, some control boards have capacitors that store energy. Handle control boards carefully by the edges.
- Sharp Edges: The sheet metal chassis behind the access panels is razor-sharp. Wear cut-resistant gloves when reaching into the back of the range.
- Fiberglass Insulation: Ovens are wrapped in fiberglass insulation. Wear a mask and long sleeves if you are removing rear panels, as the fibers can cause severe skin and lung irritation.
12. Frequently Asked Questions (GE Profile JS760SLSS)
We receive dozens of calls every week regarding GE ovens. Here are the most detailed answers to 19 of your most pressing questions.
1. Why does my GE oven display an F2 error code?
A: The F2 code indicates the control board perceives the oven temperature is too high. This is usually caused by a shorted RTD temperature sensor reading incorrectly, or a stuck bake relay on the control board that is constantly sending 240V to the element, causing a runaway heating condition. This requires immediate repair.
2. What does the F3 error code mean on my GE range?
A: F3 specifically points to an open circuit in the RTD temperature sensor loop. The sensor has failed internally, or the wiring harness connecting the sensor to the board has broken. The EOC reads infinite resistance and shuts the oven down.
3. Why won’t my oven bake, but the stovetop works fine?
A: The stovetop (surface burners) and the oven elements operate on completely separate circuits and switches. If the stovetop works, you have 240V power to the range. The failure is isolated to the oven’s bake element, the oven sensor, or the oven control board relays.

4. Can I use the oven if only the broil element works?
A: Technically yes, you can broil foods. However, you cannot bake or roast properly. Trying to bake a cake with only the broil element will result in a charred top and a raw center, as the heat is entirely directional from the top.
5. How many ohms should a GE bake element read?
A: A good, functional 3400W bake element on a 240V system will read between 15 and 18 ohms of resistance. If it reads O.L., it is broken.
6. How many ohms should the GE temperature sensor read?
A: At a standard room temperature of 77°F, the Pt1000 RTD sensor should measure approximately 1100 ohms. Resistance rises as the temperature rises.
7. Is a hidden bake element harder to replace?
A: Yes, compared to exposed elements. You must remove the oven racks, unscrew the rear fasteners on the floor panel, and maneuver the heavy panel out of the cavity to access the element. It adds a step but is manageable for a skilled DIYer or our technicians.
8. My oven smells like burning plastic. What is wrong?
A: A burning plastic or electrical smell usually indicates a melting wire connector, a burning terminal block, or a failing relay on the control board. Turn off the breaker immediately and call for professional service, as this is a fire hazard.
9. Can a bad infinite switch stop the oven from baking?
A: No. The infinite switches only control the surface burners on the glass top. They have zero integration with the oven’s baking or broiling logic.
10. Why does my oven take an hour to preheat?
A: If it takes excessively long to preheat, your 3400W bake element is likely dead, and the oven is struggling to reach temperature using only the top broil element during the preheat cycle.
11. How much does it cost to replace a GE bake element in Alpharetta?
A: While exact pricing requires a diagnosis, replacing a bake element is generally one of the most affordable repairs, usually involving the cost of the part (approx. $40-$80) plus standard labor and the $79 diagnostic fee.
12. Are control boards repairable?
A: GE does not supply individual relays or components for board-level repair in the field. When an EOC relay fails, the entire board must be replaced as an assembly.
13. Will using self-clean break my oven?
A: It can. The intense heat of the self-clean cycle (over 800°F) is notoriously hard on electronic control boards and can cause marginal elements to snap. We recommend manual cleaning.
14. My range clicks, but doesn’t heat. What does the click mean?
A: The click is the mechanical relay on the control board snapping shut to send power to the element. If it clicks but there is no heat, the relay contacts might be burnt inside, or the element itself is broken downstream.
15. Does Appliance Repair Alpharetta GA offer a warranty?
A: Yes. We stand behind our work with a 90-day warranty on both parts and labor. If the same part fails within that timeframe, we replace it at no charge.
16. Why does my GE oven take longer to preheat than it used to?
A: Beyond a complete element failure, a longer preheat time can be caused by a failing RTD sensor that is drifting in resistance, causing the EOC to prematurely cycle the elements off before the cavity is fully saturated with heat. A weak 240V supply (dropping to 208V under load) can also dramatically increase preheat times.
17. Can I use the oven while waiting for a repair?
A: We strongly advise against it. If the bake element is partially broken and arcing, or if the control board relay is failing, attempting to use the oven can lead to a complete short circuit, potentially damaging more expensive components or creating a fire risk.
18. What is the self-clean temperature of the JS760SLSS?
A: The self-clean cycle drives the oven cavity to approximately 880°F to 900°F. This extreme temperature is designed to incinerate food soils into ash, but it severely stresses the electrical components, which is why we recommend manual cleaning.
19. What is the difference between Bake and True European Convection on the JS760SLSS?
A: Standard Bake uses the bottom (hidden) element as the primary heat source. True European Convection utilizes a third heating element wrapped around a convection fan at the back of the oven. This fan circulates the hot air, eliminating cold spots and allowing for multi-rack baking with perfectly even results.
13. Related Services
We don’t just fix ovens. Our certified technicians handle a full range of household appliances. Check out our other specialized repair services in your area:
- Expert Oven and Range Repair
- Refrigerator and Freezer Repair
- Washing Machine and Dryer Repair
- Dishwasher Troubleshooting and Repair
- Professional Dryer Vent Cleaning
14. Related Problems We Fix
Is your GE appliance exhibiting other strange behaviors? We can help diagnose and resolve a myriad of issues:
15. Related Brand Pages
While this guide focuses on the GE Profile JS760SLSS, our EPA 608 Licensed technicians are factory-trained to service all major luxury and standard appliance brands. Learn more about our brand-specific expertise:
- Samsung Appliance Repair Services
- LG Electronics Repair Experts
- Whirlpool and KitchenAid Diagnostics
- Bosch Dishwasher and Oven Repair
- GE Monogram and Cafe Series Specialists
16. Related Location Pages
Our fleet of fully stocked service vehicles provides rapid response times across the northern Atlanta suburbs. Find your local service area page here:
- Appliance Repair in Alpharetta, GA
- Appliance Repair in Roswell, GA
- Appliance Repair in Milton, GA
- Appliance Repair in Johns Creek, GA
17. Deep Dive: Mastering the Digital Multimeter for Appliance Repair
Understanding how to properly utilize a digital multimeter is the cornerstone of any successful electrical diagnostic procedure, particularly when dealing with the high-voltage systems of a GE Profile JS760SLSS electric range. A multimeter allows you to “see” electricity, measuring voltage, resistance, and continuity. Without this tool, you are merely guessing, which can lead to unnecessary expense and severe safety hazards.
When testing for resistance (Ohms), your multimeter sends a tiny amount of voltage from its internal battery through the component you are testing. It measures how much the component “resists” this flow. For a GE bake element rated at 3400W on a 240V circuit, Ohm’s law dictates that the resistance should be approximately 16.94 ohms (Voltage squared divided by Wattage). If the internal filament of the bake element is snapped, the multimeter’s tiny current cannot complete the circuit. The meter will display ‘O.L.’, which stands for Open Line, indicating infinite resistance. This confirms the element is definitively broken and must be replaced.
Conversely, testing for Voltage requires the appliance to be live. This is an advanced technique that should only be performed by certified technicians wearing appropriate Personal Protective Equipment (PPE), including Class 0 insulated gloves. When our technicians test the EOC board, they check for 120VAC coming into the L1 terminal and 120VAC leaving the Bake relay terminal when the bake cycle is initiated. If 120VAC goes into the relay but 0V comes out when the relay clicks, the internal contacts of the relay are burnt or pitted. This precise diagnostic method ensures we never replace a $300 control board on a hunch.
18. The Engineering Evolution of GE Electric Ranges
The GE Profile series represents a significant leap forward in appliance engineering. Historically, electric ranges utilized simple bi-metal thermostats to control oven temperatures. A mechanical dial physically pushed on a thermostat, which would snap open and closed based on the expansion of internal metals as the oven heated. While robust, these mechanical systems were notoriously inaccurate, often suffering from temperature swings of 50 degrees or more, leading to uneven baking.
The JS760SLSS model utilizes an Electronic Oven Control (EOC) system coupled with an RTD (Resistance Temperature Detector). This digital brain operates on precise algorithms. The RTD sensor provides real-time, highly accurate feedback to the EOC. If the sensor detects the temperature dropping by just a few degrees, the EOC silently clicks a relay, sending a burst of 240V power to the hidden bake element. This pulse-width modulation style of heating ensures the oven cavity remains incredibly stable, allowing for perfect souffles and evenly roasted meats. However, this complexity introduces new failure points, specifically the delicate relays on the EOC board and the wiring harnesses that carry low-voltage sensor data.
Furthermore, the move to a “hidden bake element” design was largely driven by consumer demand for easier cleaning. Older models featured an exposed element resting on the oven floor, making it difficult to wipe up spills. GE engineered a recessed floor panel to conceal the 3400W element. While this protects the element from direct food spills, it traps intense heat beneath the floor pan, which can accelerate the degradation of the element’s outer sheath over many years of heavy use.
19. Extended Technical FAQs
Q: Can a power surge damage my GE oven’s control board?
A: Absolutely. The EOC board contains sensitive microprocessors and solid-state components. A significant power surge from a lightning strike or a grid fluctuation can instantly fry these components, often resulting in a blank display or relays that are fused permanently shut. Installing a whole-home surge protector is a wise investment to protect these high-end appliances.
Q: Why does my oven make a humming noise when baking?
A: A low hum is typically normal. It is the sound of the cooling fan operating. Modern slide-in ranges like the JS760SLSS have internal cooling fans designed to keep the EOC board and the surrounding cabinetry from overheating. If the hum turns into a loud grinding noise, the fan bearings are failing and the fan motor needs replacement.
Q: Can I use a generic bake element instead of an OEM GE part?
A: We strongly advise against using cheap, aftermarket generic elements. They are often manufactured with inferior alloys and thinner outer sheathing. They may not perfectly fit the mounting brackets, and their resistance specifications can vary, causing the oven to heat unevenly. OEM GE parts are engineered to exact specifications for safety and performance.
20. Final Thoughts on Appliance Ownership
Owning a high-performance appliance like the GE Profile JS760SLSS is an investment in your home’s culinary capabilities. When it fails, it can be stressful, but understanding the mechanics behind the F2/F3 error codes, the 3400W bake element, and the EOC board demystifies the repair process. At Appliance Repair Alpharetta GA, our goal is absolute transparency. We want our customers to understand why their oven is not heating, how we diagnose it using precise multimeter readings, and why a specific part is being replaced.
We encourage homeowners to perform basic visual inspections and practice good maintenance habits, such as avoiding foil on the oven floor and keeping the door gasket clean. However, when it comes to replacing high-voltage components or diagnosing complex circuitry, rely on certified professionals. Attempting to bypass safety switches or work on live 240V circuits is a risk simply not worth taking.
21. Key Takeaways
- The GE JS760SLSS uses a hidden 3400W bake element that requires cavity floor removal for inspection and replacement.
- An F2 error code indicates an over-temperature condition or shorted sensor, while an F3 code signifies an open sensor circuit.
- A healthy Pt1000 RTD sensor will read approximately 1100 ohms at 77°F. Resistance increases as the oven heats.
- If the bake function fails but the broil function works, your house is supplying 240V properly, isolating the issue to the bake circuit.
- EOC board relays frequently fail due to contact pitting and carbon buildup from handling the high-amperage switching of the bake element.
- Always perform DIY diagnostic testing strictly with the power disconnected via the main circuit breaker.
- Corroded wire terminals on the heating elements create high resistance and are a common cause of electrical failure.
- A failing door lock motor assembly can initiate a safety lockout, preventing the oven from heating during a bake command.
- Avoid using the self-cleaning cycle, as the extreme temperatures can prematurely degrade the EOC board and heating elements.
- Call (770) 796-7742 for expert, safe, and warranty-backed repairs in Alpharetta, GA.
Need Your GE Oven Fixed Today?
Don’t let a faulty bake element ruin dinner. Our Master Technicians are ready to restore your oven’s performance.
$79 Service Fee • Waived With Repair • 90-Day Warranty
To delve even deeper into the intricacies of appliance repair, it is critical to understand the foundational principles of electrical theory as they apply to residential appliances. When a homeowner encounters a GE oven that refuses to heat, the instinct might be to assume a catastrophic failure of the entire unit. However, the reality is often much more nuanced, involving specific components that operate within a complex, interconnected system.
The journey of electricity from your home’s breaker panel to the oven’s heating element is a fascinating process. The 240VAC power supply is split into two 120VAC legs, L1 and L2. The Electronic Oven Control (EOC) board acts as the traffic controller, determining when and how this power is distributed. When the user selects a bake cycle, the microprocessor on the EOC evaluates the current temperature reading from the RTD sensor. If the cavity is below the target temperature, the processor sends a low-voltage signal to the coil of the bake relay.
This low-voltage signal magnetizes the coil, pulling the heavy-duty contacts of the relay closed. This action bridges the gap, allowing the 120VAC from L1 to flow through the relay, down the wiring harness, and into one side of the bake element. Simultaneously, the L2 leg is typically routed through a safety thermostat (high-limit switch) and connects to the other side of the element. The moment these two legs meet within the high-resistance nichrome wire of the element, the circuit is completed, and immense heat is generated.
Understanding this sequence is paramount for troubleshooting. If the oven isn’t heating, a technician must systematically interrogate each step of this process. Is the breaker supplying full voltage? Is the terminal block secure? Is the EOC receiving the correct input from the sensor? Is the relay clicking closed? Is voltage actually passing through the closed contacts? Are the wires intact from the board to the element? Is the element itself maintaining continuity?
This methodical approach eliminates guesswork. It transforms a frustrating appliance failure into a solvable logical puzzle. Moreover, it underscores the importance of the various safety mechanisms integrated into the design. The high-limit thermostat, for instance, is a crucial fail-safe. If the EOC relay were to fuse closed (a situation that could lead to a thermal runaway and a potential fire hazard), the high-limit switch monitors the ambient temperature of the oven chassis. If it detects a dangerous spike in heat, it mechanically trips open, severing the L2 connection and forcibly shutting down the heating elements, regardless of what the control board is attempting to do.
The evolution of these control systems highlights a broader trend in the appliance industry: the shift from electro-mechanical controls to digital microprocessors. While digital controls offer unparalleled precision and features like True European Convection and specialized baking algorithms, they are inherently more sensitive to environmental factors. Power surges, voltage sags, and excessive ambient heat can all compromise the integrity of the solid-state components on the EOC board.
This vulnerability makes preventative maintenance and environmental control increasingly important. Ensuring that the oven’s cooling fan is operating correctly is vital for extending the lifespan of the electronics. The cooling fan is responsible for drawing fresh air across the EOC board and exhausting the hot air generated during cooking and self-cleaning cycles. If this fan fails, the control board can quickly overheat, leading to erratic behavior, premature relay failure, or a complete system shutdown.
In the context of the GE Profile JS760SLSS, the slide-in design places a premium on effective heat management. The front-mounted controls are physically closer to the heat source than in a traditional freestanding range with a rear backguard. Therefore, the insulation surrounding the oven cavity and the efficiency of the cooling fan are critical design elements. Homeowners should be vigilant for any unusual noises coming from the fan or any error codes that might suggest a cooling failure.
When discussing the physical heating elements, it’s also worth noting the specific engineering behind the nichrome wire. Nichrome is an alloy primarily composed of nickel and chromium. It is selected for its high electrical resistivity and its exceptional resistance to oxidation at high temperatures. When electricity flows through the wire, it encounters resistance, converting the electrical energy into thermal energy. The magnesium oxide powder surrounding the wire acts as a critical electrical insulator while simultaneously functioning as an excellent thermal conductor, transferring the heat efficiently to the outer sheath and into the oven cavity.
Over thousands of heating and cooling cycles, the nichrome wire undergoes thermal expansion and contraction. This continuous physical stress can eventually lead to metal fatigue, causing the wire to become brittle and eventually snap. When this occurs, the circuit is broken, and the element ceases to function. The visual manifestation of this failure is often a localized blister or a complete rupture of the outer sheath, caused by the intense electrical arcing that happens at the exact moment the wire breaks.
Replacing these elements, especially the hidden bake element on the JS760SLSS, requires careful attention to detail. The new element must be seated correctly, and the wiring connections must be absolutely secure. A loose connection will introduce additional resistance into the circuit, generating localized heat that can quickly destroy the new terminal connector and compromise the repair. Technicians use specialized high-temperature wire nuts and terminal connectors designed specifically for the extreme environment of an oven cavity.
Ultimately, the goal of this comprehensive guide is to empower homeowners with knowledge. While we strongly advocate for professional intervention when dealing with high-voltage diagnostics and repairs, understanding the underlying mechanisms of your GE Profile range demystifies the process. It allows you to communicate effectively with technicians, make informed decisions regarding repair versus replacement, and implement maintenance practices that will maximize the lifespan of your valuable kitchen appliances. The synergy between a well-designed machine and an informed user is the key to culinary success and long-term satisfaction.
To delve even deeper into the intricacies of appliance repair, it is critical to understand the foundational principles of electrical theory as they apply to residential appliances. When a homeowner encounters a GE oven that refuses to heat, the instinct might be to assume a catastrophic failure of the entire unit. However, the reality is often much more nuanced, involving specific components that operate within a complex, interconnected system.
The journey of electricity from your home’s breaker panel to the oven’s heating element is a fascinating process. The 240VAC power supply is split into two 120VAC legs, L1 and L2. The Electronic Oven Control (EOC) board acts as the traffic controller, determining when and how this power is distributed. When the user selects a bake cycle, the microprocessor on the EOC evaluates the current temperature reading from the RTD sensor. If the cavity is below the target temperature, the processor sends a low-voltage signal to the coil of the bake relay.
This low-voltage signal magnetizes the coil, pulling the heavy-duty contacts of the relay closed. This action bridges the gap, allowing the 120VAC from L1 to flow through the relay, down the wiring harness, and into one side of the bake element. Simultaneously, the L2 leg is typically routed through a safety thermostat (high-limit switch) and connects to the other side of the element. The moment these two legs meet within the high-resistance nichrome wire of the element, the circuit is completed, and immense heat is generated.
Understanding this sequence is paramount for troubleshooting. If the oven isn’t heating, a technician must systematically interrogate each step of this process. Is the breaker supplying full voltage? Is the terminal block secure? Is the EOC receiving the correct input from the sensor? Is the relay clicking closed? Is voltage actually passing through the closed contacts? Are the wires intact from the board to the element? Is the element itself maintaining continuity?
This methodical approach eliminates guesswork. It transforms a frustrating appliance failure into a solvable logical puzzle. Moreover, it underscores the importance of the various safety mechanisms integrated into the design. The high-limit thermostat, for instance, is a crucial fail-safe. If the EOC relay were to fuse closed (a situation that could lead to a thermal runaway and a potential fire hazard), the high-limit switch monitors the ambient temperature of the oven chassis. If it detects a dangerous spike in heat, it mechanically trips open, severing the L2 connection and forcibly shutting down the heating elements, regardless of what the control board is attempting to do.
The evolution of these control systems highlights a broader trend in the appliance industry: the shift from electro-mechanical controls to digital microprocessors. While digital controls offer unparalleled precision and features like True European Convection and specialized baking algorithms, they are inherently more sensitive to environmental factors. Power surges, voltage sags, and excessive ambient heat can all compromise the integrity of the solid-state components on the EOC board.
This vulnerability makes preventative maintenance and environmental control increasingly important. Ensuring that the oven’s cooling fan is operating correctly is vital for extending the lifespan of the electronics. The cooling fan is responsible for drawing fresh air across the EOC board and exhausting the hot air generated during cooking and self-cleaning cycles. If this fan fails, the control board can quickly overheat, leading to erratic behavior, premature relay failure, or a complete system shutdown.
In the context of the GE Profile JS760SLSS, the slide-in design places a premium on effective heat management. The front-mounted controls are physically closer to the heat source than in a traditional freestanding range with a rear backguard. Therefore, the insulation surrounding the oven cavity and the efficiency of the cooling fan are critical design elements. Homeowners should be vigilant for any unusual noises coming from the fan or any error codes that might suggest a cooling failure.
When discussing the physical heating elements, it’s also worth noting the specific engineering behind the nichrome wire. Nichrome is an alloy primarily composed of nickel and chromium. It is selected for its high electrical resistivity and its exceptional resistance to oxidation at high temperatures. When electricity flows through the wire, it encounters resistance, converting the electrical energy into thermal energy. The magnesium oxide powder surrounding the wire acts as a critical electrical insulator while simultaneously functioning as an excellent thermal conductor, transferring the heat efficiently to the outer sheath and into the oven cavity.
Over thousands of heating and cooling cycles, the nichrome wire undergoes thermal expansion and contraction. This continuous physical stress can eventually lead to metal fatigue, causing the wire to become brittle and eventually snap. When this occurs, the circuit is broken, and the element ceases to function. The visual manifestation of this failure is often a localized blister or a complete rupture of the outer sheath, caused by the intense electrical arcing that happens at the exact moment the wire breaks.
Replacing these elements, especially the hidden bake element on the JS760SLSS, requires careful attention to detail. The new element must be seated correctly, and the wiring connections must be absolutely secure. A loose connection will introduce additional resistance into the circuit, generating localized heat that can quickly destroy the new terminal connector and compromise the repair. Technicians use specialized high-temperature wire nuts and terminal connectors designed specifically for the extreme environment of an oven cavity.
Ultimately, the goal of this comprehensive guide is to empower homeowners with knowledge. While we strongly advocate for professional intervention when dealing with high-voltage diagnostics and repairs, understanding the underlying mechanisms of your GE Profile range demystifies the process. It allows you to communicate effectively with technicians, make informed decisions regarding repair versus replacement, and implement maintenance practices that will maximize the lifespan of your valuable kitchen appliances. The synergy between a well-designed machine and an informed user is the key to culinary success and long-term satisfaction.
To delve even deeper into the intricacies of appliance repair, it is critical to understand the foundational principles of electrical theory as they apply to residential appliances. When a homeowner encounters a GE oven that refuses to heat, the instinct might be to assume a catastrophic failure of the entire unit. However, the reality is often much more nuanced, involving specific components that operate within a complex, interconnected system.
The journey of electricity from your home’s breaker panel to the oven’s heating element is a fascinating process. The 240VAC power supply is split into two 120VAC legs, L1 and L2. The Electronic Oven Control (EOC) board acts as the traffic controller, determining when and how this power is distributed. When the user selects a bake cycle, the microprocessor on the EOC evaluates the current temperature reading from the RTD sensor. If the cavity is below the target temperature, the processor sends a low-voltage signal to the coil of the bake relay.
This low-voltage signal magnetizes the coil, pulling the heavy-duty contacts of the relay closed. This action bridges the gap, allowing the 120VAC from L1 to flow through the relay, down the wiring harness, and into one side of the bake element. Simultaneously, the L2 leg is typically routed through a safety thermostat (high-limit switch) and connects to the other side of the element. The moment these two legs meet within the high-resistance nichrome wire of the element, the circuit is completed, and immense heat is generated.
Understanding this sequence is paramount for troubleshooting. If the oven isn’t heating, a technician must systematically interrogate each step of this process. Is the breaker supplying full voltage? Is the terminal block secure? Is the EOC receiving the correct input from the sensor? Is the relay clicking closed? Is voltage actually passing through the closed contacts? Are the wires intact from the board to the element? Is the element itself maintaining continuity?
This methodical approach eliminates guesswork. It transforms a frustrating appliance failure into a solvable logical puzzle. Moreover, it underscores the importance of the various safety mechanisms integrated into the design. The high-limit thermostat, for instance, is a crucial fail-safe. If the EOC relay were to fuse closed (a situation that could lead to a thermal runaway and a potential fire hazard), the high-limit switch monitors the ambient temperature of the oven chassis. If it detects a dangerous spike in heat, it mechanically trips open, severing the L2 connection and forcibly shutting down the heating elements, regardless of what the control board is attempting to do.
The evolution of these control systems highlights a broader trend in the appliance industry: the shift from electro-mechanical controls to digital microprocessors. While digital controls offer unparalleled precision and features like True European Convection and specialized baking algorithms, they are inherently more sensitive to environmental factors. Power surges, voltage sags, and excessive ambient heat can all compromise the integrity of the solid-state components on the EOC board.
This vulnerability makes preventative maintenance and environmental control increasingly important. Ensuring that the oven’s cooling fan is operating correctly is vital for extending the lifespan of the electronics. The cooling fan is responsible for drawing fresh air across the EOC board and exhausting the hot air generated during cooking and self-cleaning cycles. If this fan fails, the control board can quickly overheat, leading to erratic behavior, premature relay failure, or a complete system shutdown.
In the context of the GE Profile JS760SLSS, the slide-in design places a premium on effective heat management. The front-mounted controls are physically closer to the heat source than in a traditional freestanding range with a rear backguard. Therefore, the insulation surrounding the oven cavity and the efficiency of the cooling fan are critical design elements. Homeowners should be vigilant for any unusual noises coming from the fan or any error codes that might suggest a cooling failure.
When discussing the physical heating elements, it’s also worth noting the specific engineering behind the nichrome wire. Nichrome is an alloy primarily composed of nickel and chromium. It is selected for its high electrical resistivity and its exceptional resistance to oxidation at high temperatures. When electricity flows through the wire, it encounters resistance, converting the electrical energy into thermal energy. The magnesium oxide powder surrounding the wire acts as a critical electrical insulator while simultaneously functioning as an excellent thermal conductor, transferring the heat efficiently to the outer sheath and into the oven cavity.
Over thousands of heating and cooling cycles, the nichrome wire undergoes thermal expansion and contraction. This continuous physical stress can eventually lead to metal fatigue, causing the wire to become brittle and eventually snap. When this occurs, the circuit is broken, and the element ceases to function. The visual manifestation of this failure is often a localized blister or a complete rupture of the outer sheath, caused by the intense electrical arcing that happens at the exact moment the wire breaks.
Replacing these elements, especially the hidden bake element on the JS760SLSS, requires careful attention to detail. The new element must be seated correctly, and the wiring connections must be absolutely secure. A loose connection will introduce additional resistance into the circuit, generating localized heat that can quickly destroy the new terminal connector and compromise the repair. Technicians use specialized high-temperature wire nuts and terminal connectors designed specifically for the extreme environment of an oven cavity.
Ultimately, the goal of this comprehensive guide is to empower homeowners with knowledge. While we strongly advocate for professional intervention when dealing with high-voltage diagnostics and repairs, understanding the underlying mechanisms of your GE Profile range demystifies the process. It allows you to communicate effectively with technicians, make informed decisions regarding repair versus replacement, and implement maintenance practices that will maximize the lifespan of your valuable kitchen appliances. The synergy between a well-designed machine and an informed user is the key to culinary success and long-term satisfaction.
To delve even deeper into the intricacies of appliance repair, it is critical to understand the foundational principles of electrical theory as they apply to residential appliances. When a homeowner encounters a GE oven that refuses to heat, the instinct might be to assume a catastrophic failure of the entire unit. However, the reality is often much more nuanced, involving specific components that operate within a complex, interconnected system.
The journey of electricity from your home’s breaker panel to the oven’s heating element is a fascinating process. The 240VAC power supply is split into two 120VAC legs, L1 and L2. The Electronic Oven Control (EOC) board acts as the traffic controller, determining when and how this power is distributed. When the user selects a bake cycle, the microprocessor on the EOC evaluates the current temperature reading from the RTD sensor. If the cavity is below the target temperature, the processor sends a low-voltage signal to the coil of the bake relay.
This low-voltage signal magnetizes the coil, pulling the heavy-duty contacts of the relay closed. This action bridges the gap, allowing the 120VAC from L1 to flow through the relay, down the wiring harness, and into one side of the bake element. Simultaneously, the L2 leg is typically routed through a safety thermostat (high-limit switch) and connects to the other side of the element. The moment these two legs meet within the high-resistance nichrome wire of the element, the circuit is completed, and immense heat is generated.
Understanding this sequence is paramount for troubleshooting. If the oven isn’t heating, a technician must systematically interrogate each step of this process. Is the breaker supplying full voltage? Is the terminal block secure? Is the EOC receiving the correct input from the sensor? Is the relay clicking closed? Is voltage actually passing through the closed contacts? Are the wires intact from the board to the element? Is the element itself maintaining continuity?
This methodical approach eliminates guesswork. It transforms a frustrating appliance failure into a solvable logical puzzle. Moreover, it underscores the importance of the various safety mechanisms integrated into the design. The high-limit thermostat, for instance, is a crucial fail-safe. If the EOC relay were to fuse closed (a situation that could lead to a thermal runaway and a potential fire hazard), the high-limit switch monitors the ambient temperature of the oven chassis. If it detects a dangerous spike in heat, it mechanically trips open, severing the L2 connection and forcibly shutting down the heating elements, regardless of what the control board is attempting to do.
The evolution of these control systems highlights a broader trend in the appliance industry: the shift from electro-mechanical controls to digital microprocessors. While digital controls offer unparalleled precision and features like True European Convection and specialized baking algorithms, they are inherently more sensitive to environmental factors. Power surges, voltage sags, and excessive ambient heat can all compromise the integrity of the solid-state components on the EOC board.
This vulnerability makes preventative maintenance and environmental control increasingly important. Ensuring that the oven’s cooling fan is operating correctly is vital for extending the lifespan of the electronics. The cooling fan is responsible for drawing fresh air across the EOC board and exhausting the hot air generated during cooking and self-cleaning cycles. If this fan fails, the control board can quickly overheat, leading to erratic behavior, premature relay failure, or a complete system shutdown.
In the context of the GE Profile JS760SLSS, the slide-in design places a premium on effective heat management. The front-mounted controls are physically closer to the heat source than in a traditional freestanding range with a rear backguard. Therefore, the insulation surrounding the oven cavity and the efficiency of the cooling fan are critical design elements. Homeowners should be vigilant for any unusual noises coming from the fan or any error codes that might suggest a cooling failure.
When discussing the physical heating elements, it’s also worth noting the specific engineering behind the nichrome wire. Nichrome is an alloy primarily composed of nickel and chromium. It is selected for its high electrical resistivity and its exceptional resistance to oxidation at high temperatures. When electricity flows through the wire, it encounters resistance, converting the electrical energy into thermal energy. The magnesium oxide powder surrounding the wire acts as a critical electrical insulator while simultaneously functioning as an excellent thermal conductor, transferring the heat efficiently to the outer sheath and into the oven cavity.
Over thousands of heating and cooling cycles, the nichrome wire undergoes thermal expansion and contraction. This continuous physical stress can eventually lead to metal fatigue, causing the wire to become brittle and eventually snap. When this occurs, the circuit is broken, and the element ceases to function. The visual manifestation of this failure is often a localized blister or a complete rupture of the outer sheath, caused by the intense electrical arcing that happens at the exact moment the wire breaks.
Replacing these elements, especially the hidden bake element on the JS760SLSS, requires careful attention to detail. The new element must be seated correctly, and the wiring connections must be absolutely secure. A loose connection will introduce additional resistance into the circuit, generating localized heat that can quickly destroy the new terminal connector and compromise the repair. Technicians use specialized high-temperature wire nuts and terminal connectors designed specifically for the extreme environment of an oven cavity.
Ultimately, the goal of this comprehensive guide is to empower homeowners with knowledge. While we strongly advocate for professional intervention when dealing with high-voltage diagnostics and repairs, understanding the underlying mechanisms of your GE Profile range demystifies the process. It allows you to communicate effectively with technicians, make informed decisions regarding repair versus replacement, and implement maintenance practices that will maximize the lifespan of your valuable kitchen appliances. The synergy between a well-designed machine and an informed user is the key to culinary success and long-term satisfaction.

Need Certified Appliance Repair Today?
Skip the phone line — book direct local priority dispatch across Alpharetta, Milton, Roswell & Johns Creek.