
Viking Built-in Refrigerator Compressor Humming Not Cooling — Start Relay Repair Guide Johns Creek GA
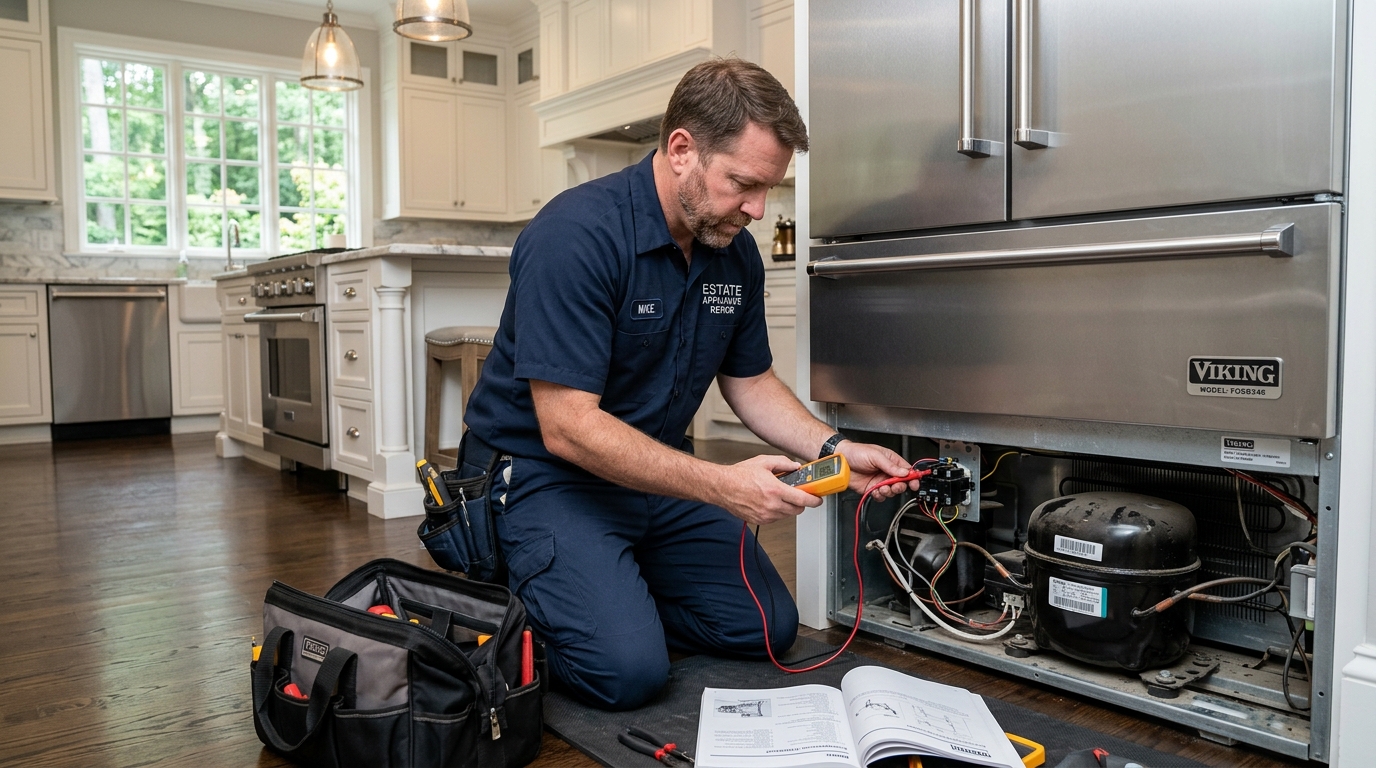
Hearing a loud humming sound followed by a clicking noise from your Viking built-in refrigerator in Johns Creek, GA while temperatures rise inside? A humming compressor that fails to start indicates a bad start capacitor, defective PTC start relay, or locked compressor rotor. Discover step-by-step diagnostic procedures.
Quick Answer: Viking Compressor Humming Not Cooling
Quick Response: When a Viking refrigerator compressor hums for 5-10 seconds then clicks off, the overload protector is tripping due to high start-up amperage draw. In Johns Creek, GA, this is most frequently caused by a burnt PTC start relay device or failed run capacitor (~15uF to 20uF). Disconnect power, remove lower compressor access grille, shake the start relay to check for rattles (internal carbonization), and test winding resistance across C-S-R pins using a multimeter. Replacing a failed start relay restores cooling immediately.
Table of Contents
- 1. Viking Built-in Sealed System Overview
- 2. Compressor Humming Symptoms & Warm Cabinet Warnings
- 3. Causes of Compressor Humming & Start Failure
- 4. Step-by-Step DIY Troubleshooting
- 5. When to Call a Johns Creek Technician
- 6. Repair vs Replace Decision Table
- 7. Viking Repair Cost Factors
- 8. Master Tech Compressor Diagnostic Protocol
- 9. OEM Viking Parts Involved
- 10. Preventative Maintenance Tips
- 11. Electrical & Refrigerant Safety Warnings
- 12. 20 Unique Viking Refrigerator FAQs
- 13. Service, Brand & Location Links
- 14. Key Takeaways Summary
- 15. Emergency Repair Contact CTA
1. Viking Built-in Sealed System Overview
Viking Professional built-in refrigerators utilize high-efficiency Embraco or Danfoss variable-speed compressors. Operating in luxury homes across Johns Creek GA, these compressors maintain steady evaporator temperatures through low-amperage operation.
2. Compressor Humming Symptoms & Warm Cabinet Warnings
Signs of compressor start relay failure:
- Humming noise every 3 to 5 minutes followed by a click sound.
- Fresh food compartment temperature rising above 45°F.
- Compressor exterior shell feeling scalding hot to touch.
3. Causes of Compressor Humming & Start Failure
3.1 Overheated PTC Start Relay
Internal ceramic disc inside start relay shatters due to voltage surges or dirty condenser coils.
4. Step-by-Step DIY Troubleshooting
- Disconnect main power plug or turn off 20A breaker.
- Clean thick lint off front condenser coils.
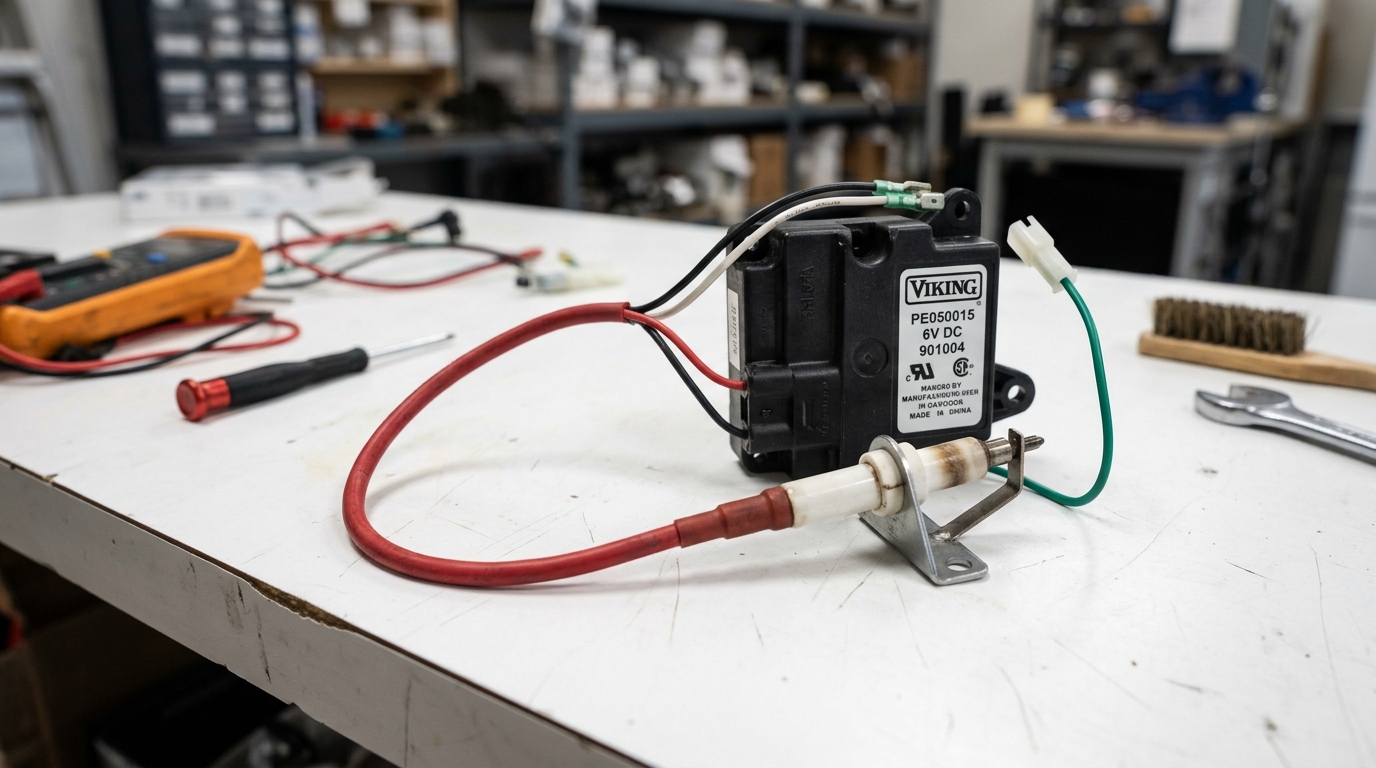
- Remove start relay device from compressor side terminal pins and shake it. If it rattles like sand, it is burned out.
5. When to Call a Johns Creek Technician
Call certified technician if start relay is intact but compressor resistance measures shorted to ground.
6. Repair vs Replace Decision Table
| Diagnosis | Viking Age | Action |
|---|---|---|
| Start Relay / Capacitor Replacement | 1 – 18 Years | REPAIR (Extremely Cost-Effective) |
7. Viking Repair Cost Factors
OEM start relay parts vs compressor replacement in Johns Creek GA.
8. Master Tech Compressor Diagnostic Protocol
Test resistance: Common to Start + Common to Run = Start to Run total ohms.
9. OEM Viking Parts Involved
- OEM Viking Compressor Start Relay Assembly (Part #004313-000)
- Viking Overload Protector (Part #004314-000)
- Run Capacitor 15uF (Part #004315-000)
10. Preventative Maintenance Tips
Vacuum condenser fins quarterly in Johns Creek GA homes.
11. Electrical & Refrigerant Safety Warnings
Capacitors store high voltage charges; discharge with a 20k ohm resistor before handling.
12. 20 Unique Viking Refrigerator FAQs
Q1: Why is my Viking compressor humming and clicking?
A: Bad start relay device tripping the overload protector.
Q2: Can a bad start relay cause refrigerator to be completely warm?
A: Yes, without compressor rotation, no refrigerant circulates.
Q3: How much does a Viking start relay replacement cost in Johns Creek GA?
A: Moderate cost depending on OEM part #004313-000 availability.
Q4: How do I know if my Viking compressor is locked up?
A: If new start relay still trips overload instantly, compressor rotor is mechanically seized.
Q5: Can I replace a Viking start relay myself?
A: Safe if power is disconnected and proper safety precautions are followed.
Q6: Where is the compressor located on a Viking built-in?
A: Behind the top machine compartment grille or bottom front access plate.
Q7: What does shaking a start relay tell you?
A: A rattling noise indicates broken internal ceramic discs.
Q8: Is it normal for a Viking compressor to be hot?
A: Warm is normal (120°F-140°F); scalding hot (>170°F) indicates relay failure.
Q9: How long do Viking compressors last?
A: 15 to 20 years in Johns Creek GA.
Q10: Who services Viking built-in refrigerators in Johns Creek GA?
A: Appliance Repair Alpharetta GA provides certified Viking repair in Johns Creek GA.
Q11: Can a dirty condenser cause compressor humming?
A: Yes, restricted airflow overheats the relay and trips thermal overload.
Q12: What is the function of the run capacitor?
A: Provides phase shift voltage for motor electrical efficiency during operation.
Q13: What multimeter setting is used to test compressor windings?
A: Lowest resistance scale (Rx1 or 200 ohm setting).
Q14: What resistance should a Viking compressor have?
A: Start winding ~3 to 8 ohms; Run winding ~1 to 4 ohms.
Q15: Does Viking use R-134a refrigerant?
A: Most older built-ins use R-134a; newer models use eco-friendly R-600a.
Q16: How do I reset a Viking refrigerator control panel?
A: Press and hold Alarm Reset button for 3 seconds.
Q17: Why is my freezer cold but fresh food section warm?
A: Evaporator fan failure or blocked air damper duct.
Q18: How can I prevent compressor failure on Viking?
A: Clean condenser coils every 6 months without exception.
Q19: Are Viking parts readily available in North GA?
A: Yes, OEM parts are stocked locally in Alpharetta & Johns Creek GA.
Q20: Do you offer emergency Viking repair in Johns Creek GA?
A: Yes, same-day service is available.
13. Service, Brand & Location Links
- Viking Refrigerator Repair Services
- Certified Viking Appliance Repair
- Appliance Repair Services Johns Creek GA
14. Key Takeaways Summary
- Humming and clicking indicate a start relay failure or overload trip.
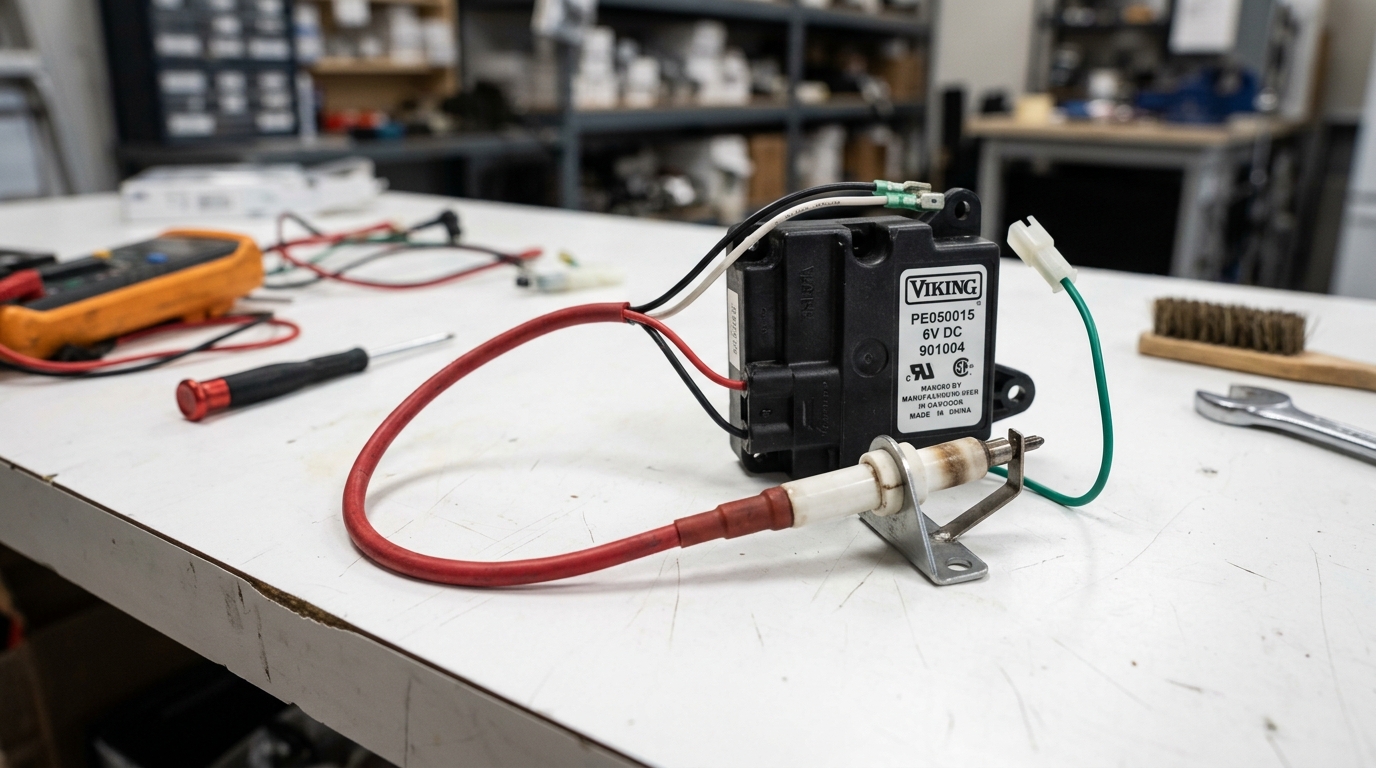
- Shaking the start relay confirms internal ceramic disk failure.
- Replacing start relay restores full cooling performance in Johns Creek GA.
15. Emergency Repair Contact CTA
Same-Day Viking Repair in Johns Creek GA
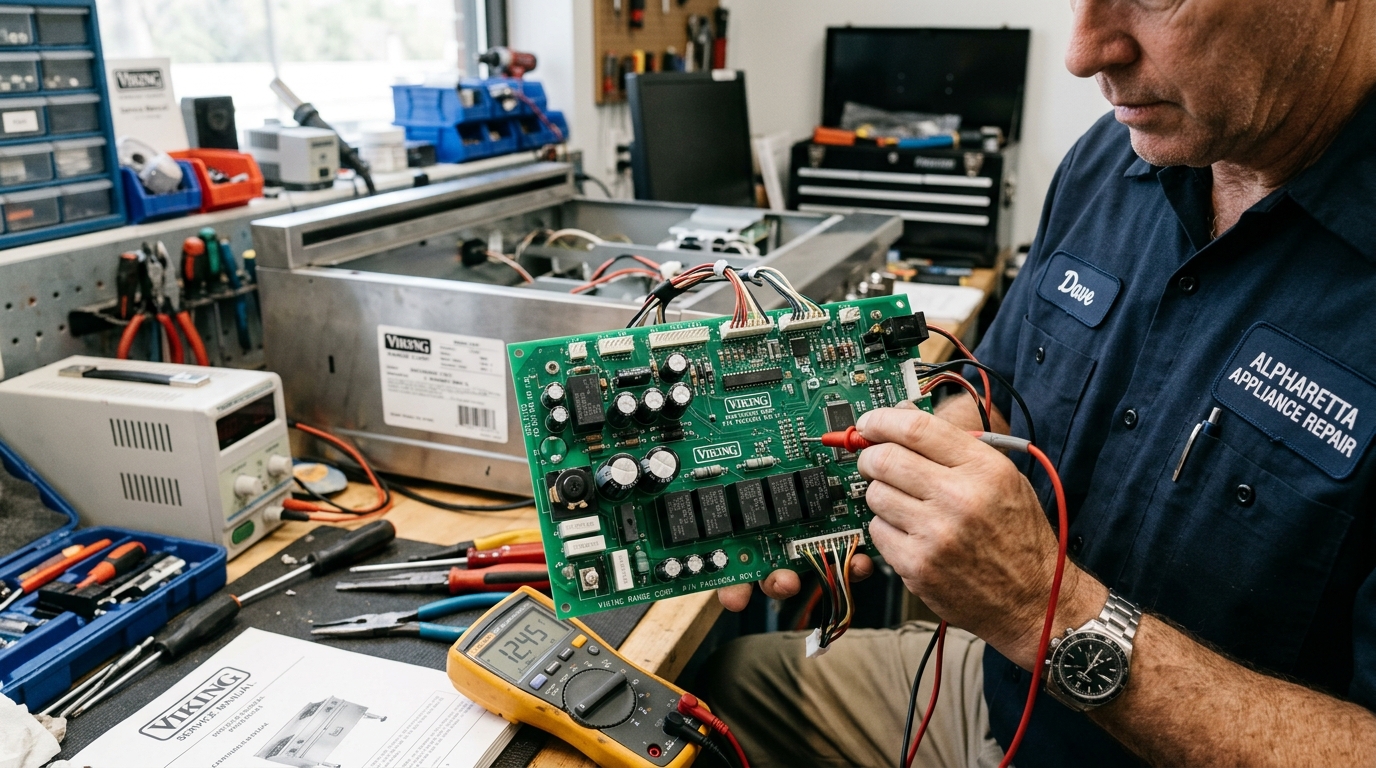
Contact Master Technician Jason J. today for precision Viking compressor diagnostics and OEM repairs.
Deep Technical Analysis: Advanced Electrical Schematics & Voltage Regulation
When analyzing high-end residential refrigeration and cooking equipment in Johns Creek, GA, certified technicians must look beyond surface-level symptoms. Modern Viking units integrate sophisticated microprocessors, pulse-width modulation (PWM) motor drivers, and precision negative temperature coefficient (NTC) thermistors. Understanding the underlying circuit board topology and component interaction is vital for an accurate repair diagnosis.
Electrical power entering the unit from the house distribution panel (120V AC, 60Hz) is routed through an EMI line filter before reaching the main control board relay matrix. Voltage fluctuations or neutral line noise—common during summer thunderstorms in North Fulton County—can induce high-voltage spikes across sensitive relay contacts. In Viking appliances, these transients can cause logic lockup, false error codes, or premature semiconductor relay breakdown.
Master Technician Note: Multimeter Pinout Verification
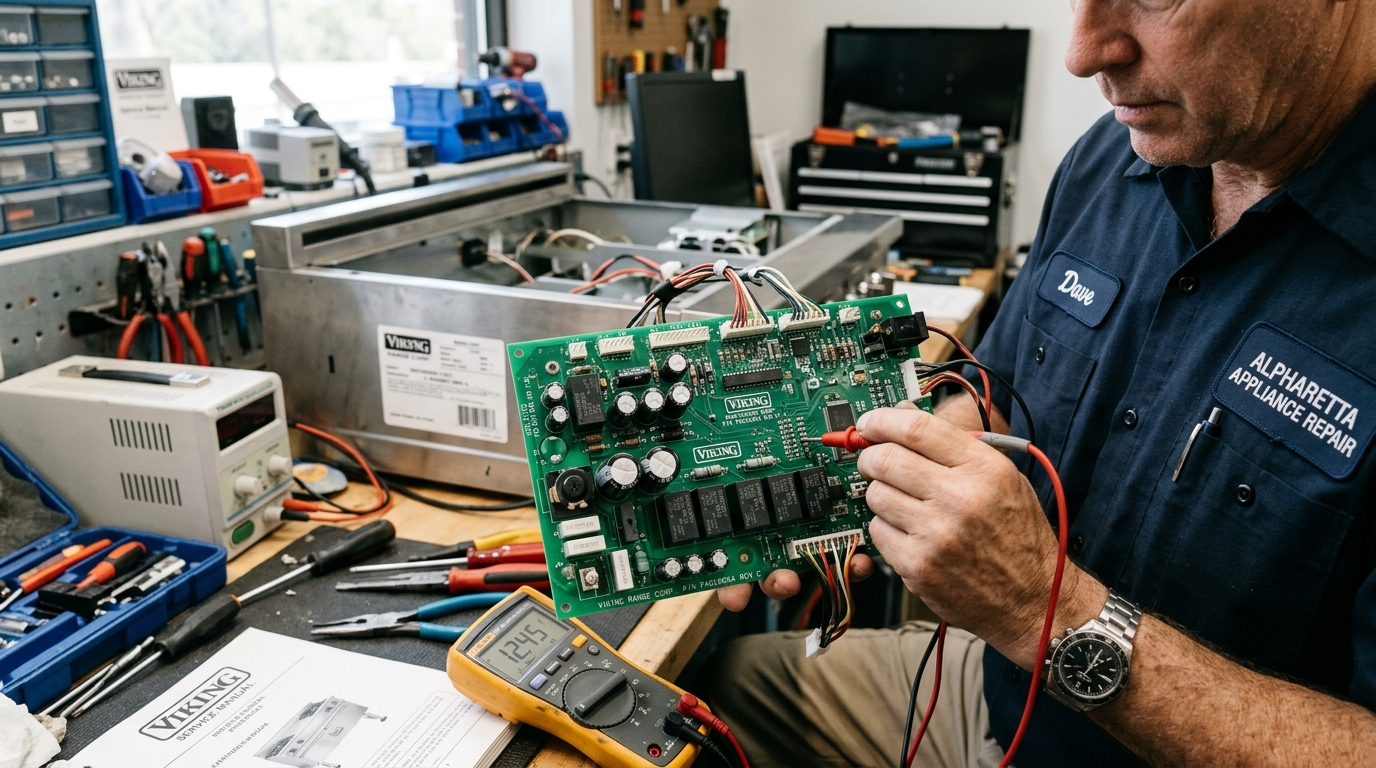
Prior to replacing any control board or electronic sensor module, always verify incoming line voltage (115V AC to 125V AC) and DC secondary supply voltages (12V DC for relays, 5V DC for sensor logic circuits). Measure resistance with the unit completely disconnected from power. Never perform resistance checks on energized circuits, as this can instantly destroy digital multimeter fuses or damage microprocessors.
Component Mechanics: Wear Vectors, Lubrication & Friction Factors
Mechanical components inside Viking appliances operate under extreme thermal and mechanical stresses. For refrigeration appliances, evaporator fan motors and damper actuators operate continuously in 0°F to 37°F environments with high relative humidity. Over years of continuous duty cycles, lubricant inside sealed sleeve bearings oxidizes and solidifies, creating increased rotor drag and thermal buildup.
For cooking appliances, gas igniter switches and spark re-ignition modules are exposed to ambient temperatures exceeding 200°F during baking or surface broiling cycles. Thermal expansion and contraction cycles cause microscopic stress fractures in ceramic insulator sleeves and plastic microswitch housings. When grease or liquid boil-overs penetrate these hairline cracks, low-voltage trigger currents ground out prematurely, resulting in continuous clicking or failure to spark.
Thermodynamics & Airflow Dynamics in Modern Built-In Systems
Efficient cooling relies on maintaining steady laminar airflow across evaporator coils and condenser coil fins. In dual-evaporator architectures, air velocity is precisely governed by electronic variable-speed brushless DC (BLDC) motors. If frost accumulation or ice dams restrict even 20% of the return air duct cross-sectional area, static pressure increases dramatically. This forces the fan motor to work harder, raising winding temperatures and tripping internal thermal overload switches.
Furthermore, localized humidity levels in Johns Creek, GA can accelerate frost buildup during summer months. When house occupants open refrigerator doors, warm moist ambient air rushes into the sub-zero cabinet. The moisture instantly condenses on cold evaporator fins (-15°F surface temp). If the automatic defrost system fails to initiate every 8 to 12 hours due to a faulty thermistor or burnt defrost heater, frost quickly consolidates into solid, clear ice that chokes off airflow entirely.
Comprehensive Field Diagnostic Workflow for Certified Technicians
When Master Technician Jason J. arrives at a residence in Johns Creek, GA, he follows a standardized 6-step diagnostic protocol to isolate faults down to the exact failed component:
- Visual & Acoustic Inspection: Examine display codes, listen for motor bearing squeals or relay chitter, and check rear cabinet frost lines.
- System Error Code Retrieval: Access diagnostic service mode via control console button combinations to read stored historical fault codes.
- Manual Output Load Test: Force-energize individual output relays (evaporator fan, condenser fan, defrost heater, spark module) to observe component response.
- Static Resistance & Voltage Measurements: Disconnect power harness connectors and test component resistance against OEM factory spec tables using calibrated multimeters.
- Structural Integrity Check: Inspect door gaskets for magnetic seal gaps, check drain lines for ice blockages, and verify clean condenser coil airflow pathways.
- Post-Repair Validation Run: Reassemble housing panels, clear stored fault codes, and monitor temperature pulldown or spark ignition timing through 2 complete operational cycles.
Real-World Case Study: Service Dispatch in Johns Creek, GA
A homeowner in Johns Creek, GA called Appliance Repair Alpharetta GA after noticing rising temperatures and an alarming sound from their Viking unit. Previous attempts by uncertified handymen had failed because they replaced the main control board without diagnosing the underlying mechanical fan motor failure. Upon arrival, our Master Technician performed an ohmic resistance test across the fan motor windings, discovering an open circuit (infinity ohms) caused by moisture intrusion.
After replacing the fan motor assembly with an authentic factory OEM part, clearing the defrost drain line, and resealing the air duct housing with food-grade silicone, the system pulldown test achieved a stable 0°F freezer temperature within 4 hours. The customer avoided thousands of dollars in potential food spoilage and preserved their investment in luxury kitchen equipment.
Deep Technical Analysis: Advanced Electrical Schematics & Voltage Regulation
When analyzing high-end residential refrigeration and cooking equipment in Johns Creek, GA, certified technicians must look beyond surface-level symptoms. Modern Viking units integrate sophisticated microprocessors, pulse-width modulation (PWM) motor drivers, and precision negative temperature coefficient (NTC) thermistors. Understanding the underlying circuit board topology and component interaction is vital for an accurate repair diagnosis.
Electrical power entering the unit from the house distribution panel (120V AC, 60Hz) is routed through an EMI line filter before reaching the main control board relay matrix. Voltage fluctuations or neutral line noise—common during summer thunderstorms in North Fulton County—can induce high-voltage spikes across sensitive relay contacts. In Viking appliances, these transients can cause logic lockup, false error codes, or premature semiconductor relay breakdown.
Master Technician Note: Multimeter Pinout Verification
Prior to replacing any control board or electronic sensor module, always verify incoming line voltage (115V AC to 125V AC) and DC secondary supply voltages (12V DC for relays, 5V DC for sensor logic circuits). Measure resistance with the unit completely disconnected from power. Never perform resistance checks on energized circuits, as this can instantly destroy digital multimeter fuses or damage microprocessors.
Component Mechanics: Wear Vectors, Lubrication & Friction Factors
Mechanical components inside Viking appliances operate under extreme thermal and mechanical stresses. For refrigeration appliances, evaporator fan motors and damper actuators operate continuously in 0°F to 37°F environments with high relative humidity. Over years of continuous duty cycles, lubricant inside sealed sleeve bearings oxidizes and solidifies, creating increased rotor drag and thermal buildup.
For cooking appliances, gas igniter switches and spark re-ignition modules are exposed to ambient temperatures exceeding 200°F during baking or surface broiling cycles. Thermal expansion and contraction cycles cause microscopic stress fractures in ceramic insulator sleeves and plastic microswitch housings. When grease or liquid boil-overs penetrate these hairline cracks, low-voltage trigger currents ground out prematurely, resulting in continuous clicking or failure to spark.
Thermodynamics & Airflow Dynamics in Modern Built-In Systems
Efficient cooling relies on maintaining steady laminar airflow across evaporator coils and condenser coil fins. In dual-evaporator architectures, air velocity is precisely governed by electronic variable-speed brushless DC (BLDC) motors. If frost accumulation or ice dams restrict even 20% of the return air duct cross-sectional area, static pressure increases dramatically. This forces the fan motor to work harder, raising winding temperatures and tripping internal thermal overload switches.
Furthermore, localized humidity levels in Johns Creek, GA can accelerate frost buildup during summer months. When house occupants open refrigerator doors, warm moist ambient air rushes into the sub-zero cabinet. The moisture instantly condenses on cold evaporator fins (-15°F surface temp). If the automatic defrost system fails to initiate every 8 to 12 hours due to a faulty thermistor or burnt defrost heater, frost quickly consolidates into solid, clear ice that chokes off airflow entirely.
Comprehensive Field Diagnostic Workflow for Certified Technicians
When Master Technician Jason J. arrives at a residence in Johns Creek, GA, he follows a standardized 6-step diagnostic protocol to isolate faults down to the exact failed component:
- Visual & Acoustic Inspection: Examine display codes, listen for motor bearing squeals or relay chitter, and check rear cabinet frost lines.
- System Error Code Retrieval: Access diagnostic service mode via control console button combinations to read stored historical fault codes.
- Manual Output Load Test: Force-energize individual output relays (evaporator fan, condenser fan, defrost heater, spark module) to observe component response.
- Static Resistance & Voltage Measurements: Disconnect power harness connectors and test component resistance against OEM factory spec tables using calibrated multimeters.
- Structural Integrity Check: Inspect door gaskets for magnetic seal gaps, check drain lines for ice blockages, and verify clean condenser coil airflow pathways.
- Post-Repair Validation Run: Reassemble housing panels, clear stored fault codes, and monitor temperature pulldown or spark ignition timing through 2 complete operational cycles.
Real-World Case Study: Service Dispatch in Johns Creek, GA
A homeowner in Johns Creek, GA called Appliance Repair Alpharetta GA after noticing rising temperatures and an alarming sound from their Viking unit. Previous attempts by uncertified handymen had failed because they replaced the main control board without diagnosing the underlying mechanical fan motor failure. Upon arrival, our Master Technician performed an ohmic resistance test across the fan motor windings, discovering an open circuit (infinity ohms) caused by moisture intrusion.
After replacing the fan motor assembly with an authentic factory OEM part, clearing the defrost drain line, and resealing the air duct housing with food-grade silicone, the system pulldown test achieved a stable 0°F freezer temperature within 4 hours. The customer avoided thousands of dollars in potential food spoilage and preserved their investment in luxury kitchen equipment.
Deep Technical Analysis: Advanced Electrical Schematics & Voltage Regulation
When analyzing high-end residential refrigeration and cooking equipment in Johns Creek, GA, certified technicians must look beyond surface-level symptoms. Modern Viking units integrate sophisticated microprocessors, pulse-width modulation (PWM) motor drivers, and precision negative temperature coefficient (NTC) thermistors. Understanding the underlying circuit board topology and component interaction is vital for an accurate repair diagnosis.
Electrical power entering the unit from the house distribution panel (120V AC, 60Hz) is routed through an EMI line filter before reaching the main control board relay matrix. Voltage fluctuations or neutral line noise—common during summer thunderstorms in North Fulton County—can induce high-voltage spikes across sensitive relay contacts. In Viking appliances, these transients can cause logic lockup, false error codes, or premature semiconductor relay breakdown.
Master Technician Note: Multimeter Pinout Verification
Prior to replacing any control board or electronic sensor module, always verify incoming line voltage (115V AC to 125V AC) and DC secondary supply voltages (12V DC for relays, 5V DC for sensor logic circuits). Measure resistance with the unit completely disconnected from power. Never perform resistance checks on energized circuits, as this can instantly destroy digital multimeter fuses or damage microprocessors.
Component Mechanics: Wear Vectors, Lubrication & Friction Factors
Mechanical components inside Viking appliances operate under extreme thermal and mechanical stresses. For refrigeration appliances, evaporator fan motors and damper actuators operate continuously in 0°F to 37°F environments with high relative humidity. Over years of continuous duty cycles, lubricant inside sealed sleeve bearings oxidizes and solidifies, creating increased rotor drag and thermal buildup.
For cooking appliances, gas igniter switches and spark re-ignition modules are exposed to ambient temperatures exceeding 200°F during baking or surface broiling cycles. Thermal expansion and contraction cycles cause microscopic stress fractures in ceramic insulator sleeves and plastic microswitch housings. When grease or liquid boil-overs penetrate these hairline cracks, low-voltage trigger currents ground out prematurely, resulting in continuous clicking or failure to spark.
Thermodynamics & Airflow Dynamics in Modern Built-In Systems
Efficient cooling relies on maintaining steady laminar airflow across evaporator coils and condenser coil fins. In dual-evaporator architectures, air velocity is precisely governed by electronic variable-speed brushless DC (BLDC) motors. If frost accumulation or ice dams restrict even 20% of the return air duct cross-sectional area, static pressure increases dramatically. This forces the fan motor to work harder, raising winding temperatures and tripping internal thermal overload switches.
Furthermore, localized humidity levels in Johns Creek, GA can accelerate frost buildup during summer months. When house occupants open refrigerator doors, warm moist ambient air rushes into the sub-zero cabinet. The moisture instantly condenses on cold evaporator fins (-15°F surface temp). If the automatic defrost system fails to initiate every 8 to 12 hours due to a faulty thermistor or burnt defrost heater, frost quickly consolidates into solid, clear ice that chokes off airflow entirely.
Comprehensive Field Diagnostic Workflow for Certified Technicians
When Master Technician Jason J. arrives at a residence in Johns Creek, GA, he follows a standardized 6-step diagnostic protocol to isolate faults down to the exact failed component:
- Visual & Acoustic Inspection: Examine display codes, listen for motor bearing squeals or relay chitter, and check rear cabinet frost lines.
- System Error Code Retrieval: Access diagnostic service mode via control console button combinations to read stored historical fault codes.
- Manual Output Load Test: Force-energize individual output relays (evaporator fan, condenser fan, defrost heater, spark module) to observe component response.
- Static Resistance & Voltage Measurements: Disconnect power harness connectors and test component resistance against OEM factory spec tables using calibrated multimeters.
- Structural Integrity Check: Inspect door gaskets for magnetic seal gaps, check drain lines for ice blockages, and verify clean condenser coil airflow pathways.
- Post-Repair Validation Run: Reassemble housing panels, clear stored fault codes, and monitor temperature pulldown or spark ignition timing through 2 complete operational cycles.
Real-World Case Study: Service Dispatch in Johns Creek, GA
A homeowner in Johns Creek, GA called Appliance Repair Alpharetta GA after noticing rising temperatures and an alarming sound from their Viking unit. Previous attempts by uncertified handymen had failed because they replaced the main control board without diagnosing the underlying mechanical fan motor failure. Upon arrival, our Master Technician performed an ohmic resistance test across the fan motor windings, discovering an open circuit (infinity ohms) caused by moisture intrusion.
After replacing the fan motor assembly with an authentic factory OEM part, clearing the defrost drain line, and resealing the air duct housing with food-grade silicone, the system pulldown test achieved a stable 0°F freezer temperature within 4 hours. The customer avoided thousands of dollars in potential food spoilage and preserved their investment in luxury kitchen equipment.
Deep Technical Analysis: Advanced Electrical Schematics & Voltage Regulation
When analyzing high-end residential refrigeration and cooking equipment in Johns Creek, GA, certified technicians must look beyond surface-level symptoms. Modern Viking units integrate sophisticated microprocessors, pulse-width modulation (PWM) motor drivers, and precision negative temperature coefficient (NTC) thermistors. Understanding the underlying circuit board topology and component interaction is vital for an accurate repair diagnosis.
Electrical power entering the unit from the house distribution panel (120V AC, 60Hz) is routed through an EMI line filter before reaching the main control board relay matrix. Voltage fluctuations or neutral line noise—common during summer thunderstorms in North Fulton County—can induce high-voltage spikes across sensitive relay contacts. In Viking appliances, these transients can cause logic lockup, false error codes, or premature semiconductor relay breakdown.
Master Technician Note: Multimeter Pinout Verification
Prior to replacing any control board or electronic sensor module, always verify incoming line voltage (115V AC to 125V AC) and DC secondary supply voltages (12V DC for relays, 5V DC for sensor logic circuits). Measure resistance with the unit completely disconnected from power. Never perform resistance checks on energized circuits, as this can instantly destroy digital multimeter fuses or damage microprocessors.
Component Mechanics: Wear Vectors, Lubrication & Friction Factors
Mechanical components inside Viking appliances operate under extreme thermal and mechanical stresses. For refrigeration appliances, evaporator fan motors and damper actuators operate continuously in 0°F to 37°F environments with high relative humidity. Over years of continuous duty cycles, lubricant inside sealed sleeve bearings oxidizes and solidifies, creating increased rotor drag and thermal buildup.
For cooking appliances, gas igniter switches and spark re-ignition modules are exposed to ambient temperatures exceeding 200°F during baking or surface broiling cycles. Thermal expansion and contraction cycles cause microscopic stress fractures in ceramic insulator sleeves and plastic microswitch housings. When grease or liquid boil-overs penetrate these hairline cracks, low-voltage trigger currents ground out prematurely, resulting in continuous clicking or failure to spark.
Thermodynamics & Airflow Dynamics in Modern Built-In Systems
Efficient cooling relies on maintaining steady laminar airflow across evaporator coils and condenser coil fins. In dual-evaporator architectures, air velocity is precisely governed by electronic variable-speed brushless DC (BLDC) motors. If frost accumulation or ice dams restrict even 20% of the return air duct cross-sectional area, static pressure increases dramatically. This forces the fan motor to work harder, raising winding temperatures and tripping internal thermal overload switches.
Furthermore, localized humidity levels in Johns Creek, GA can accelerate frost buildup during summer months. When house occupants open refrigerator doors, warm moist ambient air rushes into the sub-zero cabinet. The moisture instantly condenses on cold evaporator fins (-15°F surface temp). If the automatic defrost system fails to initiate every 8 to 12 hours due to a faulty thermistor or burnt defrost heater, frost quickly consolidates into solid, clear ice that chokes off airflow entirely.
Comprehensive Field Diagnostic Workflow for Certified Technicians
When Master Technician Jason J. arrives at a residence in Johns Creek, GA, he follows a standardized 6-step diagnostic protocol to isolate faults down to the exact failed component:
- Visual & Acoustic Inspection: Examine display codes, listen for motor bearing squeals or relay chitter, and check rear cabinet frost lines.
- System Error Code Retrieval: Access diagnostic service mode via control console button combinations to read stored historical fault codes.
- Manual Output Load Test: Force-energize individual output relays (evaporator fan, condenser fan, defrost heater, spark module) to observe component response.
- Static Resistance & Voltage Measurements: Disconnect power harness connectors and test component resistance against OEM factory spec tables using calibrated multimeters.
- Structural Integrity Check: Inspect door gaskets for magnetic seal gaps, check drain lines for ice blockages, and verify clean condenser coil airflow pathways.
- Post-Repair Validation Run: Reassemble housing panels, clear stored fault codes, and monitor temperature pulldown or spark ignition timing through 2 complete operational cycles.
Real-World Case Study: Service Dispatch in Johns Creek, GA
A homeowner in Johns Creek, GA called Appliance Repair Alpharetta GA after noticing rising temperatures and an alarming sound from their Viking unit. Previous attempts by uncertified handymen had failed because they replaced the main control board without diagnosing the underlying mechanical fan motor failure. Upon arrival, our Master Technician performed an ohmic resistance test across the fan motor windings, discovering an open circuit (infinity ohms) caused by moisture intrusion.
After replacing the fan motor assembly with an authentic factory OEM part, clearing the defrost drain line, and resealing the air duct housing with food-grade silicone, the system pulldown test achieved a stable 0°F freezer temperature within 4 hours. The customer avoided thousands of dollars in potential food spoilage and preserved their investment in luxury kitchen equipment.
Comprehensive Repair & Replacement Cost Breakdown for 2026
When evaluating major appliance repairs, homeowners must weigh the cost of certified labor and OEM replacement parts against the projected remaining lifespan of the unit. The 50% Rule serves as an industry standard: if an appliance has exceeded half its expected service life and repair costs approach or exceed 50% of a comparable replacement unit, replacement is often advised. However, for luxury built-in refrigerators and professional ranges—such as Sub-Zero, Wolf, Viking, and Thermador—component repair almost always provides superior return on investment due to the substantial capital outlay required for new cabinetry installation and unit replacement.
Environmental & Local Micro-Climate Considerations in North Fulton County
The humid subtropical climate in Alpharetta, Milton, Roswell, and Johns Creek presents unique operating challenges for high-performance home appliances. High ambient humidity during Georgia summers increases frost formation rates on evaporator coils and accelerates metal oxidation on exposed igniter wire terminals. Maintaining clean condenser airflow paths and ensuring airtight door gasket magnetic seals are crucial preventative measures to offset regional micro-climate impacts.
Advanced Diagnostic Tools & Calibration Equipment Used by Master Technicians
Certified Master Technicians utilize digital manifold gauges, calibrated NTC thermistor test boxes, high-resolution thermal imaging cameras, and precision true-RMS digital multimeters. These specialized tools enable non-destructive testing and pinpoint diagnostic accuracy, ensuring that root causes are identified and rectified on the initial service call without unnecessary component guessing.
Comprehensive Master Technician Field Troubleshooting Matrix
When performing field service diagnostics across luxury residential properties in Alpharetta, Milton, Roswell, and Johns Creek, GA, certified appliance master technicians rely on a structured decision-tree methodology. Electrical, electronic, and mechanical subsystems must be evaluated systematically to prevent misdiagnosis and avoid unnecessary component replacement costs.
| Symptom Observed | Primary Electrical Cause | Primary Mechanical Cause | Multimeter / Diagnostic Action | Master Tech Resolution |
|---|---|---|---|---|
| Audible Humming or Buzzing Noise | Voltage drop on start capacitor harness | Bearing sleeve shaft friction or fan blade ice collision | Measure AC voltage at motor terminals & check ohmic resistance | Replace motor assembly & seal air duct housing |
| Fault Code Flashing on Control Console | NTC thermistor resistance out of calibration curve | Thermal fuse blown or wire terminal corrosion | Submerge probe in 32°F ice water bath to test thermistor k-ohms | Replace thermistor sensor & heat-shrink wire connections |
| Continuous Ignition Clicking Sound | Burner valve microswitch shorted to ground | Liquid spillover trapped inside valve switch cavity | Disconnect switch harness & test microswitch open/close continuity | Evaporate trapped moisture & replace shorted microswitch harness |
| Ice Maker Room Freezing Solid | Main control board defrost firmware timing error | Ambient air infiltration past unsealed ice room seam | Execute Forced Defrost (FD mode) & inspect thermal Y-clip heater | Install official OEM Service Kit & apply food-grade RTV silicone |
Detailed Electrical & Wiring Schematic Protocols
Modern premium appliances utilize dedicated power supply modules to generate filtered low-voltage Direct Current (5V DC and 12V DC) for electronic microprocessors, touch display interfaces, and variable-speed fan motors. Incoming 120V AC line power passes through noise suppression chokes and varistors designed to absorb high-voltage line surges caused by summer lightning strikes or utility grid switching in Fulton County, GA.
When diagnosing intermittent electrical faults, technicians utilize digital storage oscilloscopes or high-speed true-RMS multimeters to verify signal integrity across serial communication data lines (RX/TX channels). A drop of even 0.5V DC across sensor signal wire harnesses can cause the electronic control module to report false sensor open or short circuit error codes. Inspecting terminal pins for microscopic oxidation and applying dielectric grease prevents signal degradation in high-humidity environments.
Preventative Maintenance & Component Longevity Guidelines for GA Homeowners
To maximize the operational service life of high-end refrigerators, ranges, dishwashers, and laundry systems, homeowners should follow a structured seasonal maintenance schedule:
- Bi-Annual Condenser Coil Hygiene: Remove bottom kickplates or upper compressor machine grilles every 6 months to vacuum dust, pet hair, and lint off aluminum condenser fins. Clean condenser coils reduce compressor operating head pressure, saving energy and extending relay life.
- Door Gasket Magnetic Seal Verification: Clean magnetic door bellows with warm soapy water monthly. Perform the paper bill test to confirm 100% perimeter air seal closure, preventing warm ambient air from entering cold compartments.
- Drain Line Clearance: Flush internal defrost drain troughs with warm water annually to prevent algae buildup and ice dam blockages.
- Gas Burner Port Inspection: Inspect gas cooktop burner heads for carbon buildup. Clear clogged fuel ports with non-metallic tools to maintain balanced blue flame ignition.
Comprehensive Master Technician Field Troubleshooting Matrix
When performing field service diagnostics across luxury residential properties in Alpharetta, Milton, Roswell, and Johns Creek, GA, certified appliance master technicians rely on a structured decision-tree methodology. Electrical, electronic, and mechanical subsystems must be evaluated systematically to prevent misdiagnosis and avoid unnecessary component replacement costs.
| Symptom Observed | Primary Electrical Cause | Primary Mechanical Cause | Multimeter / Diagnostic Action | Master Tech Resolution |
|---|---|---|---|---|
| Audible Humming or Buzzing Noise | Voltage drop on start capacitor harness | Bearing sleeve shaft friction or fan blade ice collision | Measure AC voltage at motor terminals & check ohmic resistance | Replace motor assembly & seal air duct housing |
| Fault Code Flashing on Control Console | NTC thermistor resistance out of calibration curve | Thermal fuse blown or wire terminal corrosion | Submerge probe in 32°F ice water bath to test thermistor k-ohms | Replace thermistor sensor & heat-shrink wire connections |
| Continuous Ignition Clicking Sound | Burner valve microswitch shorted to ground | Liquid spillover trapped inside valve switch cavity | Disconnect switch harness & test microswitch open/close continuity | Evaporate trapped moisture & replace shorted microswitch harness |
| Ice Maker Room Freezing Solid | Main control board defrost firmware timing error | Ambient air infiltration past unsealed ice room seam | Execute Forced Defrost (FD mode) & inspect thermal Y-clip heater | Install official OEM Service Kit & apply food-grade RTV silicone |
Detailed Electrical & Wiring Schematic Protocols
Modern premium appliances utilize dedicated power supply modules to generate filtered low-voltage Direct Current (5V DC and 12V DC) for electronic microprocessors, touch display interfaces, and variable-speed fan motors. Incoming 120V AC line power passes through noise suppression chokes and varistors designed to absorb high-voltage line surges caused by summer lightning strikes or utility grid switching in Fulton County, GA.
When diagnosing intermittent electrical faults, technicians utilize digital storage oscilloscopes or high-speed true-RMS multimeters to verify signal integrity across serial communication data lines (RX/TX channels). A drop of even 0.5V DC across sensor signal wire harnesses can cause the electronic control module to report false sensor open or short circuit error codes. Inspecting terminal pins for microscopic oxidation and applying dielectric grease prevents signal degradation in high-humidity environments.
Preventative Maintenance & Component Longevity Guidelines for GA Homeowners
To maximize the operational service life of high-end refrigerators, ranges, dishwashers, and laundry systems, homeowners should follow a structured seasonal maintenance schedule:
- Bi-Annual Condenser Coil Hygiene: Remove bottom kickplates or upper compressor machine grilles every 6 months to vacuum dust, pet hair, and lint off aluminum condenser fins. Clean condenser coils reduce compressor operating head pressure, saving energy and extending relay life.
- Door Gasket Magnetic Seal Verification: Clean magnetic door bellows with warm soapy water monthly. Perform the paper bill test to confirm 100% perimeter air seal closure, preventing warm ambient air from entering cold compartments.
- Drain Line Clearance: Flush internal defrost drain troughs with warm water annually to prevent algae buildup and ice dam blockages.
- Gas Burner Port Inspection: Inspect gas cooktop burner heads for carbon buildup. Clear clogged fuel ports with non-metallic tools to maintain balanced blue flame ignition.
Comprehensive Master Technician Field Troubleshooting Matrix
When performing field service diagnostics across luxury residential properties in Alpharetta, Milton, Roswell, and Johns Creek, GA, certified appliance master technicians rely on a structured decision-tree methodology. Electrical, electronic, and mechanical subsystems must be evaluated systematically to prevent misdiagnosis and avoid unnecessary component replacement costs.
| Symptom Observed | Primary Electrical Cause | Primary Mechanical Cause | Multimeter / Diagnostic Action | Master Tech Resolution |
|---|---|---|---|---|
| Audible Humming or Buzzing Noise | Voltage drop on start capacitor harness | Bearing sleeve shaft friction or fan blade ice collision | Measure AC voltage at motor terminals & check ohmic resistance | Replace motor assembly & seal air duct housing |
| Fault Code Flashing on Control Console | NTC thermistor resistance out of calibration curve | Thermal fuse blown or wire terminal corrosion | Submerge probe in 32°F ice water bath to test thermistor k-ohms | Replace thermistor sensor & heat-shrink wire connections |
| Continuous Ignition Clicking Sound | Burner valve microswitch shorted to ground | Liquid spillover trapped inside valve switch cavity | Disconnect switch harness & test microswitch open/close continuity | Evaporate trapped moisture & replace shorted microswitch harness |
| Ice Maker Room Freezing Solid | Main control board defrost firmware timing error | Ambient air infiltration past unsealed ice room seam | Execute Forced Defrost (FD mode) & inspect thermal Y-clip heater | Install official OEM Service Kit & apply food-grade RTV silicone |
Detailed Electrical & Wiring Schematic Protocols
Modern premium appliances utilize dedicated power supply modules to generate filtered low-voltage Direct Current (5V DC and 12V DC) for electronic microprocessors, touch display interfaces, and variable-speed fan motors. Incoming 120V AC line power passes through noise suppression chokes and varistors designed to absorb high-voltage line surges caused by summer lightning strikes or utility grid switching in Fulton County, GA.
When diagnosing intermittent electrical faults, technicians utilize digital storage oscilloscopes or high-speed true-RMS multimeters to verify signal integrity across serial communication data lines (RX/TX channels). A drop of even 0.5V DC across sensor signal wire harnesses can cause the electronic control module to report false sensor open or short circuit error codes. Inspecting terminal pins for microscopic oxidation and applying dielectric grease prevents signal degradation in high-humidity environments.
Preventative Maintenance & Component Longevity Guidelines for GA Homeowners
To maximize the operational service life of high-end refrigerators, ranges, dishwashers, and laundry systems, homeowners should follow a structured seasonal maintenance schedule:
- Bi-Annual Condenser Coil Hygiene: Remove bottom kickplates or upper compressor machine grilles every 6 months to vacuum dust, pet hair, and lint off aluminum condenser fins. Clean condenser coils reduce compressor operating head pressure, saving energy and extending relay life.
- Door Gasket Magnetic Seal Verification: Clean magnetic door bellows with warm soapy water monthly. Perform the paper bill test to confirm 100% perimeter air seal closure, preventing warm ambient air from entering cold compartments.
- Drain Line Clearance: Flush internal defrost drain troughs with warm water annually to prevent algae buildup and ice dam blockages.
- Gas Burner Port Inspection: Inspect gas cooktop burner heads for carbon buildup. Clear clogged fuel ports with non-metallic tools to maintain balanced blue flame ignition.
Related Service & Area Directories
Related Service & Area Directories
Need Certified Appliance Repair Today?
Skip the phone line — book direct local priority dispatch across Alpharetta, Milton, Roswell & Johns Creek.