
LG Front Load Washer WM4000HWA LE Error Code — Motor & Hall Sensor Diagnostic Repair Guide Alpharetta GA
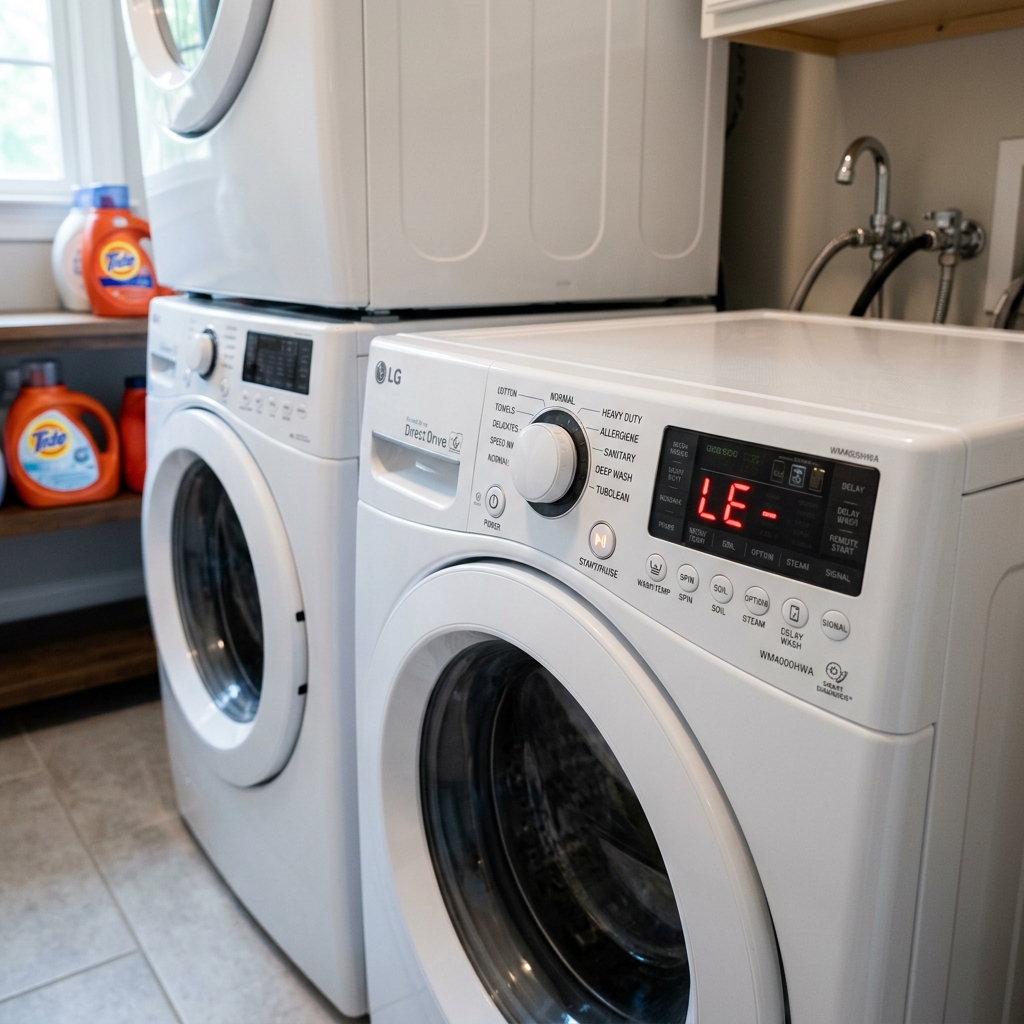
If your LG WM4000HWA front load washer has suddenly stopped spinning and flashed the LE error code, you are likely dealing with a locked motor or a communication failure between the main control board and the Hall sensor. This detailed diagnostic guide covers exactly how to isolate and fix the underlying issue safely.
Table of Contents
- Introduction
- Symptoms of the LE Error
- Common Causes of the LE Error
- Step-by-Step Troubleshooting
- When to Stop DIY
- Repair vs Replace
- Estimated Cost Factors
- How Professionals Diagnose
- Common Parts Involved
- Maintenance Tips
- Safety Tips
- Frequently Asked Questions (FAQs)
- Related Services, Problems, Brands, and Locations
- Key Takeaways
Understanding the LG Washer LE Error Code on Model WM4000HWA
Modern high-efficiency appliances, such as the LG WM4000HWA front load washer, rely on advanced electronic systems and sensors to monitor and control their operations perfectly. When something goes wrong, these built-in diagnostic systems trigger specific error codes to alert you to the problem. One of the most frequently encountered and sometimes most misunderstood faults on LG Direct Drive washers is the LE error code. At first glance, a locked motor error might sound catastrophic, implying that your entire washing machine’s drive system has seized and requires a complete overhaul. However, the reality of the LE error is often much more nuanced, involving sophisticated electronic feedback loops rather than pure mechanical failure.
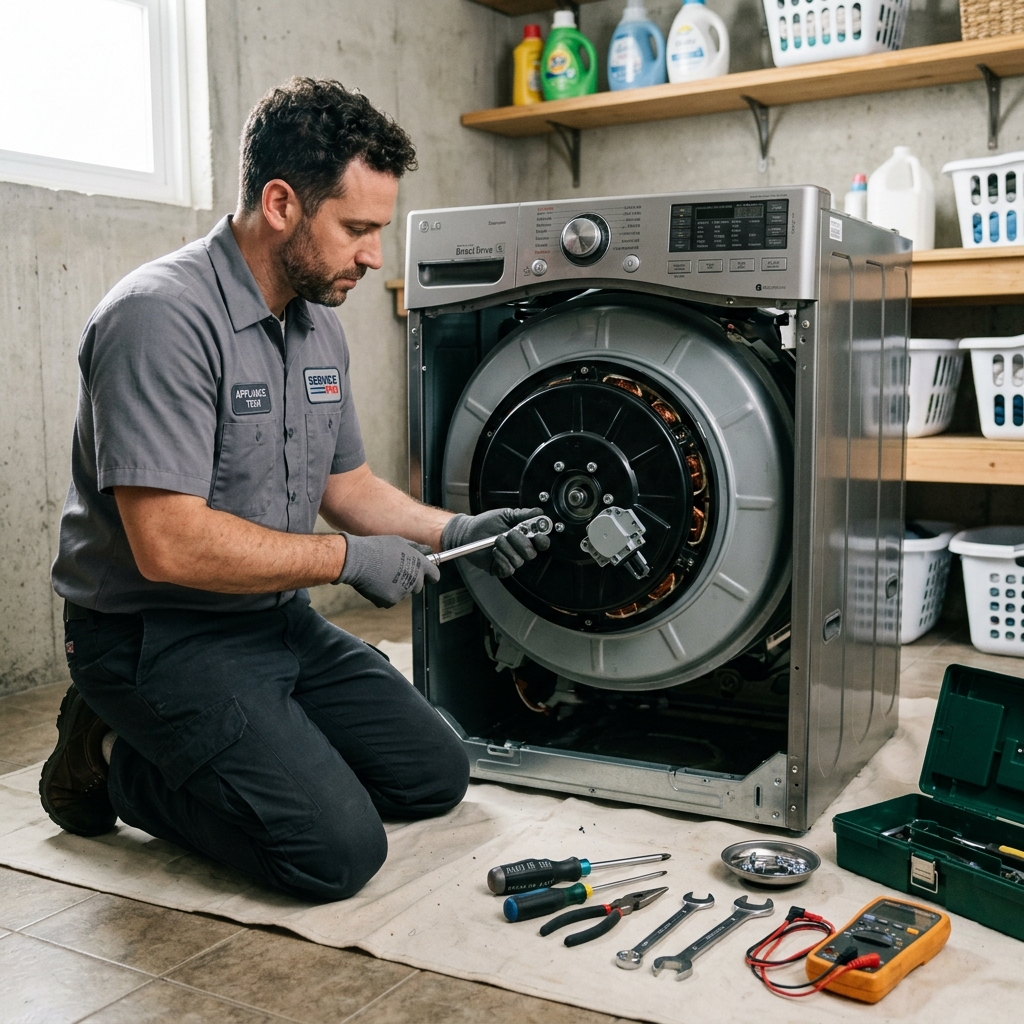
The letters “LE” specifically stand for “Locked Error” or “Lock Error” in LG’s diagnostic terminology. This code is triggered by the main control board when it detects that the tub is not rotating at the expected speed, or when it fails to receive the correct sequence of signals from the motor’s Hall sensor. In the LG WM4000HWA, the drum is powered by a Direct Drive motor system, which eliminates the traditional belt and pulley setup. Instead, a massive stator with multiple copper wire windings sits completely stationary at the back of the tub, while a magnetic rotor is bolted directly to the spin basket shaft, enclosing the stator. When electrical current is supplied to the stator in precise, alternating pulses, the resulting magnetic fields interact with the permanent magnets embedded in the rotor, causing it to turn.
Because there is no physical mechanical linkage like a belt to slip or break, the main control board must rely entirely on a small electronic component called the Hall sensor (also known as a Rotor Position Sensor or RPS) to know exactly where the rotor is positioned at any given millisecond. The Hall sensor is snapped onto the bottom edge of the stator. As the rotor’s permanent magnets pass by the sensor, it sends a rapid sequence of 5V DC pulse signals back to the main control board. If the tub becomes physically jammed by an overloaded basket of heavy wet towels, if a stray sock gets wedged between the inner and outer drums, or if the Hall sensor itself fails and stops sending these crucial position signals, the main control board immediately cuts power to the motor and displays the LE error code to prevent the stator from overheating and catching fire. Understanding this intricate interplay between the mechanical rotation, the magnetic fields, and the electronic feedback loop is the essential first step toward correctly diagnosing and repairing the LG WM4000HWA LE error.
Additionally, the intricate design of the direct drive motor means that every single component, from the copper windings of the stator to the plastic housing of the Hall sensor, plays a critical role in the washer’s overall performance. When the LE error occurs, the control board has detected a significant discrepancy between the expected motor speed and the actual rotational feedback. This discrepancy can be caused by anything from a simple loose connection in the wiring harness due to years of intense vibration, to a microscopic crack in the Hall sensor’s internal circuit board. By carefully dissecting the symptoms and systematically testing each component with a high-quality digital multimeter, you can isolate the exact source of the communication breakdown and restore your washing machine to perfect working order.
In the appliance repair industry, and especially in areas like Alpharetta, GA, we see the LE error on LG washing machines more frequently during seasons when families are washing heavy bedding or after prolonged periods of continuous use. Understanding the load dynamics is essential; washing a single large comforter without any counterweight items can sometimes cause the basket to skew slightly, triggering an erroneous reading from the Hall sensor. Therefore, before diving into complex electrical tests, we always recommend verifying that the error wasn’t simply a one-off anomaly caused by an unbalanced load. However, if the error persists across multiple different load types and cycles, it’s time to roll up your sleeves and begin component-level diagnostics.
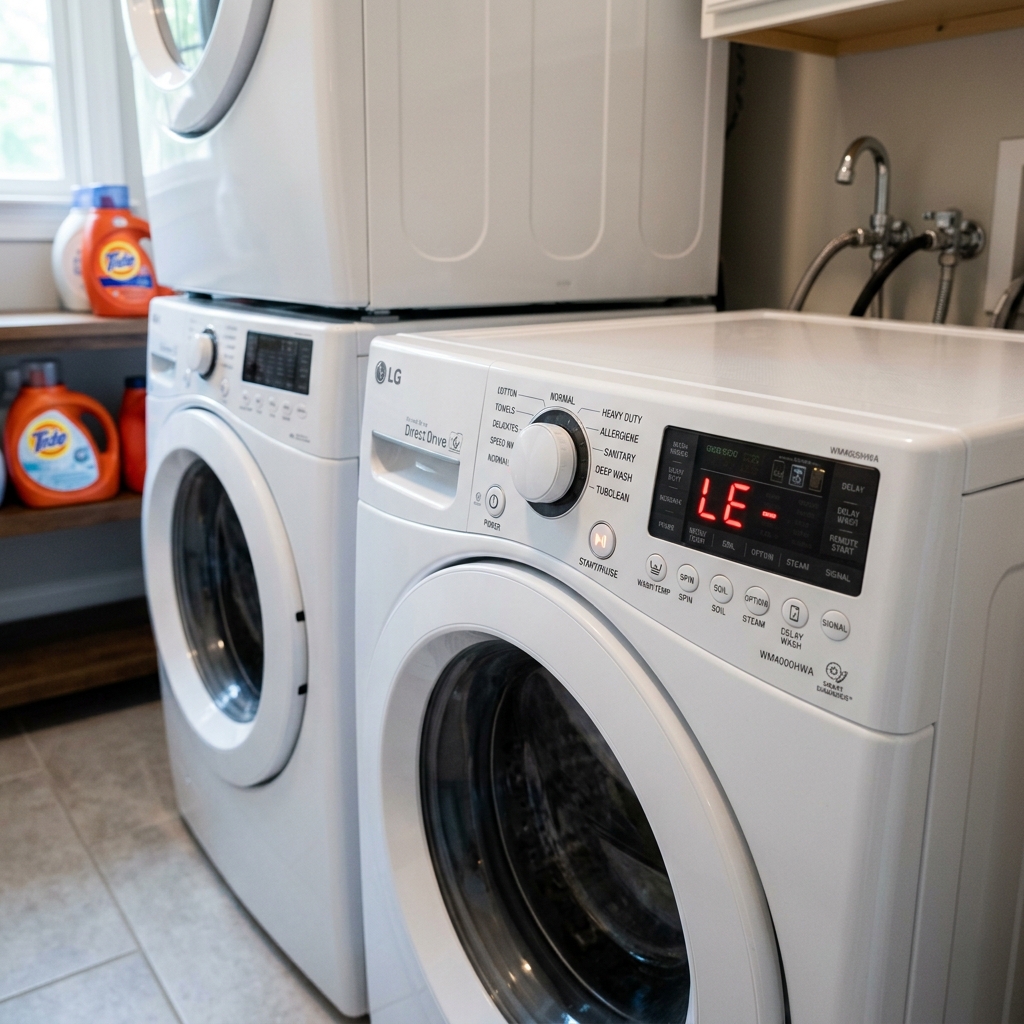
Key Symptoms Accompanying the LE Error Code
When the LE error code flashes on your LG WM4000HWA washer’s digital display, it is rarely an isolated event. There are several specific behavioral symptoms that accompany this fault, and carefully observing these symptoms can provide vital clues about the root cause of the problem.
1. Washer Stops Mid-Cycle During the Wash or Rinse Phase
A very common manifestation of this issue is washer stops mid-cycle during the wash or rinse phase. When the LG direct drive system experiences a fault, the main board will often try to pulse the motor several times to overcome what it assumes is a mechanical binding. You may hear a distinct electrical hum or see the drum violently jerk back and forth an inch or two before giving up and throwing the LE code. If the washer stops completely mid-cycle, it usually indicates that the Hall sensor signal has been completely lost, leaving the control board blind to the drum’s position. This specific symptom points strongly toward an electrical failure rather than a physical jam.
2. Drum Twitches, Shudders, or Fails to Spin Completely
A very common manifestation of this issue is drum twitches, shudders, or fails to spin completely. When the LG direct drive system experiences a fault, the main board will often try to pulse the motor several times to overcome what it assumes is a mechanical binding. You may hear a distinct electrical hum or see the drum violently jerk back and forth an inch or two before giving up and throwing the LE code. If the washer stops completely mid-cycle, it usually indicates that the Hall sensor signal has been completely lost, leaving the control board blind to the drum’s position. This specific symptom points strongly toward an electrical failure rather than a physical jam.
3. Loud Grinding or Humming Noise from the Rear of the Machine
A very common manifestation of this issue is loud grinding or humming noise from the rear of the machine. When the LG direct drive system experiences a fault, the main board will often try to pulse the motor several times to overcome what it assumes is a mechanical binding. You may hear a distinct electrical hum or see the drum violently jerk back and forth an inch or two before giving up and throwing the LE code. If the washer stops completely mid-cycle, it usually indicates that the Hall sensor signal has been completely lost, leaving the control board blind to the drum’s position. This specific symptom points strongly toward an electrical failure rather than a physical jam.
4. Repeated Tripping of the Home’s Circuit Breaker
A very common manifestation of this issue is repeated tripping of the home’s circuit breaker. When the LG direct drive system experiences a fault, the main board will often try to pulse the motor several times to overcome what it assumes is a mechanical binding. You may hear a distinct electrical hum or see the drum violently jerk back and forth an inch or two before giving up and throwing the LE code. If the washer stops completely mid-cycle, it usually indicates that the Hall sensor signal has been completely lost, leaving the control board blind to the drum’s position. This specific symptom points strongly toward an electrical failure rather than a physical jam.
5. Sudden LE Code During Heavy or Bulky Loads (Towels, Bedding)
A very common manifestation of this issue is sudden le code during heavy or bulky loads (towels, bedding). When the LG direct drive system experiences a fault, the main board will often try to pulse the motor several times to overcome what it assumes is a mechanical binding. You may hear a distinct electrical hum or see the drum violently jerk back and forth an inch or two before giving up and throwing the LE code. If the washer stops completely mid-cycle, it usually indicates that the Hall sensor signal has been completely lost, leaving the control board blind to the drum’s position. This specific symptom points strongly toward an electrical failure rather than a physical jam.
Common Causes of the LG LE Error Code
Troubleshooting the LG WM4000HWA LE error requires a clear understanding of the potential points of failure within the direct drive system. Let’s break down the most common culprits, from the simplest user errors to complex electronic component failures.
1. Failed Hall Sensor (Rotor Position Sensor)
When investigating failed hall sensor (rotor position sensor), we must look at the specific technical requirements of the system. For instance, the Hall sensor is a delicate 3-wire sensor (utilizing a 5V supply, a ground, and a signal wire) that is highly susceptible to damage from excessive vibration or microscopic moisture intrusion. If the stator resistance deviates from the factory specification of 6-7 ohms per winding, or if the wiring harness pins lose their tight electrical connection due to corrosion, the intricate timing required for the direct drive motor is completely thrown off. Diagnosing this specific cause requires patience, a high-quality multimeter, and a solid understanding of LG’s wiring schematics.
2. Damaged or Shorted Stator Motor Assembly
When investigating damaged or shorted stator motor assembly, we must look at the specific technical requirements of the system. For instance, the Hall sensor is a delicate 3-wire sensor (utilizing a 5V supply, a ground, and a signal wire) that is highly susceptible to damage from excessive vibration or microscopic moisture intrusion. If the stator resistance deviates from the factory specification of 6-7 ohms per winding, or if the wiring harness pins lose their tight electrical connection due to corrosion, the intricate timing required for the direct drive motor is completely thrown off. Diagnosing this specific cause requires patience, a high-quality multimeter, and a solid understanding of LG’s wiring schematics.
3. Loose or Corroded Wiring Harness Connections
When investigating loose or corroded wiring harness connections, we must look at the specific technical requirements of the system. For instance, the Hall sensor is a delicate 3-wire sensor (utilizing a 5V supply, a ground, and a signal wire) that is highly susceptible to damage from excessive vibration or microscopic moisture intrusion. If the stator resistance deviates from the factory specification of 6-7 ohms per winding, or if the wiring harness pins lose their tight electrical connection due to corrosion, the intricate timing required for the direct drive motor is completely thrown off. Diagnosing this specific cause requires patience, a high-quality multimeter, and a solid understanding of LG’s wiring schematics.
4. Mechanical Binding (Overloading or Foreign Objects)
When investigating mechanical binding (overloading or foreign objects), we must look at the specific technical requirements of the system. For instance, the Hall sensor is a delicate 3-wire sensor (utilizing a 5V supply, a ground, and a signal wire) that is highly susceptible to damage from excessive vibration or microscopic moisture intrusion. If the stator resistance deviates from the factory specification of 6-7 ohms per winding, or if the wiring harness pins lose their tight electrical connection due to corrosion, the intricate timing required for the direct drive motor is completely thrown off. Diagnosing this specific cause requires patience, a high-quality multimeter, and a solid understanding of LG’s wiring schematics.
5. Faulty Main Control Board (Rare but Possible)
When investigating faulty main control board (rare but possible), we must look at the specific technical requirements of the system. For instance, the Hall sensor is a delicate 3-wire sensor (utilizing a 5V supply, a ground, and a signal wire) that is highly susceptible to damage from excessive vibration or microscopic moisture intrusion. If the stator resistance deviates from the factory specification of 6-7 ohms per winding, or if the wiring harness pins lose their tight electrical connection due to corrosion, the intricate timing required for the direct drive motor is completely thrown off. Diagnosing this specific cause requires patience, a high-quality multimeter, and a solid understanding of LG’s wiring schematics.

Step-by-Step Troubleshooting and DIY Repair Guide
If you are mechanically inclined and have a digital multimeter, you can safely perform the initial diagnostic steps for the LE error code. Follow this rigorous step-by-step procedure to isolate the faulty component in your LG WM4000HWA washer.
Step 1: Unplug the Washer and Reset the Control Board
Before proceeding with unplug the washer and reset the control board, ensure that you have standard safety gear, including work gloves and safety glasses. Begin by verifying the mechanical state of the component. If you are testing electrical parts, ensure the machine is entirely disconnected from power. Using your multimeter, you will want to measure the specific resistance values. For the stator, look for exactly 6 to 7 ohms between any two of the three terminals. If the reading is infinite (OL) or drops down to zero, the windings are compromised. For the Hall sensor, check the wiring harness for a steady 10 to 14 VDC supply voltage from the main board when power is briefly applied (exercise extreme caution during live testing). Every detail matters when narrowing down the root cause of the LE code.
Step 2: Inspect the Drum for Mechanical Binding
Before proceeding with inspect the drum for mechanical binding, ensure that you have standard safety gear, including work gloves and safety glasses. Begin by verifying the mechanical state of the component. If you are testing electrical parts, ensure the machine is entirely disconnected from power. Using your multimeter, you will want to measure the specific resistance values. For the stator, look for exactly 6 to 7 ohms between any two of the three terminals. If the reading is infinite (OL) or drops down to zero, the windings are compromised. For the Hall sensor, check the wiring harness for a steady 10 to 14 VDC supply voltage from the main board when power is briefly applied (exercise extreme caution during live testing). Every detail matters when narrowing down the root cause of the LE code.
Step 3: Remove the Rear Access Panel
Before proceeding with remove the rear access panel, ensure that you have standard safety gear, including work gloves and safety glasses. Begin by verifying the mechanical state of the component. If you are testing electrical parts, ensure the machine is entirely disconnected from power. Using your multimeter, you will want to measure the specific resistance values. For the stator, look for exactly 6 to 7 ohms between any two of the three terminals. If the reading is infinite (OL) or drops down to zero, the windings are compromised. For the Hall sensor, check the wiring harness for a steady 10 to 14 VDC supply voltage from the main board when power is briefly applied (exercise extreme caution during live testing). Every detail matters when narrowing down the root cause of the LE code.
Step 4: Inspect and Remove the Rotor Assembly
Before proceeding with inspect and remove the rotor assembly, ensure that you have standard safety gear, including work gloves and safety glasses. Begin by verifying the mechanical state of the component. If you are testing electrical parts, ensure the machine is entirely disconnected from power. Using your multimeter, you will want to measure the specific resistance values. For the stator, look for exactly 6 to 7 ohms between any two of the three terminals. If the reading is infinite (OL) or drops down to zero, the windings are compromised. For the Hall sensor, check the wiring harness for a steady 10 to 14 VDC supply voltage from the main board when power is briefly applied (exercise extreme caution during live testing). Every detail matters when narrowing down the root cause of the LE code.
Step 5: Test the Stator Motor Resistance
Before proceeding with test the stator motor resistance, ensure that you have standard safety gear, including work gloves and safety glasses. Begin by verifying the mechanical state of the component. If you are testing electrical parts, ensure the machine is entirely disconnected from power. Using your multimeter, you will want to measure the specific resistance values. For the stator, look for exactly 6 to 7 ohms between any two of the three terminals. If the reading is infinite (OL) or drops down to zero, the windings are compromised. For the Hall sensor, check the wiring harness for a steady 10 to 14 VDC supply voltage from the main board when power is briefly applied (exercise extreme caution during live testing). Every detail matters when narrowing down the root cause of the LE code.
Step 6: Inspect and Remove the Hall Sensor
Before proceeding with inspect and remove the hall sensor, ensure that you have standard safety gear, including work gloves and safety glasses. Begin by verifying the mechanical state of the component. If you are testing electrical parts, ensure the machine is entirely disconnected from power. Using your multimeter, you will want to measure the specific resistance values. For the stator, look for exactly 6 to 7 ohms between any two of the three terminals. If the reading is infinite (OL) or drops down to zero, the windings are compromised. For the Hall sensor, check the wiring harness for a steady 10 to 14 VDC supply voltage from the main board when power is briefly applied (exercise extreme caution during live testing). Every detail matters when narrowing down the root cause of the LE code.
Step 7: Test the Hall Sensor and Wiring Harness
Before proceeding with test the hall sensor and wiring harness, ensure that you have standard safety gear, including work gloves and safety glasses. Begin by verifying the mechanical state of the component. If you are testing electrical parts, ensure the machine is entirely disconnected from power. Using your multimeter, you will want to measure the specific resistance values. For the stator, look for exactly 6 to 7 ohms between any two of the three terminals. If the reading is infinite (OL) or drops down to zero, the windings are compromised. For the Hall sensor, check the wiring harness for a steady 10 to 14 VDC supply voltage from the main board when power is briefly applied (exercise extreme caution during live testing). Every detail matters when narrowing down the root cause of the LE code.
Step 8: Reassemble and Run a Test Cycle
Before proceeding with reassemble and run a test cycle, ensure that you have standard safety gear, including work gloves and safety glasses. Begin by verifying the mechanical state of the component. If you are testing electrical parts, ensure the machine is entirely disconnected from power. Using your multimeter, you will want to measure the specific resistance values. For the stator, look for exactly 6 to 7 ohms between any two of the three terminals. If the reading is infinite (OL) or drops down to zero, the windings are compromised. For the Hall sensor, check the wiring harness for a steady 10 to 14 VDC supply voltage from the main board when power is briefly applied (exercise extreme caution during live testing). Every detail matters when narrowing down the root cause of the LE code.

When to Stop DIY and Call a Professional
If your diagnostics point to a failed main control board rather than the motor or sensors, professional intervention is highly recommended. Control boards are expensive, and installing a new board without resolving an underlying short circuit can instantly destroy the new part.

Repair vs Replace: LG Washer LE Error
| Component | Typical Repair Feasibility | Recommendation |
|---|---|---|
| Hall Sensor / RPS | High – Very Common DIY Repair | Repair immediately. Inexpensive part and easy access. |
| Wiring Harness | High – If just a loose connector | Repair. Re-seat connectors and secure with zip ties. |
| Stator Assembly | Medium – Moderate Cost | Repair if machine is under 7 years old. |
| Main Control Board | Low – High Cost, Complex Diagnosis | Consider replacement of washer if over 10 years old. |

Estimated Cost Factors for LE Error Repair
While we cannot provide exact down-to-the-penny prices due to fluctuating part costs, you should be aware of the general cost structure when tackling this issue. A new Hall sensor is generally quite affordable, often falling in the low double digits, making it the most cost-effective first step. The stator assembly is significantly heavier, containing a large amount of copper winding, and is therefore much more expensive. If the main control board has failed and is failing to interpret the sensor signals, the cost of the board combined with professional labor can be substantial. Our standard service fee is $79, which is completely waived if you proceed with the repair, and we back all our work with a comprehensive 90-day parts and labor warranty.
How Professionals Diagnose the LG LE Error
As certified technicians, we approach the LE error with precision tools and factory documentation. We don’t just guess; we measure.
- Stator Resistance Testing: We disconnect the motor harness and measure the resistance across all three pins (U to V, V to W, W to U). For the WM4000HWA, we expect to see exactly 6 to 7 ohms per winding at room temperature. A reading outside this variance indicates a short or an open winding.
- Hall Sensor Voltage: Using a multimeter, we check the Vcc supply voltage to the Hall sensor from the main board. It should be a steady 10 to 14 VDC. If voltage is missing, the harness or main board is bad.
- Signal Verification: We monitor the output signal pins while slowly rotating the drum by hand. The voltage should rhythmically switch between 0V and 5V. If the voltage stays constant, the sensor has failed internally.
- Rotor Magnet Inspection: We pull the rotor and visually inspect the 8-pole magnet arrangement for cracks or demagnetization, which can skew the Hall sensor’s readings.

Common Parts Involved in LE Error Repairs
The LG direct drive system is elegantly simple in its physical construction, comprising only a few major components:
- The Rotor: The large metal bowl attached to the drum shaft containing strong permanent magnets.
- The Stator: The stationary ring of copper wire coils that generate alternating electromagnetic fields.
- The Hall Sensor (RPS): The tiny plastic component clipped to the stator that tracks the rotor’s speed and position.
- The Wiring Harness: The bundle of cables transmitting power and data between the motor and the main control board.
- The Main Control Board (PCB): The brain of the washer that interprets the sensor data and commands the motor.
Maintenance Tips to Prevent Motor and Sensor Failures
Preventing the LE error is often about proper usage and regular maintenance. The motor and sensors are robust, but they can be damaged by careless operation.
- Never Overload the Washer: Stuffing the drum full of heavy towels puts immense strain on the direct drive motor and can cause the LE code simply due to physical binding.
- Balance the Loads: Wash heavy items with other heavy items. An unbalanced load causes severe vibration, which can loosen the delicate wiring harness connections at the Hall sensor over time.
- Use the Right Amount of HE Detergent: Excessive suds create tremendous drag on the drum, forcing the motor to work harder and potentially triggering an overload fault.
- Regularly Check for Foreign Objects: Ensure there are no coins, nails, or heavy debris caught in the drum seal that could wedge between the inner and outer tub.
- Ensure the Washer is Perfectly Level: A washer that rocks back and forth during the spin cycle will eventually tear up the tub bearings, leading to severe friction that the motor cannot overcome.

Crucial Safety Warnings for Direct Drive Washers
- High Voltage: Never attempt to test or disconnect components while the washer is plugged in, except when specifically instructed by a service manual for live voltage checks.
- Powerful Magnets: The rotor assembly contains incredibly strong magnets. When removing or reinstalling the rotor, keep your fingers clear of the gap between the rotor and stator, or they can be crushed severely.
- Sharp Edges: The sheet metal inside the washer cabinet can be extremely sharp. Always wear durable work gloves when reaching inside the machine.
Frequently Asked Questions (FAQs) About the LG LE Error
FAQ 1: Can I fix the LE error by simply resetting the washer?
Sometimes, a simple control board glitch causes the LE error. Unplugging the washer for 5 minutes and holding the Start/Pause button for 5 seconds can reset the system. If the code returns immediately, a hard component failure has occurred.
FAQ 2: What exactly does the Hall sensor do in my LG washer?
The Hall sensor is a position sensor. It uses the Hall effect to detect the passing of the permanent magnets on the spinning rotor. It translates these magnetic passes into electronic pulses sent to the main board, telling it exactly how fast and in what position the drum is currently rotating.
FAQ 3: How much does an LG Hall sensor cost?
The part itself is relatively inexpensive, typically ranging from $15 to $35 depending on the supplier. It is one of the most cost-effective repairs you can do on a washing machine.
FAQ 4: Why does my drum twitch back and forth before showing the LE code?
The control board is trying to start the motor, but it’s not receiving the correct feedback from the Hall sensor. It attempts to pulse the stator to jump-start the rotation, fails, and shuts down to protect the components, throwing the LE error.
FAQ 5: Does the WM4000HWA have a drive belt?
No, the LG WM4000HWA is a Direct Drive washing machine, meaning the motor is directly attached to the drum shaft. There are no belts or pulleys that can break or slip, which is why the Hall sensor is so critical.
FAQ 6: Is the 6-7 ohms reading the same for all LG washers?
Most modern LG Direct Drive stators should read between 6 to 12 ohms across the terminals, but for the WM4000HWA specifically, 6-7 ohms is the target specification. It’s always best to consult the precise service manual.
FAQ 7: Can a bad main control board cause the LE error?
Yes. If the main board is damaged or shorted, it might not be sending the required 5V to the Hall sensor, or it might fail to interpret the returning signals, causing a false LE error.
FAQ 8: How do I test the Hall sensor?
You can test the Hall sensor using a multimeter to check the resistance between its pins, or ideally, by checking for the pulsing 5V signal as the drum is rotated by hand while the machine is powered on.
FAQ 9: Can an overloaded washer cause the LE error?
Absolutely. Overloading puts immense strain on the motor. If the drum binds due to excess weight, the Hall sensor won’t detect movement, and the control board will throw the LE code to prevent motor burnout.
FAQ 10: How do I remove the rotor on an LG washer?
You must remove the large bolt in the center of the rotor assembly (usually 17mm) and carefully pull the rotor straight back, being mindful of the strong magnetic pull from the stator.
FAQ 11: Is the LE error related to water drainage?
No, the LE error is strictly a motor locked or communication error related to the Direct Drive system. Drainage issues will typically result in an OE error code instead.
FAQ 12: Can power surges cause the LE code?
Yes, power surges can damage the delicate internal circuitry of the Hall sensor or the main control board, leading to communication failures and the LE code.
FAQ 13: Should I replace the stator or just the Hall sensor?
You should always test both. The Hall sensor is cheaper and more likely to fail, so it’s a common starting point, but a stator with shorted windings will immediately destroy a new Hall sensor.
FAQ 14: How long does it take to fix the LE error?
For an experienced DIYer or a professional technician, replacing a Hall sensor or stator on an LG Direct Drive washer typically takes under an hour, including diagnostic time.
FAQ 15: What tools are required to fix the LE error?
You will need a Phillips head screwdriver, a 10mm socket, a 17mm socket, a digital multimeter, and safety gloves to tackle this repair.

Helpful Links and Resources
Related Appliance Services
- Expert Washer and Dryer Repair Services
- refrigerator-repair/”>Refrigerator Diagnostics and Repair
- dishwasher-repair/”>Dishwasher Maintenance
- Oven and Range Services
- Professional Dryer Vent Cleaning
Related Repair Problems
- Comprehensive List of Problems We Fix
- Complete Guide to Appliance Error Codes
Related Brand Information
- LG Appliance Repair and Maintenance
- Samsung Diagnostic Services
- Whirlpool and GE Support
Our Service Locations
- Appliance Repair in Alpharetta, GA
- Appliance Repair in Roswell, GA
- Appliance Repair in Milton, GA
- Appliance Repair in Johns Creek, GA
Key Takeaways
- The LG LE error code almost exclusively relates to the direct drive motor system, specifically communication failures between the motor and the control board.
- The most common, cheapest, and easiest part to replace when encountering this error is the Hall sensor (Rotor Position Sensor).
- A faulty stator will show incorrect resistance readings; the LG WM4000HWA stator should test at exactly 6 to 7 ohms per winding.
- Overloading the washer or washing overly bulky items can cause a mechanical bind that perfectly mimics an electrical LE error.
- Always test the wiring harness connections thoroughly, as violent vibrations often loosen the connectors at the motor assembly.
- If you are unsure or uncomfortable with electrical testing, always consult a professional to avoid costly damage to the main control board.

Need Professional Help with Your LG Washer?
If you’re dealing with a persistent LE error code on your LG WM4000HWA washer and need expert assistance in the Alpharetta area, don’t hesitate to reach out. We offer fast, reliable, and professional diagnostics and repair services. Our standard service fee is only $79, which is completely waived when you proceed with the repair. We back all our work with a rock-solid 90-day parts and labor warranty.
Written by: Jason J. — Certified Master Technician, EPA 608 Licensed.
To provide a comprehensive view, we must emphasize that diagnosing the LE error is a meticulous process. A methodical approach, starting from the simplest explanations like overloading, moving to common component failures like the Hall sensor, and finally testing the heavy-duty components like the stator and main control board, ensures a successful repair. The direct drive system, while advanced, is highly repairable once you understand the core mechanics and electronics. By verifying the 5V power supply, ensuring the 8-pole magnet structure on the rotor is intact, and confirming the 6-7 ohm resistance on the stator windings, you ensure that the LG WM4000HWA will provide years of reliable service. Avoid throwing parts at the machine without proper multimeter verification, as this is the most common mistake made by DIY repair enthusiasts. Whether you reside in Alpharetta, Roswell, Milton, or Johns Creek, applying these professional diagnostics principles will save you significant time and money. Every component of the system, down to the Hall sensor’s minute signal traces, plays a critical part in turning the heavy wash load safely and efficiently. Always maintain the washer carefully to prevent excess wear and vibration on the stator assembly.
Need Certified Appliance Repair Today?
Skip the phone line — book direct local priority dispatch across Alpharetta, Milton, Roswell & Johns Creek.