
Maytag Dryer Not Heating But Drum Spins — Heating Element & Thermal Fuse Repair Guide Alpharetta
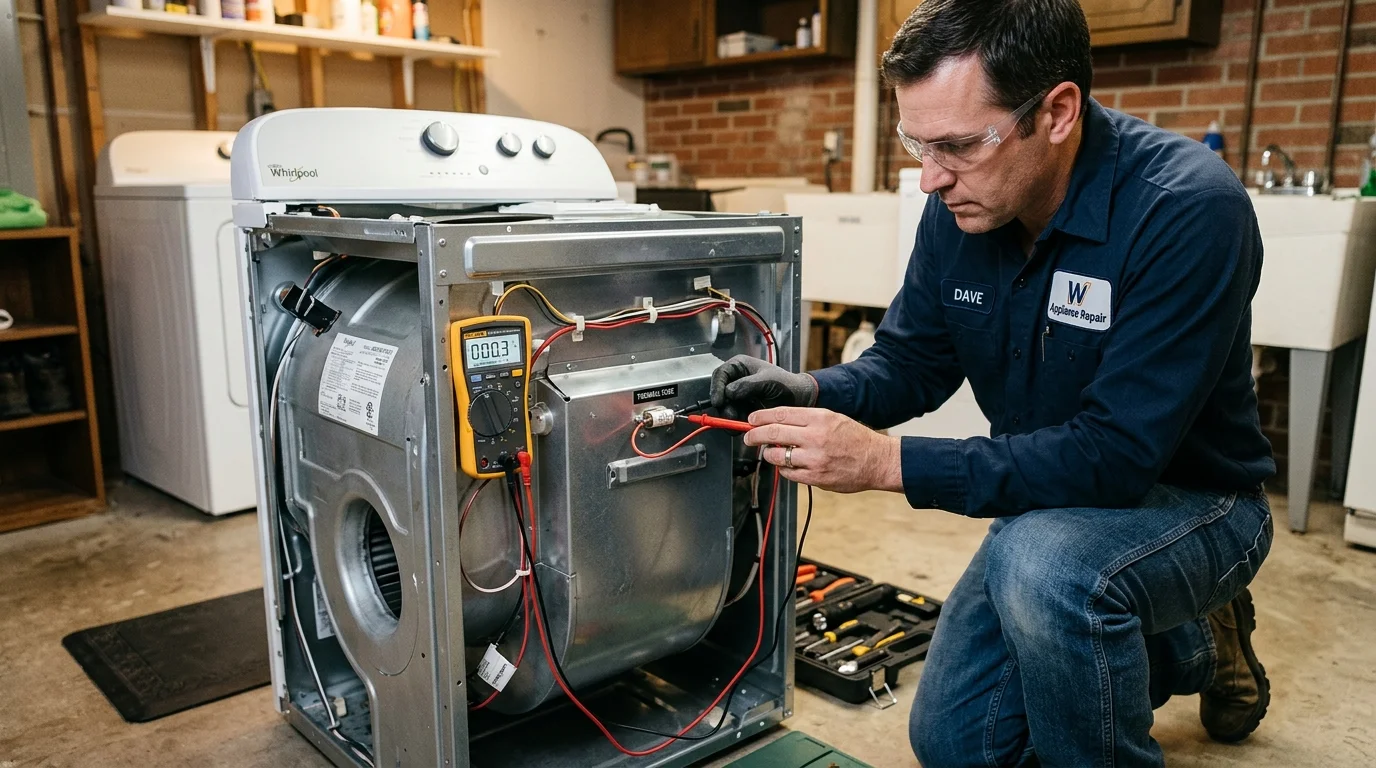
Is your Maytag extra-large capacity electric dryer tumbling properly, yet leaving your freshly washed laundry completely damp and freezing cold? When your Maytag dryer (like model MEDB835DW or MEDC465HW) runs but fails to produce any heat, it typically points to a failure within the 240-volt heating circuit, such as a burned-out heating element, blown thermal fuse, or a tripped high-limit thermostat. This comprehensive diagnostic and repair guide will walk you through everything you need to know to get your clothes drying again in Alpharetta, Georgia.
Table of Contents
- 1. Introduction: The Frustration of a Non-Heating Maytag Dryer
- 2. Recognizing the Symptoms of a Heating Failure
- 3. Common Causes Behind the Lack of Heat
- 4. Step-by-Step Troubleshooting Guide
- 5. When to Stop DIY and Call a Professional
- 6. Repair vs. Replace: Making the Right Call
- 7. Estimated Cost Factors for Maytag Dryer Repair
- 8. How Professionals Diagnose Heating Issues
- 9. Common Parts Involved in the Heating Circuit
- 10. Maintenance Tips to Prevent Future Breakdowns
- 11. Critical Safety Tips for Dryer Repair
- 12. Frequently Asked Questions (FAQs)
- 13. Related Appliance Repair Services
- 14. Related Dryer Problems
- 15. Related Brand Specific Repairs
- 16. Related Service Locations
- 17. Key Takeaways
- 18. Schedule Your Professional Repair Today
1. Introduction: The Frustration of a Non-Heating Maytag Dryer
There are few household frustrations quite like pulling a load of laundry out of your Maytag Extra Large Capacity Electric Dryer (like the popular MEDB835DW model) after a full 60-minute cycle, only to find the clothes are still completely wet and freezing cold. The drum was spinning, the timer advanced, the lights turned on—everything seemed completely normal until you reached inside. This specific failure mode—where the dryer operates mechanically but fails thermally—is one of the most common service calls we receive at Alpharetta appliance repair technicians.
Your Maytag dryer relies on a fascinating interplay of mechanical and electrical systems. While a 120-volt circuit handles the motor that spins the drum and the timer that counts down the cycle, a separate, more robust 240-volt circuit (the L1 to L2 power supply) is entirely responsible for generating the intense heat needed to dry your clothes. When the drum spins but there’s no heat, it tells us definitively that the 120V motor circuit is perfectly fine, but something in the 240V heating circuit has failed. This could be anything from a simple tripped breaker in your home’s electrical panel to a catastrophic failure of the WP3387747 heating element assembly.

Understanding this distinction is the first step in diagnosing the problem. If you live in Alpharetta, Milton, Roswell, or Johns Creek, our team of professional washer repair service experts is ready to help. But if you’re the handy type, this comprehensive guide will give you the technical specifications, the safety protocols, and the step-by-step instructions needed to identify the exact cause of your Maytag dryer’s heating failure. We’ll explore the thermal cutoff fuses, high-limit thermostats, centrifugal motor switches, and the mechanical timer relays that all must work in perfect harmony to produce heat.
Before we dive into the technical details of ohms and voltage drops, remember that electricity—especially 240 volts—commands respect. Always prioritize safety, and never hesitate to reach out to a local professional if a step feels beyond your comfort zone. Let’s get started on restoring your dryer’s heat and your laundry routine.
2. Recognizing the Symptoms of a Heating Failure
When a Maytag dryer stops heating, the symptoms are usually quite distinct from other types of failures. Identifying the precise nature of the symptom can help narrow down which component in the heating circuit has failed.
The Tumbling But Freezing Cold Phenomenon
The hallmark symptom of this specific issue is that the dryer appears to run normally. You press start, the motor engages, the drum rotates, and the timer slowly ticks down. However, when the cycle finishes, the clothes are exactly as wet and cold as when they came out of the washing machine. This indicates that the 120V circuit powering the motor is intact, but the 240V heating circuit has been interrupted. This is the classic symptom of a broken heating element or a blown thermal fuse.
Intermittent Heating or Lukewarm Temperatures
Sometimes, the failure isn’t complete. You might find that the dryer produces a little bit of heat, leaving clothes slightly warm but still damp after a full cycle. Or, the dryer might heat normally for the first ten minutes and then run cold for the rest of the cycle. This intermittent behavior often points to a failing component rather than a completely broken one. For example, a weak gas valve coil (in gas models, though we are focusing on electric here), a failing high-limit thermostat that trips too early, or a restricted exhaust vent causing the dryer to cycle the heat off prematurely to prevent a fire.

Excessive Drying Times
If your Maytag MEDC465HW is suddenly taking two or three full cycles to dry a standard load of towels, you have a heating problem. While this can sometimes be caused by an overloaded drum, it’s frequently the result of poor airflow. When the vent is clogged, the hot, moisture-laden air cannot escape. The high-limit thermostat detects the excessive heat buildup inside the cabinet and shuts off the heating element to prevent a fire. The drum keeps spinning, but the heat remains off until the thermostat cools down and resets, leading to drastically extended drying times.
No Error Codes, Just Wet Clothes
Unlike modern washing machines or refrigerators that flash clear error codes (like “E1” or “F3”) on a digital display, many Maytag dryers—especially those with mechanical timers—will not give you a diagnostic code for a burned-out heating element. The machine is “dumb” in the sense that it doesn’t know the element has failed; it just keeps sending voltage to a broken circuit. You must rely on the physical symptoms to guide your diagnosis.
The Smoldering Lint Smell
Occasionally, right before a heating element completely breaks, it might short to the metal housing. This can cause the element to stay on constantly, even when the dryer is turned off, leading to an extremely hot drum and a distinct smell of burning lint. If you ever smell burning or notice the dryer is hot to the touch when not running, immediately unplug it or turn off the breaker. This is a severe fire hazard that requires immediate attention from appliance repair Milton GA specialists.
3. Common Causes Behind the Lack of Heat
When a Maytag electric dryer (such as the MEDB835DW) spins but fails to heat, the problem almost always lies within the 240VAC heating circuit. This circuit requires a continuous path for the electrical current to flow from the L1 power leg, through various safety and control components, through the heating element, and out to the L2 power leg. If this path is broken anywhere, you get no heat.
1. The Heating Element Assembly (WP3387747 / W10724237)
The heating element is essentially a large coil of resistance wire (usually a nickel-chromium alloy) housed in a metal chamber. When 240 volts pass through this wire, it glows red hot, generating the intense heat needed to dry your clothes. Over time, the constant heating and cooling cycles cause the wire to become brittle and eventually break. Once the wire breaks (becomes “open”), the electrical circuit is severed, and no heat can be produced. A healthy Maytag heating element should measure between 9.5 and 10.5 ohms of resistance. If your multimeter reads infinite resistance (often displayed as “OL” or “1”), the element is broken and must be replaced.
2. The Thermal Cut-Off Fuse (279816)
The thermal cut-off is a critical safety device mounted on the heater housing. Its sole purpose is to prevent a catastrophic fire if the dryer overheats. For the Maytag MEDB835DW, this fuse is designed to permanently blow (open the circuit) if the temperature reaches exactly 352°F (178°C). Unlike a thermostat, a thermal fuse is a one-time-use component; once it blows, it cannot be reset and must be replaced. A blown thermal fuse will read infinite resistance on a multimeter, while a good one will read 0 ohms (perfect continuity). If this fuse is blown, you must also investigate *why* the dryer overheated, which is usually due to a severely clogged exhaust vent.
Need help checking these parts? Reach out to our appliance repair Roswell GA team for expert diagnostics.

3. The High Limit Thermostat
Working in tandem with the thermal fuse is the high limit thermostat. This component is also mounted on the heater housing and acts as the first line of defense against overheating. It is designed to open the heating circuit if the temperature reaches around 250°F, turning off the heating element. Once the temperature drops back down to a safe level, the thermostat automatically resets (closes), allowing the element to heat again. However, if the high limit thermostat becomes faulty, it may become stuck in the “open” position, preventing the dryer from ever heating. A healthy high limit thermostat should read 0 ohms at room temperature.
4. The 240VAC L1/L2 Power Supply Problem
Electric dryers require two separate 120-volt legs of power (L1 and L2) to create the 240 volts necessary for the heating element. It is surprisingly common for a home’s electrical panel to trip just one half of a double-pole breaker. If the L1 leg is active but the L2 leg has tripped, the dryer will still receive 120 volts to power the motor, timer, and drum light (which all run on L1 to Neutral), but it will not have the 240 volts needed for the heating element. Always check your circuit breakers first, turning them fully off and then firmly back on.
5. The Centrifugal Motor Switch
This is a lesser-known but vital component. The centrifugal switch is built into the dryer’s drive motor. Its purpose is to ensure that the heating element *cannot* turn on unless the motor is spinning at its full operating speed. This prevents the element from glowing red hot while the drum is stationary, which would instantly cause a fire. When the motor reaches speed, a mechanical weight inside shifts, closing a set of electrical contacts (usually Terminal 1 to 2) that completes the L2 side of the 240V circuit. If these contacts become pitted, burned, or stuck open, the motor will spin, but the heater will never receive power. Diagnosing this requires a deep understanding of the wiring schematic.
If you’re dealing with complex motor switch issues, consider contacting Johns Creek appliance repair professionals to avoid damaging the motor.
6. Mechanical Timer or Control Board Relay Failure
The electricity for the heating element must pass through contacts inside the mechanical timer (on older models) or relays on an electronic control board (on newer models). Over years of use, the high current flowing through these tiny contact points can cause electrical arcing. This arcing pits the contacts, creating a high-resistance barrier. Eventually, the contacts become so damaged that voltage can no longer pass through them. This voltage drop across the L2 feed will result in a dryer that runs perfectly but refuses to heat.
4. Step-by-Step Troubleshooting Guide
If you are comfortable using a digital multimeter and working with electrical appliances, you can follow these steps to diagnose why your Maytag MEDB835DW is not heating. Remember to document every wire you disconnect with a clear photograph.
Step 1: Check the Power Source
Before taking anything apart, verify the home’s electrical supply. Go to your circuit breaker box and locate the double-pole breaker for the dryer. Even if it looks like it is in the “ON” position, flip it firmly to “OFF” and then forcefully back to “ON.” Sometimes, one leg of a 240V breaker can trip internally without the handle moving visibly.
Step 2: Access the Heating Components
For most Maytag extra-large capacity dryers, the heating elements and safety thermostats are located in the rear. Use a 1/4-inch nut driver to remove the numerous screws securing the back panel. Carefully lift the panel away to expose the silver, cylindrical heating element housing on the right side of the cabinet.
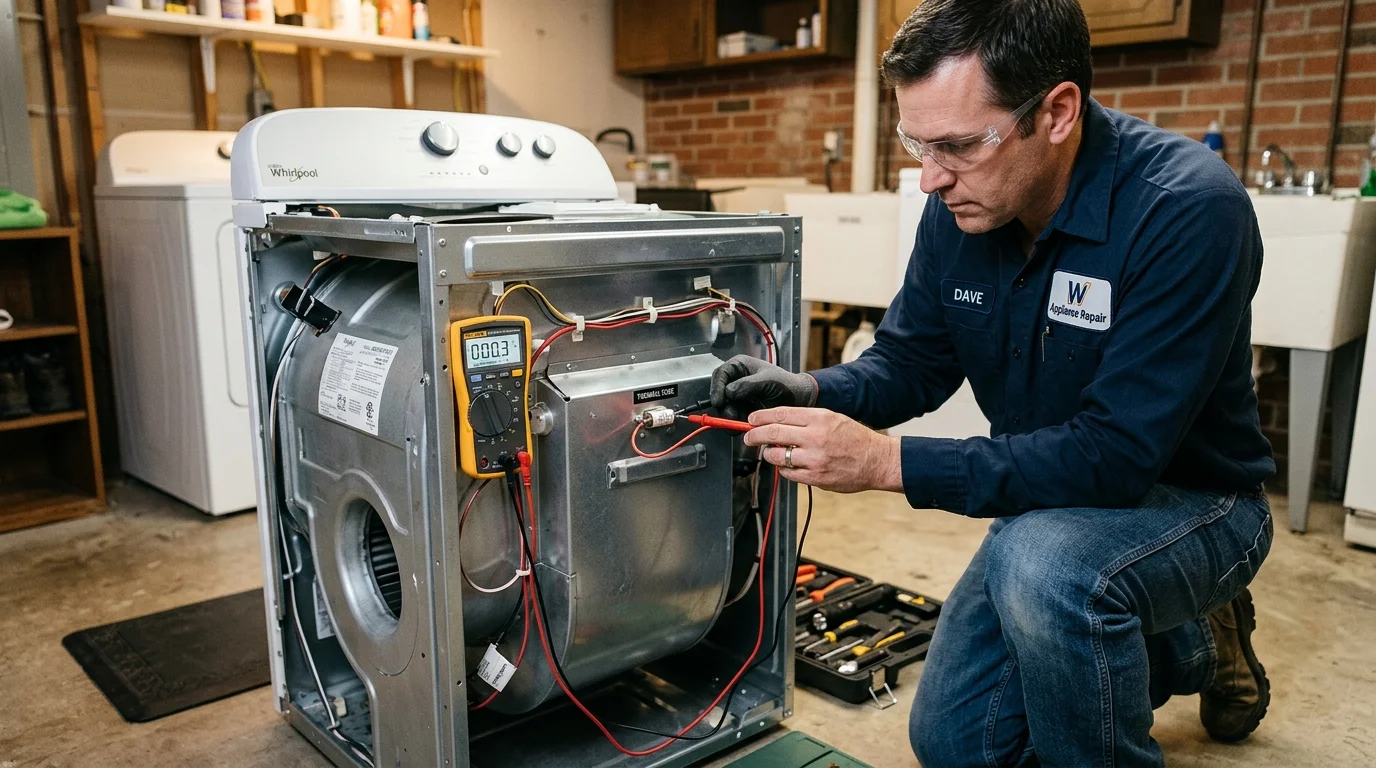
Step 3: Test the Thermal Cut-Off Fuse (279816)
Locate the thermal cut-off, which is typically mounted near the top of the heater housing. It is a small, elongated white plastic component with two wires attached. Pull the two wires off the spade terminals. Set your digital multimeter to the lowest Ohms (Ω) setting (or the continuity setting that beeps). Touch one probe to each terminal on the fuse. You should read 0 ohms (or hear a solid beep), indicating continuity. If the meter reads “OL” (Open Line) or infinite resistance, the thermal cut-off has blown and must be replaced.
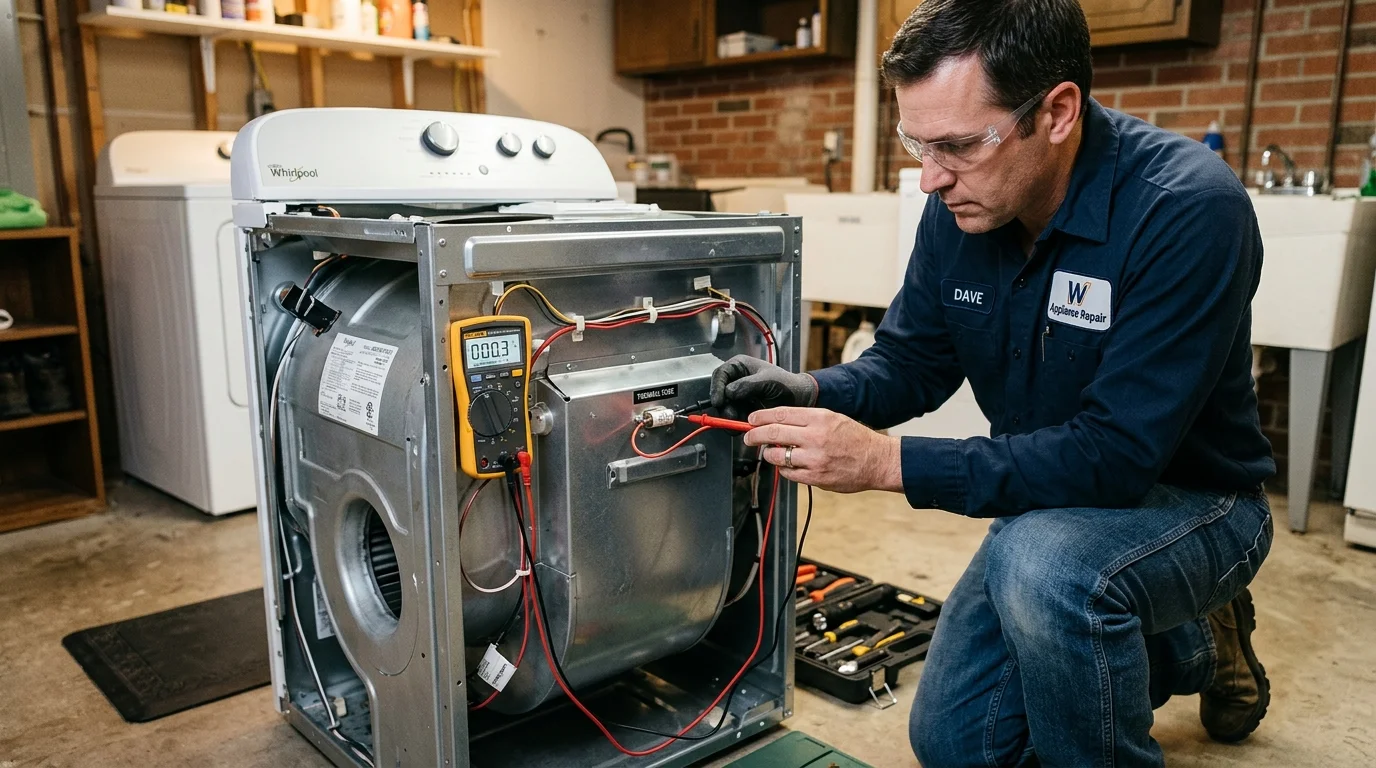
Step 4: Test the High-Limit Thermostat
Just below or near the thermal cut-off, you will find the high-limit thermostat (a small round metal component, often with an oval mounting bracket). Remove its two wires. Test it exactly as you did the thermal fuse. At room temperature, it should have continuity (0 ohms). If it is “open” (infinite resistance), it has failed and needs replacement.
Step 5: Test the Heating Element (WP3387747)
Look for the two large ceramic terminal blocks protruding from the bottom of the heater housing. These are the connections for the heating element coil inside. Remove the two wires connected to these terminals. Place your multimeter probes on the two metal terminals. A healthy Maytag WP3387747 element will show a resistance of precisely 9.5 to 10.5 ohms. If you get an “OL” reading, the internal coil has snapped, and the entire assembly must be replaced.
Step 6: Check the Element for Grounding
While testing the element, you must also check for a short to ground. Leave one probe on a heater terminal and touch the other probe firmly to the metal casing of the heater housing (scratch off a little rust if necessary to get a good connection). The meter MUST read “OL” (infinite resistance). If you get any resistance reading, the internal wire is sagging and touching the metal case. This is dangerous and requires immediate replacement of the element.
Step 7: Test the Thermistor (Temperature Sensor)
On the blower housing (the large plastic snail-shell shaped part), locate the thermistor (Part WP8577274). This component sends temperature data to the control board. Disconnect its wires. A good Maytag thermistor should read approximately 10,000 ohms (10kΩ) at an ambient room temperature of 77°F (25°C). The resistance will drop as it gets warmer. If it reads significantly out of this range, or is open/shorted, it’s faulty.
Step 8: Reassemble and Clear the Vent
If you found a faulty component and replaced it, carefully reattach all wires according to the photos you took. Reinstall the back panel. CRUCIAL STEP: Before running the dryer, you must completely clean the exhaust vent pipe leading from the back of the dryer to the outside of your home. A clogged vent is the #1 cause of blown thermal fuses and burned-out heating elements.
If you’ve completed these steps and still can’t find the issue, the problem likely lies in the motor centrifugal switch or the timer/control board, which require advanced live-voltage testing. It’s time to call in the experts at Alpharetta GA repair services.
5. When to Stop DIY and Call a Professional
While testing basic continuity is safe with the power disconnected, diagnosing appliance failures can quickly become dangerous and complex. Knowing when to step back and call a professional is crucial for your safety and the longevity of your appliance.
You should immediately stop your DIY efforts and schedule a service call if:
- Live Voltage Testing is Required: If all basic continuity checks pass, the next step involves testing the L1/L2 voltage drop across the motor switch and timer while the machine is running and fully energized. This is strictly for professionals.
- You Find Burned Wires: If you open the back panel and find melted wire insulation, scorch marks on the cabinet, or terminals welded together, do not attempt a repair. This indicates a severe electrical short that requires an expert to rebuild the wiring harness safely.
- The Centrifugal Motor Switch is Suspect: Accessing and diagnosing the motor switch is incredibly difficult and often requires specialized tools to remove the blower wheel without snapping the motor shaft.
- You Smell Gas (on Gas Models): While this guide focuses on electric dryers, if you happen to have a gas dryer and smell natural gas, evacuate immediately and call the gas company.

Don’t risk injury or property damage. Our team handles complex electrical diagnostics daily. Visit our washer and dryer repair page to see how we can safely resolve the issue.
6. Repair vs. Replace: Making the Right Call
When faced with a Maytag dryer that won’t heat, homeowners often wonder if it’s worth fixing or if they should just buy a new unit. For Maytag models like the MEDB835DW, the answer is almost always to repair. These machines are robust, and the heating components are relatively inexpensive compared to the cost of a new machine.
| Factor | Repair the Maytag Dryer | Replace with a New Dryer |
|---|---|---|
| Average Cost | $150 – $350 (Parts & Labor) | $600 – $1,200+ (Unit, Delivery, Install) |
| Time to Resolve | Same-day or next-day service | Days to weeks for delivery/install |
| Component Lifespan | OEM parts offer 5-10 more years | New machines often last 7-10 years total |
| Environmental Impact | Keeps large appliances out of landfills | High carbon footprint to manufacture/dispose |
The rule of thumb in the industry is that if a repair costs less than 50% of the price of a comparable new model, and the machine is less than 10 years old, it is economically wise to repair it. Heating elements and thermal fuses are common wear-and-tear items; replacing them is like putting new brake pads on a car. It doesn’t mean the whole machine is junk.
7. Estimated Cost Factors for Maytag Dryer Repair
If you decide to hire a professional for your Maytag dryer repair in Alpharetta, it’s helpful to understand what drives the cost. Appliance repair costs are generally broken down into three categories: trip/diagnostic fee, parts, and labor.
- Diagnostic Fee: At Appliance Repair Alpharetta GA, our diagnostic service fee is $79. This covers the technician’s travel to your home and the comprehensive testing required to pinpoint the exact failure. Importantly, this fee is waived if you proceed with the quoted repair.
- OEM Parts: We strictly use Original Equipment Manufacturer (OEM) parts, like genuine Maytag/Whirlpool heating element assemblies (WP3387747). While you can find cheap knock-off elements online for $25, they often burn out again within three months. An OEM element ensures longevity and safety.
- Labor Rate: Labor is calculated based on the complexity of the repair. Replacing a thermal fuse is a quick job, while swapping out a motor centrifugal switch is labor-intensive.
A typical professional repair for a Maytag dryer not heating ranges from $150 to $250 for minor parts (like a thermal fuse or thermostat) and $250 to $350 for a full OEM heating element assembly replacement. To get an accurate quote, check out our problems we fix page and schedule a diagnostic.

8. How Professionals Diagnose Heating Issues
When an EPA-certified technician from our team arrives at your home in Milton or Roswell, they bring a structured, scientific approach to diagnostics, moving far beyond simple guesswork.
Here is a glimpse into the professional diagnostic process:
- Verification at the Receptacle: The first step is testing the wall outlet itself. The technician will use a True-RMS multimeter to verify 120VAC from L1 to Neutral, 120VAC from L2 to Neutral, and a solid 240VAC across L1 to L2. This rules out household electrical issues immediately.
- Live Voltage Drop Testing: If continuity checks on the heating element and fuses pass, the technician must find out *where* the 240V is getting lost while the machine runs. By carefully probing the live circuit, they can measure voltage drops. If they measure 240V going *into* the mechanical timer, but only 120V coming *out* on the heater circuit leg, they know instantly the timer contacts have burned out.
- Airflow Analysis: A professional knows that a blown thermal fuse is a *symptom*, not the root cause. They will use an anemometer to measure the exhaust airflow velocity at the exterior wall vent. If the airflow is restricted, they will recommend a comprehensive professional dryer vent cleaning service to ensure the new parts don’t blow out again the next day.
9. Common Parts Involved in the Heating Circuit
Familiarizing yourself with the exact parts in your Maytag MEDB835DW can help you communicate better with a technician or source the right parts if you are attempting a DIY repair.
| Component Name | Common OEM Part Number | Technical Specification | Function |
|---|---|---|---|
| Heating Element Assembly | WP3387747 / W10724237 | 5400W 240V, 9.5-10.5 ohms | Generates the heat for drying. |
| Thermal Cut-Off Fuse | 279816 (Kit) | 352°F (178°C) blow temp, 0 ohms | One-time safety fuse prevents fires. |
| High Limit Thermostat | Included in 279816 Kit | 250°F safety limit, auto-resets | Cycles heat off if it gets too hot. |
| Thermistor | WP8577274 | ~10,000 ohms at 77°F | Senses air temp for the control board. |
| Operating Thermostat | WP3387134 | 155°F – 165°F standard cycling | Maintains normal drying temperatures. |

10. Maintenance Tips to Prevent Future Breakdowns
The vast majority of Maytag dryer heating failures are highly preventable with simple routine maintenance. The heating element and thermal fuse do not usually break on their own; they break because they are suffocated.
- Clean the Lint Screen EVERY Load: This is non-negotiable. A clogged lint screen restricts airflow by 30-50%, forcing the heater to work harder and longer, leading to premature burnout.
- Inspect the Exterior Vent Hood: Once a month, step outside while the dryer is running. Ensure the flapper on the exhaust hood is opening fully and blowing a strong volume of hot air. If it’s barely cracking open, you have a restriction inside the ductwork.
- Annual Professional Vent Cleaning: If your vent run is longer than 10 feet or has multiple 90-degree elbows, you need professional cleaning annually. A brush and heavy-duty vacuum system will remove the dangerous buildup of lint in the corrugated ducting.
- Don’t Overload the Drum: Stuffing the dryer to the brim prevents air from circulating freely through the wet clothes. The moisture stays trapped, and the heat builds up near the element, threatening the thermal fuse.
For more detailed maintenance schedules, explore our troubleshooting appliances that are not working guide.
11. Critical Safety Tips for Dryer Repair
Working on 240-volt appliances is inherently dangerous. If you choose to inspect your Maytag dryer, strictly adhere to these safety protocols:
- Verify Zero Energy: After unplugging the dryer, use a non-contact voltage tester pen near the terminal block where the cord attaches to ensure no residual power is present before touching any bare wires.
- Beware of Sharp Edges: The stamped sheet metal edges inside a Maytag cabinet are notoriously razor-sharp. Wear cut-resistant Kevlar gloves when reaching around the motor and blower housing.
- Ground Yourself: Electronic control boards are highly sensitive to static electricity. Ground yourself by touching a bare metal water pipe before handling any circuit boards.
- Check the Vent for Birds: It sounds odd, but a common cause of sudden airflow restriction (which blows the thermal fuse) is a bird building a nest in the exterior vent flap. Inspect this before assuming an internal part failed.

12. Frequently Asked Questions (FAQs)
Here are some of the most common questions our technicians answer regarding Maytag dryers that spin but won’t heat:
Q: My Maytag dryer spins but the clothes are cold, what is the most likely part?
A: The most likely culprit is a broken WP3387747 heating element or a blown 279816 thermal cut-off fuse. Both require multimeter testing.
Q: Can a bad timer cause a dryer to not heat?
A: Yes. The mechanical timer has heavy-duty electrical contacts inside that pass 240V to the heater. If these contacts burn or pit, the timer will advance, but no voltage reaches the element.
Q: Why did my thermal fuse blow in the first place?
A: A thermal fuse blows due to extreme heat buildup, which is almost exclusively caused by a clogged exhaust vent system preventing the hot air from escaping the cabinet.
Q: Is it safe to bypass the thermal fuse just to see if the dryer works?
A: Absolutely NOT. Bypassing safety devices, even temporarily, can instantly result in a house fire. Never run a dryer with bypassed safety limits.
Q: I replaced the heating element and it still won’t heat. What next?
A: You likely missed a blown thermal cut-off fuse, or there is an issue with the 240V power supply (like a half-tripped breaker). You may need help from Cumming GA appliance repair experts.
Q: What is the resistance of a good Maytag heating element?
A: A healthy 5400W heating element should read between 9.5 and 10.5 ohms on a digital multimeter.
Q: Does the motor switch affect heating?
A: Yes. The centrifugal switch on the motor must close when the drum reaches speed to complete the 240V circuit. If it fails, the dryer spins but won’t heat.
Q: Should I clean the lint trap before every load?
A: Yes, absolutely. This is the single most important maintenance task to prevent heating failures.
Q: Are Maytag and Whirlpool parts the same?
A: Yes, Whirlpool manufactures Maytag appliances. The WP3387747 heating element is used across dozens of Whirlpool, Maytag, Kenmore, and Amana models.
Q: How long should an electric dryer last?
A: With proper maintenance and vent cleaning, a Maytag dryer can easily last 10 to 15 years.
Q: Why does my dryer smell like burning lint?
A: This usually indicates lint buildup inside the actual heater housing, or the heating element has sagged and shorted to the metal casing. It requires immediate service.
Q: Can a faulty moisture sensor stop the dryer from heating?
A: Yes, in “Auto Dry” modes, a dirty moisture sensor can trick the control board into thinking the clothes are dry, causing it to shut off the heat prematurely.
Q: What does the high limit thermostat do?
A: It’s a safety device that cycles the heater off if the internal temperature exceeds 250°F, preventing damage to clothes and the machine.
Q: Do I need 240 volts for the dryer to work?
A: The motor and timer only need 120V to spin the drum. However, the heating element absolutely requires 240V to produce heat.
Q: Should I repair my 8-year-old Maytag dryer?
A: Yes, if the issue is just a heating element or fuse, the repair is cost-effective and will add years to the appliance’s life.

13. Related Appliance Repair Services
If you’re experiencing issues beyond your dryer, our certified technicians are fully equipped to handle a wide range of appliance repairs across Alpharetta and surrounding areas.
- Kitchen Appliance Repair: If your fridge is running warm, visit our refrigerator repair services page.
- Cooking Appliance Repair: Struggling with baking? Check our professional oven and range repair solutions.
- Dishwasher Service: For leaks or poor cleaning performance, see our expert dishwasher repair options.
- Microwave Repair: If your built-in unit isn’t heating, our microwave repair service can diagnose the magnetron safely.
- Disposal Issues: For jammed or leaking sinks, we offer garbage disposal repair.
14. Related Dryer Problems
A dryer that spins but won’t heat isn’t the only issue you might encounter. Here are other common dryer problems we frequently resolve:
- Loud Noises: If your dryer is squealing or thumping, it could be bad drum rollers or an idler pulley. Learn more on our diagnosing appliances making noise page.
- Error Codes: Modern dryers will display codes like “F-01” or “AF” for restricted airflow. See our appliance error code breakdown for more info.
- Completely Dead: If the dryer won’t even spin or turn on, the issue might be a broken belt (on some models with a belt switch) or a failed door switch. Check our appliance not working guide.
15. Related Brand Specific Repairs
While this guide focuses heavily on Maytag (and by extension, Whirlpool) designs, our technicians are factory-trained across all major brands. The basic principles of electric dryer heating remain similar, though the component locations and ohm specifications vary wildly.
- If you own a Korean-manufactured unit, the heating relays and thermistor specs are entirely different. See our Samsung appliance repair experts page.
- For issues with high-end, front-load matching sets, visit our LG appliance repair services.
- If you have a luxury European model with a heat-pump condensation drying system rather than a standard vented heating element, you need specialized help. Check out our Bosch appliance repair technicians.
16. Related Service Locations
Appliance Repair Alpharetta GA proudly provides fast, reliable, in-home diagnostic and repair services across the northern Metro Atlanta suburbs. We carry the common WP3387747 heating elements and 279816 thermal fuses right on our trucks for immediate repairs in:
17. Key Takeaways
To summarize, if your Maytag MEDB835DW dryer is tumbling perfectly but leaving clothes cold and damp, keep these crucial points in mind:
- The issue is isolated to the 240V heating circuit; the 120V motor circuit is functioning properly.
- The most common failure point is a burned-out heating element (WP3387747), which should test at 9.5-10.5 ohms. If it reads infinite resistance, it must be replaced.
- A blown thermal cut-off fuse (279816) will also completely sever the heating circuit. It is a one-time safety device that blows at 352°F.
- If the thermal fuse is blown, you MUST clear your exhaust vent system, or the new fuse will blow immediately. For professional help with this, consider dryer vent cleaning experts.
- Safety first: Always unplug the machine and verify zero voltage before attempting any multimeter tests. Never bypass safety limits.
18. Schedule Your Professional Repair Today
Dealing with wet laundry and complex electrical circuits is frustrating and dangerous. Let the professionals handle it! At Appliance Repair Alpharetta GA, our EPA-certified Master Technicians, led by Jason J., have decades of experience diagnosing and repairing Maytag dryers right the first time.
We carry OEM Maytag and Whirlpool parts on our trucks, meaning we can usually fix your dryer on the very first visit. Don’t let laundry pile up or risk a dangerous electrical shock. Call us today at (770) 796-7742 to schedule your diagnostic visit. Our $79 service fee is completely waived when you proceed with the repair, and we back our work with a rock-solid 90-day parts and labor warranty.
Ready to get your Maytag dryer blowing hot air again? Schedule your washer and dryer repair service with Alpharetta’s most trusted local experts today!
Need Certified Appliance Repair Today?
Skip the phone line — book direct local priority dispatch across Alpharetta, Milton, Roswell & Johns Creek.